
FAQ
- Enable SSH Server in Raspberry Pi
- Timesync between TurtleBot3 and Remote PC
- Setup DYNAMIXEL’s for TurtleBot3
- Can I Charge the Battery when the Battery is Connected to TurtleBot3?
- How to Download the STL files of TurtleBot3
- Intel® Joule™ USB-C Port is not Recognized on Windows 10
- Intel® Joule™ Freezes while Booting/Installation
- How to Update Software
- How to Update Firmware
Enable SSH Server in Raspberry Pi
First you have to install SSH on Remote PC and Raspberry Pi.
$ sudo apt-get install ssh
In case of Raspberry Pi (TurtleBot3 Burger and Waffle Pi), since the SSH server of Ubuntu MATE 16.04.x and Raspbian is disabled by default. If you want to enable SSH, please refer to the documents below.
or you can use following commands.
$ sudo service ssh start
$ sudo ufw allow ssh
Before starting to connect SSH, you need to check host name. Redbox in below image shows it.
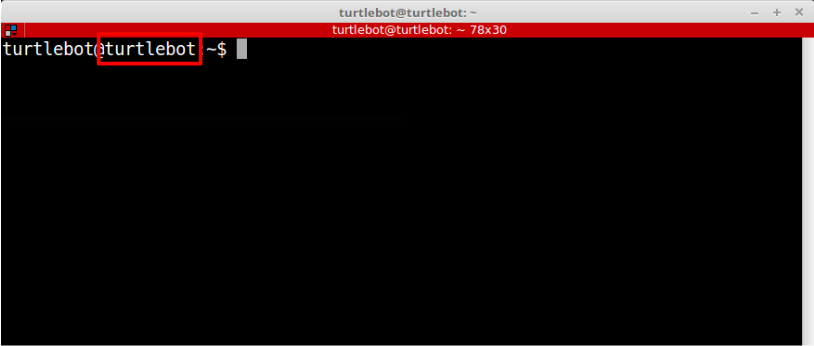
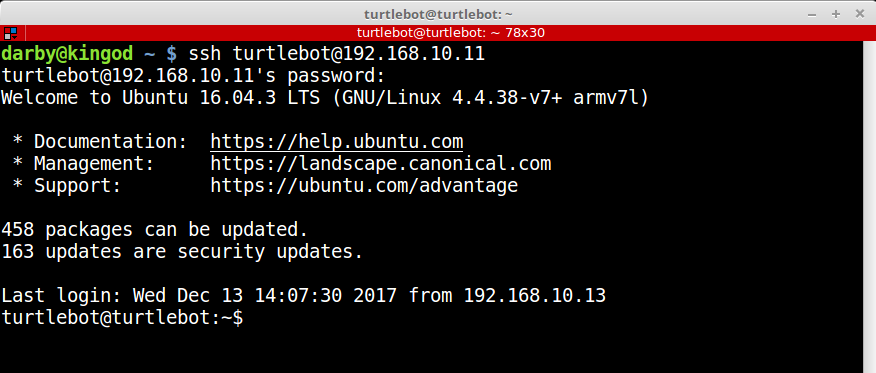
Then, you can use SSH following command in Remote PC.
$ ssh ${HOSTNAME}@xxx.xxx.xx.xx
Timesync between TurtleBot3 and Remote PC
NOTE: This solution is subject to connect internet on your TurtleBot and Remote PC under same network.
- Install
ntpdate, and synchronize to NTP server on bothTurtleBotandRemote PC.
$ sudo apt-get install ntpdate
$ sudo ntpdate ntp.ubuntu.com
Setup DYNAMIXELs for TurtleBot3
WARNING: Be sure to connect only ONE DYNAMIXEL with OpenCR 1.0
-
Turn on the power of the OpenCR 1.0, and connect the board with your PC via a USB cable.
-
Press and hold the
SW2button and click theResetbutton. If theStatusLED is blinking, release theSW2button. See Boot Sequence for more information. -
Upload Setup Firmware to OpenCR
As shown in the below image, findExamples>turtlebot3>turtlebot3_setup>turtlebot3_setup_motorand open the example.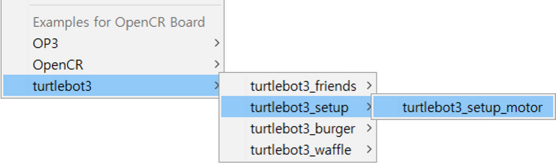
-
Click the Upload button on the Arduino IDE.
If example upload to the OpenCR is completed, connect ONE DYNAMIXEL to the OpenCR.
Click theSerial Monitoricon in the upper right corner as shown in the below image.
-
Reset OpenCR
Press theRESETbutton if the example does not run properly.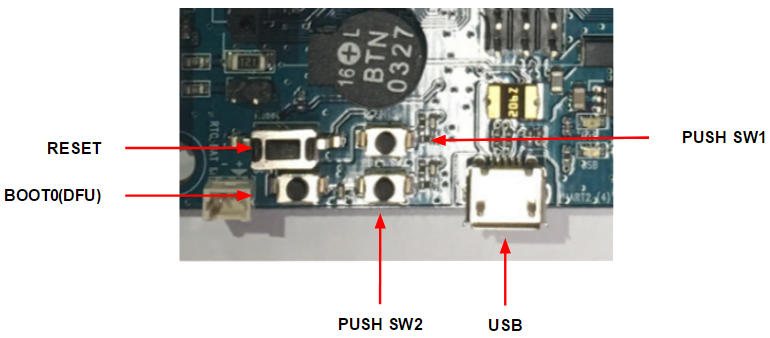
-
Select an Option
When theSerial Monitoris running, menu for DYNAMIXEL setup will be displayed as shown below.
TurtleBot3 consists of two DYNAMIXEL’s actuators for the left and right wheels, so select the proper option based on the assembled position.
For example, to set up the left side DYNAMIXEL, enter1to the input textbox.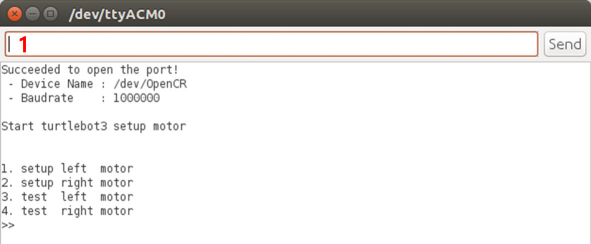
-
Confirmation
To prevent any mistakes, a confirmation will be required.
To proceed the configuration, enterYto the input textbox.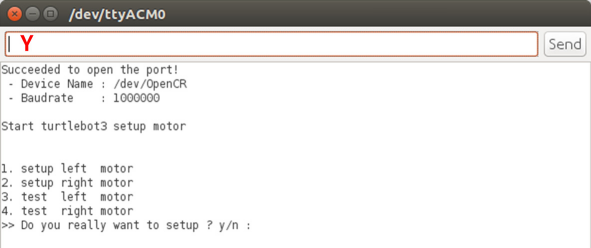
-
Configure DYNAMIXEL
The setup tool starts searching the connected DYNAMIXEL using different IDs and Baudrates.
If DYNAMIXEL is detected, it will be automatically set up for TurtleBot3.
When the setup is completed,OKmessage is printed on the screen.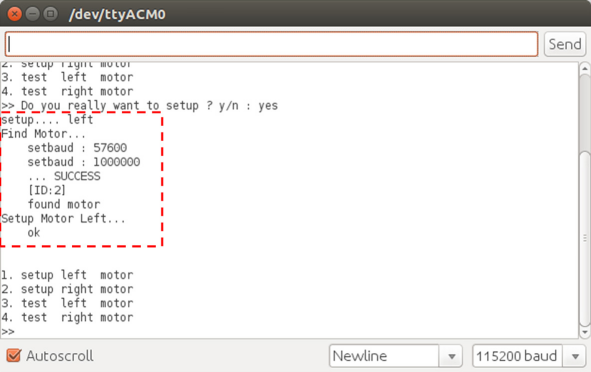
-
Test DYNAMIXEL
Complete the setup procedure and verify if the change has been properly made.
Select one of the test options, then selected DYNAMIXEL will iterate rotation and stop every 1 second to the counter-clockwise or clockwise depending on the selected wheel.
To end the test, press theEnter.
For example, to test the left DYNAMIXEL, enter3as shown in below, or enter4for the right wheel test.
-
Upload TurtleBot3 Core
If DYNAMIXEL setup is completed, TurtleBot3 Core example should be uploaded to OpenCR.
Please find proper core example fromExamples>tutlebot3>turtlebot3_burgerorturtlebot3_waffle>turtlebot3_coreand upload the example to OpenCR.
Can I Charge the Battery when the Battery is Connected to TurtleBot3?
Charging and discharging the battery at the same is NOT recommended and this may void the warranty of the product. If TurtleBot3 needs to be turned on while charging/replacing battery, please follow below procedure:
- Connect SMPS 12V 5A to OpenCR
- Disconnect the depleted battery from OpenCR
- Connect the depleted battery to battery charger or replace the depleted battery with a fully charged battery
- Connect the fully charged battery to OpenCR
- Disconnect SMPS 12V 5A from OpenCR
How to Download the STL Files of TurtleBot3
You can download it in the following way.
We released the TurtleBot3 Friends hardware design file at the link below.
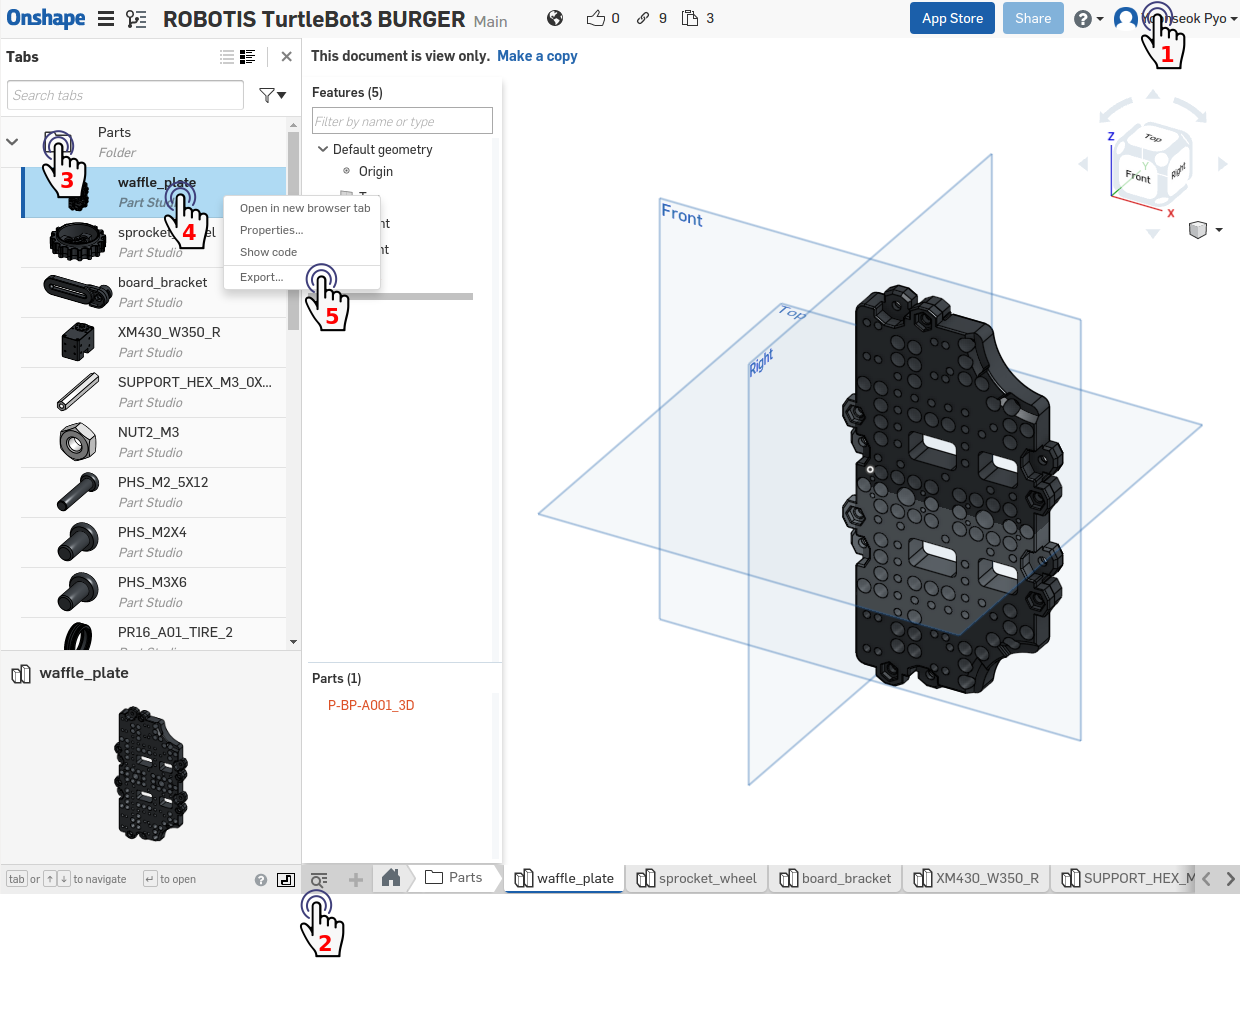
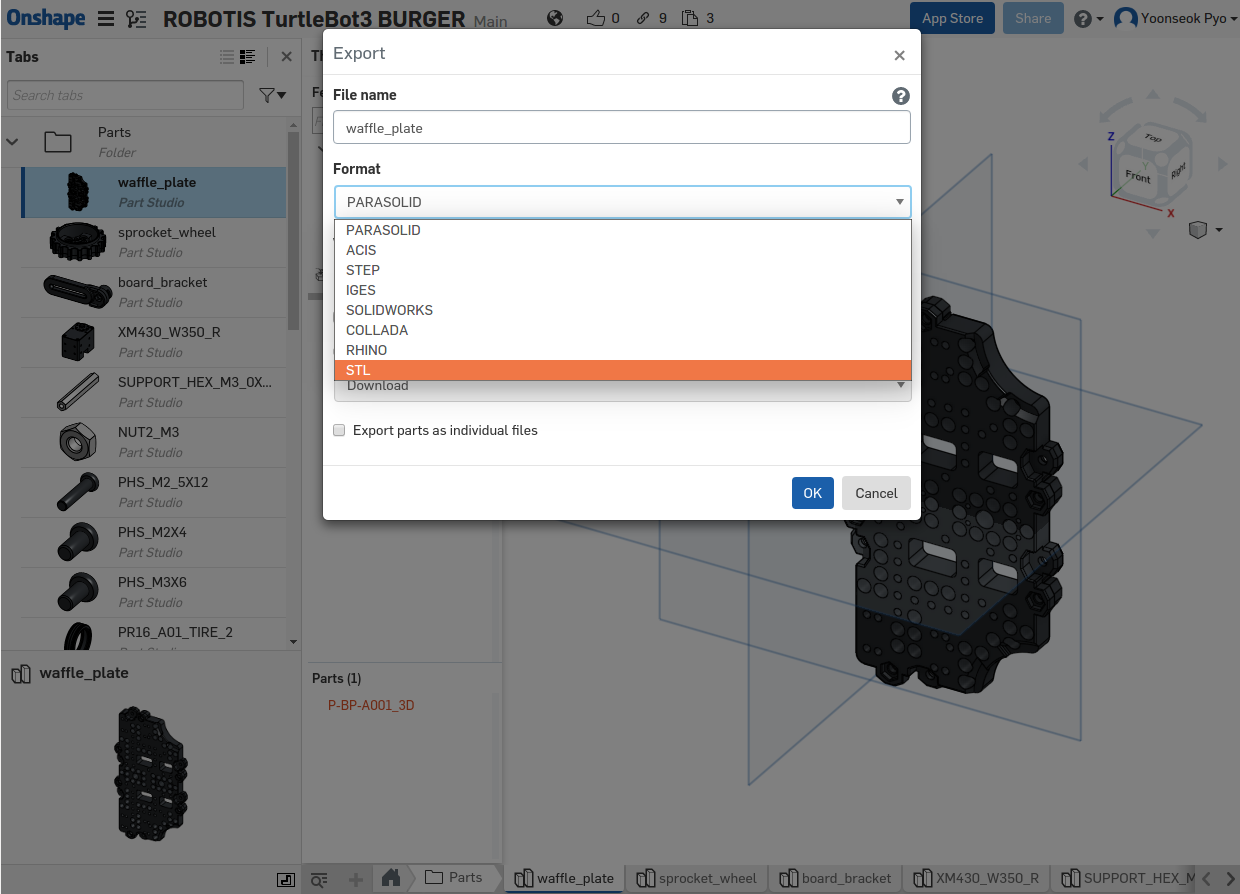
So, you can download the STL files directly from each Onshape address as shown in the following figures.
- Sign in. (If you do not have an ID, you have to create one.)
- Click the “toggle tab manager” (A menu will appear on the left side of the browser.)
- Click the “Parts folder”
- Right-click on the icon of the file you want to download.
- Click the “Export…”
- Finally, you can download the output file type you want.
Intel® Joule™ USB-C Port is not Recognized on Windows 10
Some users have reported that the USB-C port is not recognized on Windows 10 when they were trying to update BIOS. Please check below link that describes the solution that worked out (Thanks for Rknlhrqy and VRAORESEARCH).
Intel® Joule™ Freezes while Booting/Installation
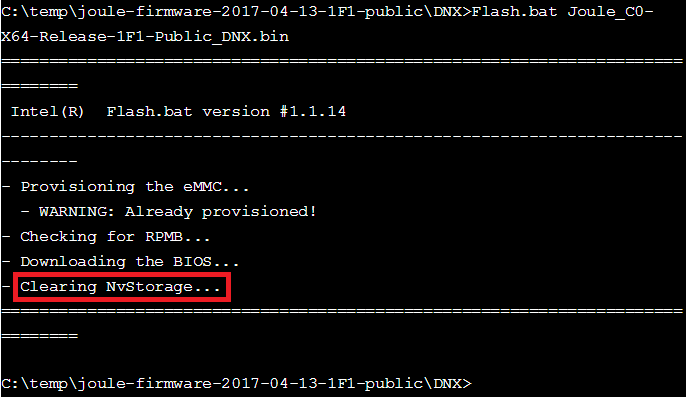
If BIOS firmware is not properly installed, this might happen. Please burn the BIOS firmware 193 release version again.
- Turn off the Joule.
- Proceed BIOS firmware #193 update using file from the below link.
- Make sure that you see the message in the red box.
How to Update Software
[TurtleBot3]
$ cd ~/catkin_ws/src/
$ rm -rf turtlebot3/ turtlebot3_msgs/ hls_lfcd_lds_driver/
$ git clone https://github.com/ROBOTIS-GIT/hls_lfcd_lds_driver.git
$ git clone https://github.com/ROBOTIS-GIT/turtlebot3_msgs.git
$ git clone https://github.com/ROBOTIS-GIT/turtlebot3.git
$ cd ~/catkin_ws/src/turtlebot3
$ sudo rm -r turtlebot3_description/ turtlebot3_teleop/ turtlebot3_navigation/ turtlebot3_slam/ turtlebot3_example/
$ cd ~/catkin_ws/
$ rm -rf build/ devel/
$ cd ~/catkin_ws && catkin_make -j1
[RemotePC]
$ cd ~/catkin_ws/src/
$ rm -rf turtlebot3/ turtlebot3_msgs/
$ git clone https://github.com/ROBOTIS-GIT/turtlebot3_msgs.git
$ git clone https://github.com/ROBOTIS-GIT/turtlebot3.git
$ cd ~/catkin_ws/
$ rm -rf build/ devel/
$ cd ~/catkin_ws && catkin_make
How to Update Firmware
[TurtleBot3]
- Burger
$ export OPENCR_PORT=/dev/ttyACM0
$ export OPENCR_MODEL=burger
$ rm -rf ./opencr_update.tar.bz2
$ wget https://github.com/ROBOTIS-GIT/OpenCR/raw/master/arduino/opencr_release/shell_update/opencr_update.tar.bz2 && tar -xvf opencr_update.tar.bz2 && cd ./opencr_update && ./update.sh $OPENCR_PORT $OPENCR_MODEL.opencr && cd ..
- Waffle or Waffle Pi
$ export OPENCR_PORT=/dev/ttyACM0
$ export OPENCR_MODEL=waffle
$ rm -rf ./opencr_update.tar.bz2
$ wget https://github.com/ROBOTIS-GIT/OpenCR/raw/master/arduino/opencr_release/shell_update/opencr_update.tar.bz2 && tar -xvf opencr_update.tar.bz2 && cd ./opencr_update && ./update.sh $OPENCR_PORT $OPENCR_MODEL.opencr && cd ..