
This step-by-step instruction describes how to install a driver (ROBOTIS Virtual COM Port) on your system (Windows 8/10).
Supported Controllers:
| Model | CM-5 | CM-50 | CM-100 | CM-150 | CM-200 | CM-510 | CM-530 | CM-550 | CM-700 | CM-900 | OpenCM9.04+[485 EXP] | OpenCM7.0 | OpenCR |
|---|---|---|---|---|---|---|---|---|---|---|---|---|---|
| ROBOTIS Virtual Driver | X | X | X | O | X | X | O | O | X | X | O | O | X |
NOTE: If your controller does not support the provided driver, use either of following ways.
1. Download a driver from the product manual.
2. If your product manual does not provide a driver information, use FTDI driver solution.
Download the driver from the given link, and extract the zipped folder.
Connect your controller to a PC via the USB cable.

WARNING: Using multiple devices via a USB hub may cause a download failure caused by insufficient current. Be sure to supply enough power to the hub, or to directly connect the controller with your PC .
Use either of ways to install it.
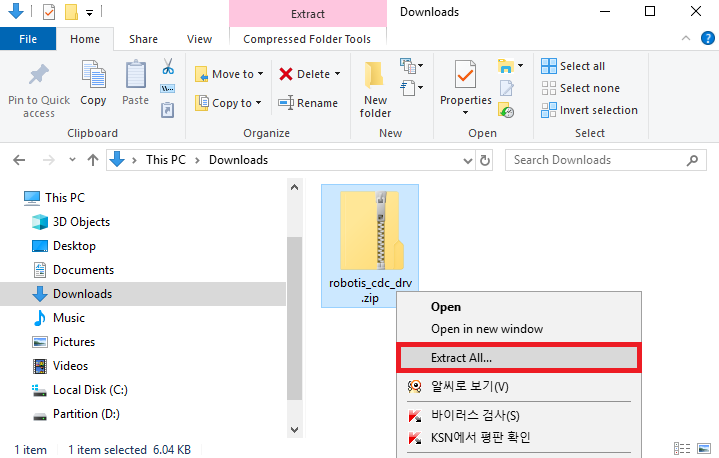
Right-Click the downloaded folder to extract.
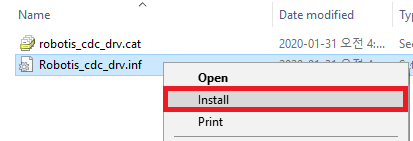
Click on Install
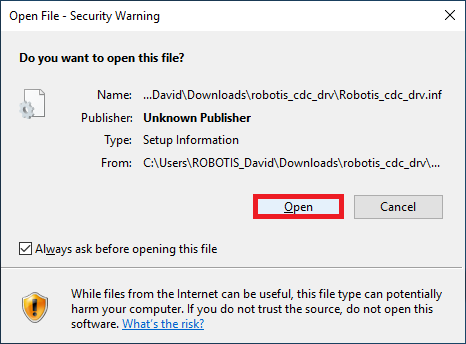
Click on Open
WARNING: If your system block the driver installation, you need to disable a driver signature enforcement.
1. Open Setting.
2. Select Update & recovery > Recovery > Advanced startup > Troubleshoot > Advanced options > Startup Setting > Restart > 7) Disable driver signature enforcement.
3. Restart your PC.
If you use Windows Server(2003 or 2008) or your system does not detect COM port, try the following instruction.
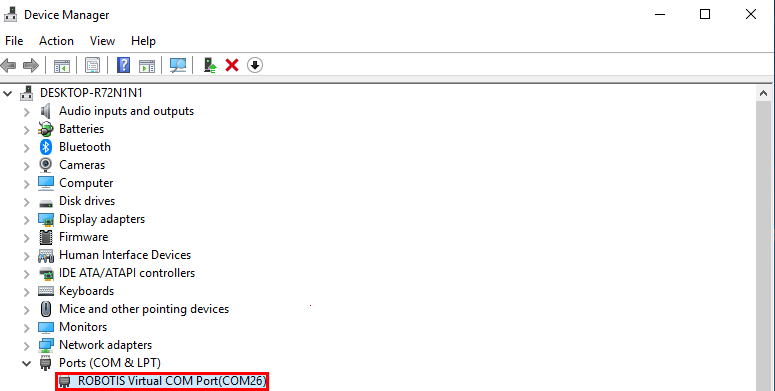
Open Device Manager, and find ROBOTIS Virtual COM Port.
Right-click on ROBOTIS Virtual COM Port and click on Update Driver Software.

Select Browse my computer for driver software.
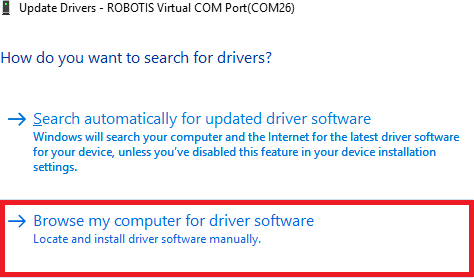
Click on Browse.
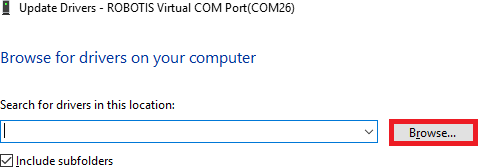
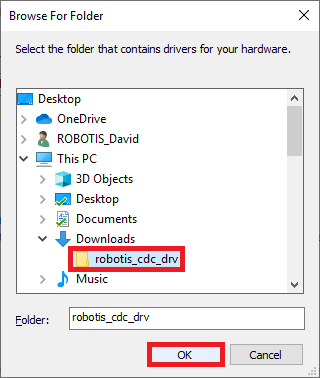
Locate the folder that contains driver files.
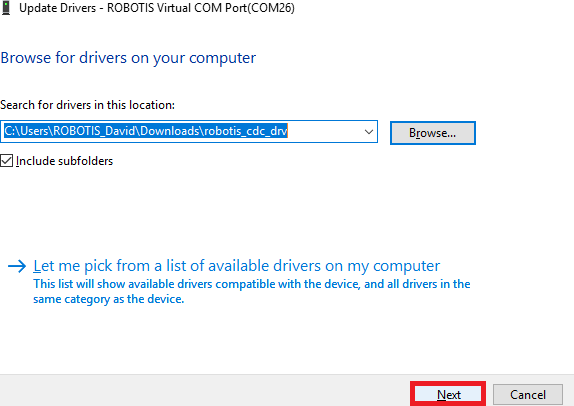
Click Next. Successful installation will say “Windows has successfully updated your driver software”
Open the Device Manager and see which COM port is assigned on your system (e.g., COM3)

NOTE: ROBOTIS Virtual COM Port may differ depending on a USB port in use.