
Introduction
ROBOTIS PLAY 700 OLLOBOT is a reconfigurable and programmable robotics kit that introduces children to STEAM Concepts.
Building upon the PLAY 600 PETs, the PLAY 700 emphasizes creative design using ROBOTIS’ patented rivet system and adds two elements: programming and smart device connectivity.
The controller included with the PLAY 700, the CM-50 is a motorized gearbox that brings your child’s creation to live. It also includes built-in sensors so that children can learn programming via SCRATCH or ROBOTIS R+TASK.
Part List

Quick Start
Please refer to the Assembly Manual included in the package.
You can also watch R+ Design interative assembly instruction.
- Download R+ Design (Android, iOS, Windows PC)
Smart Device
Please install R+ PLAY 700 to operate the assembled Play 700 robots.
In order to program the robot using smart devices, R+m.Task2 should be installed.
App Install
| Android | iOS |
|---|---|
 |
 |
Select Example
Select the example by pressing the Power button of CM-50 controller.
| Examples | Number of Times Power Button is Pressed (Musical Note) |
|---|---|
| Scorpion | 1(DO) |
| Car | 2(Re) |
| Dog | 3(Mi) |
| Windmill | 4(Fa) |
| Bear | 5(Sol) |
| Bird | 6(La) |
Once assembled example is selected, connect to smart device and use R+ PLAY 700 app to run the example.
Connect and Run
In the R+ PLAY 700 screen, select the assembled example and start playing.
| Examples | Description |
|---|---|
Scorpion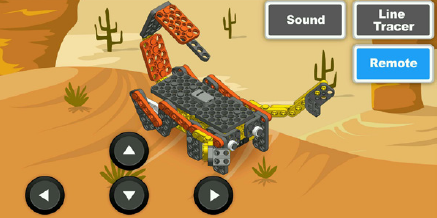 |
Remote: Forward,Backward,Left,Right Sound:1xForward, 2xBackward, 3x Left, 4x Right Line Tracer: Go on an adventure by tracing the black line on the provided map |
Car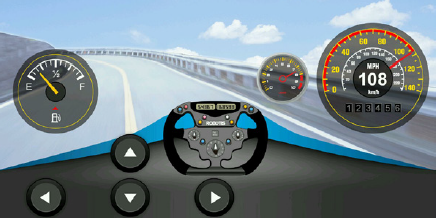 |
Foward,Backward,Left,Right |
Dog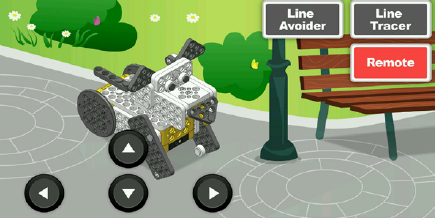 |
Remote: Forward, Backward, Left, Right Line Tracer: Go on an adventure by tracing the black line on the provided map Line Avoider: Stay within the black line on the provided map |
Windmill |
Blow into the microphone of the smart device to control the speed of the fan |
Bear |
Shake: Shake the smartphone or tablet to control the bear climbing up the bar Clap: Bear climbs up the bar as many times as you clap |
Bird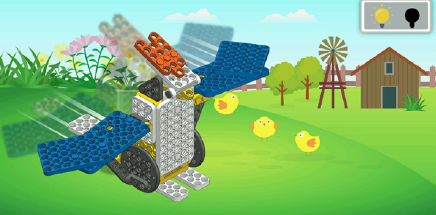 |
Tilt: Tilt the smart device to make the bird move forward, backward, left or right Light: Only when exposed to light, can the bird flaps it’s wings and cry out |
NOTE : The robot examples provided do not utilize all of the sensors available in the PLAY 700 Controller Module. You can create your own mode or build your own creation and bring it to life by programming it yourself.
Please refer to below video for connecting BT-410 to a Smart Device.
Windows PC
In order to learn how to program a robot using Scratch, please install required softwares.
WARNING : BT-410 requires BT-410 Dongle to connect to a PC.
NOTE : BT-410 Dongle can be purchased separately. Please visit ROBOTIS Shop
Software Install
Scratch adopts block programming GUI that is easier than traditional programming style.
It is recommended to use Scratch to program the robot.
- R+SCRATCH Download
- SCRATCH 2.0 Offline Editor Download
Connect Bluetooth
In order to control sensors and motors from Scratch program, CM-50 controller should be connected to Scratch via R+Scratch.
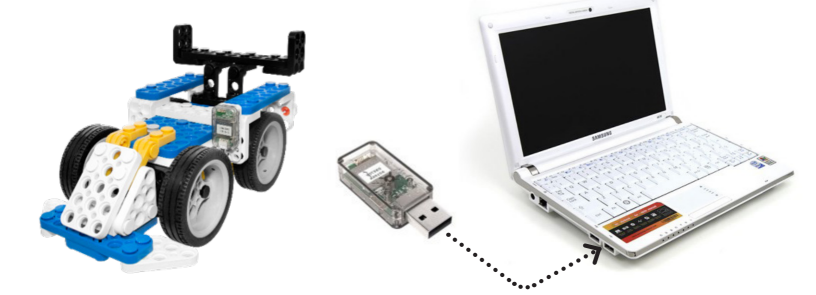
Connect BT-410 Dongle to the USB port on the PC.
After finishing assembly of a robot, turn on the controller’s power.
By taking BT-410 module close to the BT-410 Dongle, they’ll automatically be paired.
Succesful pairing will turn on the solid blue LED for both BT-410 and Dongle modules.
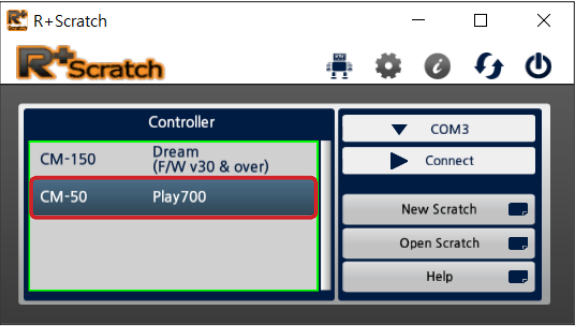
Run Scratch
-
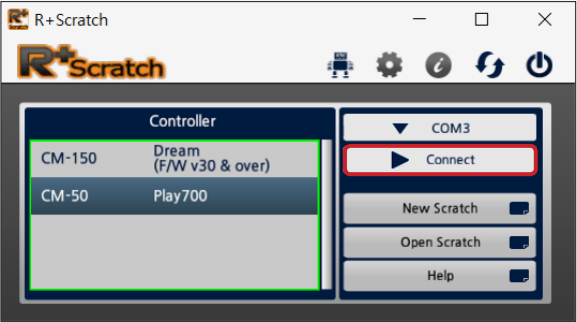
Run the R+Scratch program. Select
CM-50on the controller menu.
-
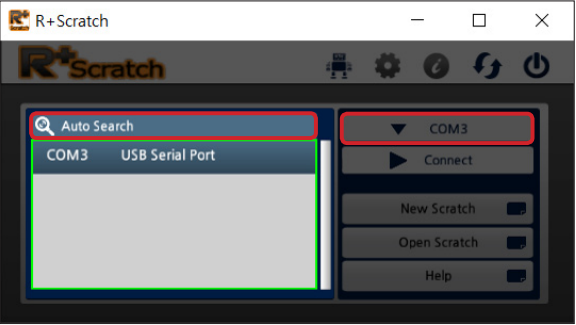
Click on Port tap and then
Auto Searchto find the port connected to controller automatically.
-
Click on
Connectbutton to connect the controller to Scratch program.
-
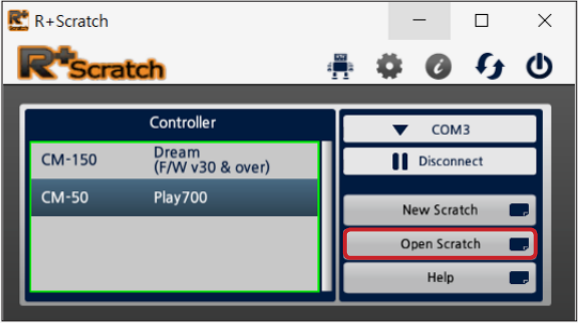
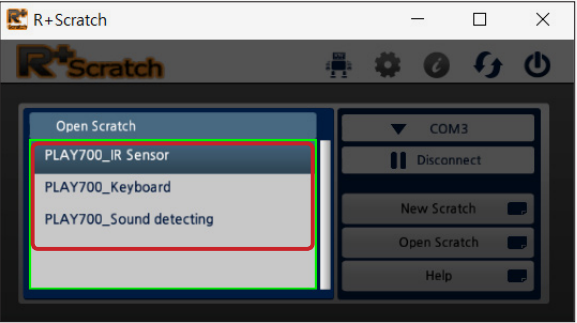
Click on
Open Scratchto open saved Scratch program. In order to write a new program, click onNew Scratch.
-
Double click on the program to run. After saving, Scratch will run.
-
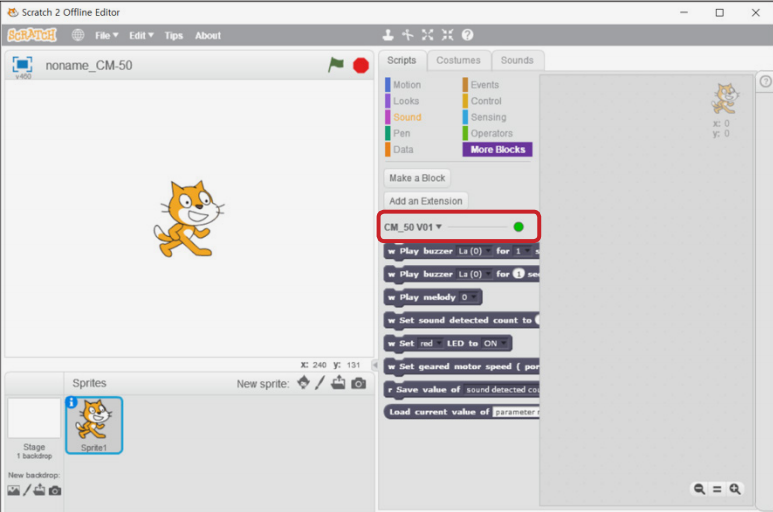
On the Scratch program, click on
More Blockto find out available blocks for CM-50 controller.
There are blocks for controlling motors and sensors in the CM-50 controller.
Green dot indicates the robot is connected to the program.
Video Tutorials
Reference
Straightness Tuning
If the robot dosen’t move straight and keep steering to the right or left, the straightness can be tuned under Tuning Mode.
Please refer to Straightness Tuning instruction from CM-50 manual.