
Getting Started
- Downlaod Android App
- Minimum System Requirements
- Android 2.3 or higher
- Hardware : 1.2GHz dual-core CPU, 1GB RAM, Bluetooth
- Supports : BT-410 (Android 4.4 or higher), BT-210, BT-110
- Minimum System Requirements
- Download iOS APP
- Minimum System Requirements
- iOS 8.0 or higher
- Hardware : iPhone 4S, iPod 5G, iPad mini, iPad 2 or higher
- Supports : BT-410
- Minimum System Requirements
Menu Description
- Editing tab per step
- Connection status of robot
- Menu bar
- Workspace
- 3D robot viewer
- Timeline (motion unit)
- Timeline menu bar
- Pose table
- Pose menu bar
- 3D robot viewer
- Flow chart (motion)
- Flow chart menu bar
Practice
Connect to Robot
Click the connect button to open the connection window.
- Enter the last 2 digits (number/letter) of the Bluetooth to search for.
- Click the
OKbutton.

- Click on the “Refresh” button.
- Click on the robot’s Bluetooth address.
- Click the “Connect” button
- Enter 0000 for the PIN code.
- Proceed with the connection (This process is skipped if the Bluetooth device is already connected).
Wait while the smart device connects with the robot.
The connection status lights up when connection is successful.
Open Project
- Go to the Home tab.
- Click the open button on the tool bar to open a project.
- Select a motion file saved in the smart device.
- Click the OK button to proceed.
Wait while the project opens.
Motion Playback
- Go to the Motion Unit tab
- Click on the Motion Unit menu
- Select a Motion Unit to playback.
- Click OK
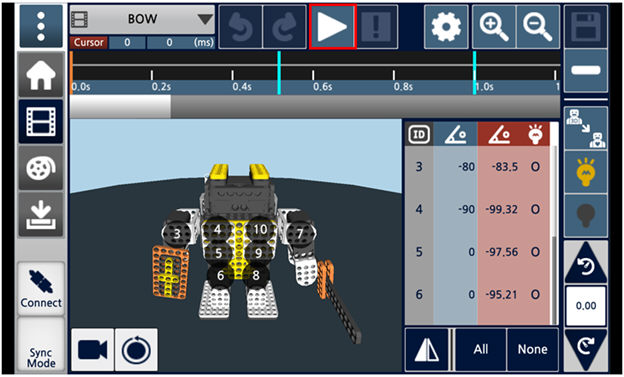
Click on the play button on the top
Check the 3D robot to see whether the selected motion unit performs well.
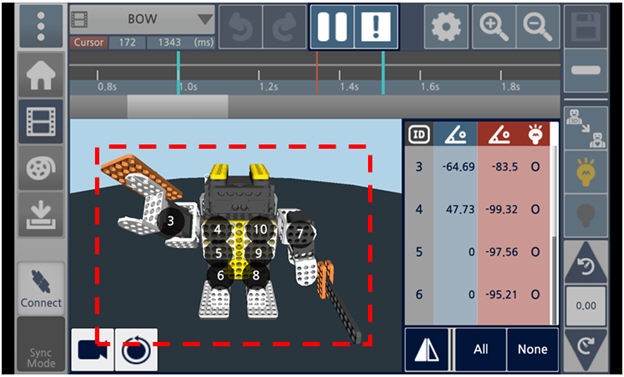
- Click on the “Sync Mode” button.
- Play the Motion Unit to see if the 3D robot and the real robot perform well.
Motion Editing
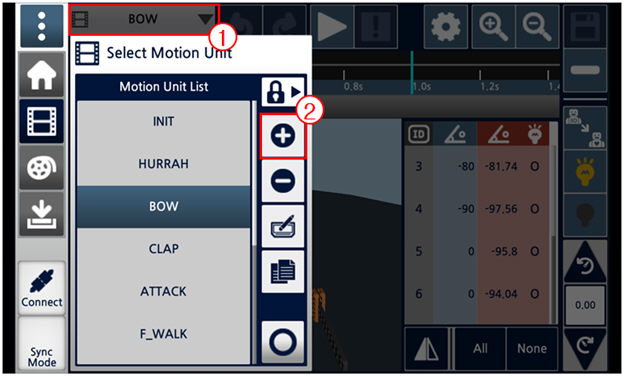
- Click on the Motion Unit list.
- Click on the “New Motion“ button.
- Enter the name of the new Motion Unit
- Click the OK button to create a new and empty motion unit.
- Select the newly created Motion file.
- Clicking the OK button will close the list.
- Click on the 3D robot’s joint to select the target for adjustment.
- You may click on additional joints for multi-selecting the joints.
- Click on the Torque OFF button to disable the torque on the motors.
Use your hand to move the joints with the disabled torque.
- Push the torque ON button
- The 3D model will now mimic the pose of the actual robot.

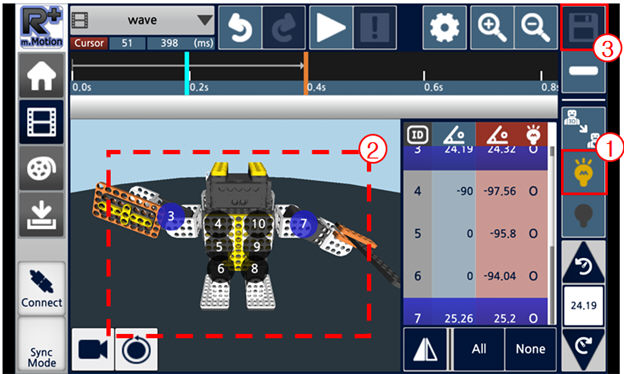
- Drag the timeline cursor to the 25th frame.
- Click the button to insert a key frame. (This process will save the robot’s pose on the 25th frame.)
- Move to the 51st frame on the timeline.
- Turn off the torque.
Make a pose by moving the motors with the torque off.
- Click the button to turn the torque on.
- The 3D model will now mimic the pose of the real robot.
- Click the insert button to save the pose as the 51st key frame.
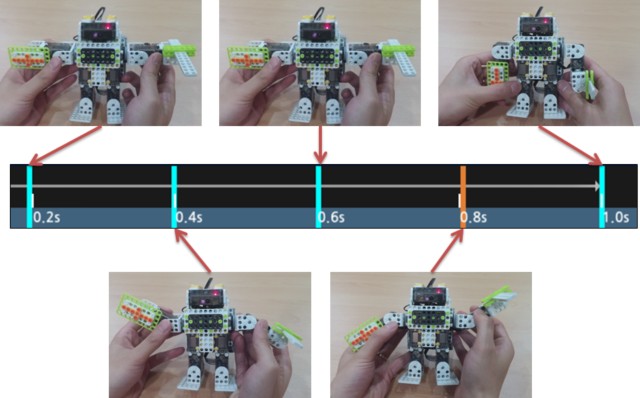
- Repeating the same process, save new poses (key frames) on the 0.6 sec., 0.8 sec., and 1 sec. position.
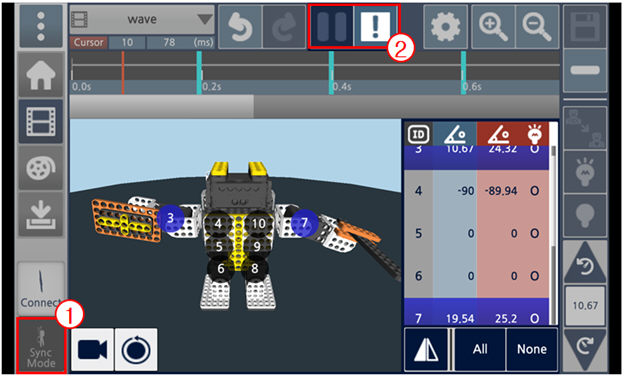
- Click the sync mode button.
- Play the motion unit to see if the robot performs the motion well.
Motion Download
- Move to the motion download tab.
- Click the “New Motion Group” button to create a new motion group.
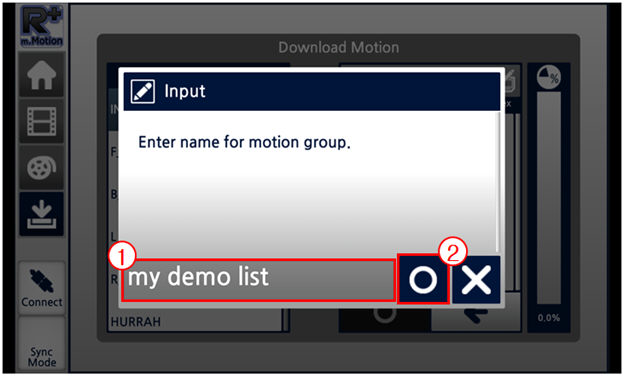
- Enter the name of the new motion group to be created.
- Click the OK button.
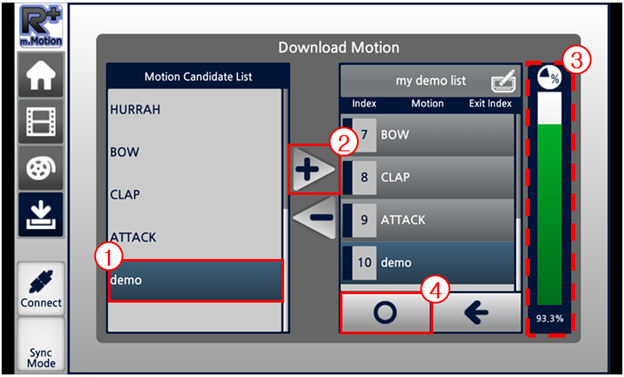
- Select the motions to be added on the motion group list.
- Click the “Add Motion” button.
- The memory is calculated based on the motions that are added from steps 1~2.
- Click the OK button once completed.
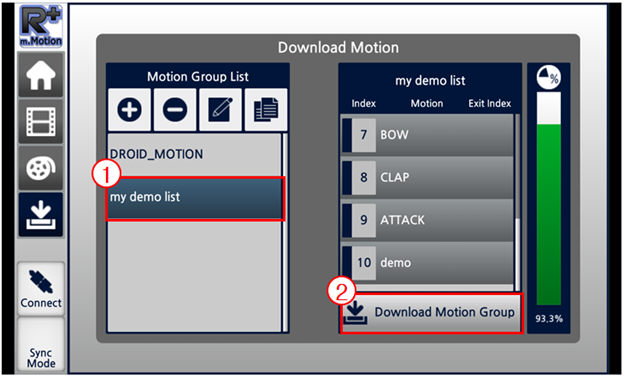
- Select the motion group that was just created.
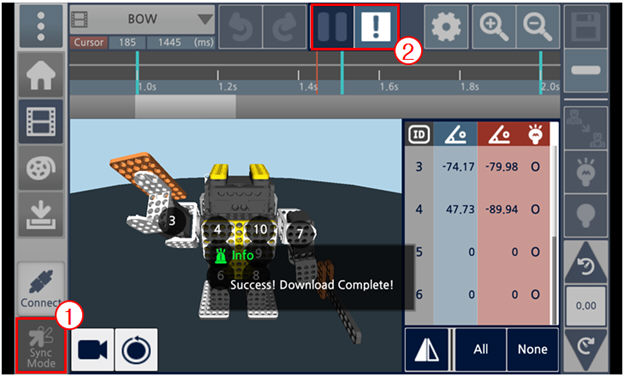
- Click the “Download Motion Group” button.
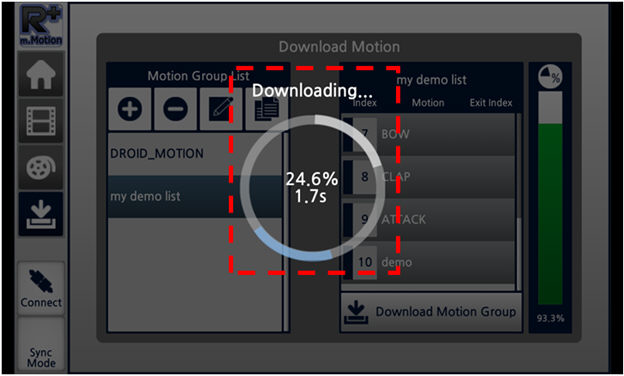
Stand by while the motion group is being downloaded.
Save Motion Project
- Move to the Home tab.
- Click the “Save As” button.
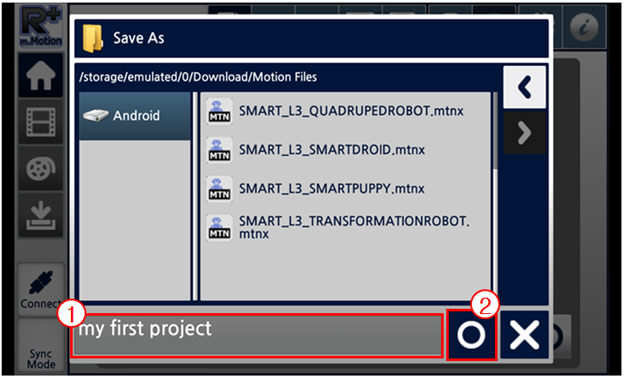
- Enter the name of the project file to save.
- Click the OK button.
- Check the log message.
- The saved motion file’s name is displayed on the top left corner.
FAQ
- Which products are supported?
PREMIUM, STEM, SMART, ROBOTIS MINI, and other products with CM-200, CM-530, OpenCM9.04C, AX series, MX series, and XL-320.
- Which 3D models are supported?
Out of the supported products, all robot examples that use Motion.
- Can more 3D models or motors be added apart from the ones provided?
Users can add in more motors (the motor will be added just on the screen, not specifically onto the robot). Planned to support 3D created models from R+ Design to be imported into R+ Motion.
- Can the MTN file be converted to an MTNX file?
Yes, the motion data can be converted, but the 3D model is not supported (will be supported later).
- Can the MTNX file be converted to an MTN file?
No, and there is no plan to support it.
- The Motion file won’t play properly after editing it.
After editing, you must download the motion group again.
- The controller won’t connect properly.
Please try turning OFF the controller then ON again. If you’re using CM-200, try turning it OFF, hold the power button for 2~3 sec. to stop the task, then try again.