
Introduction
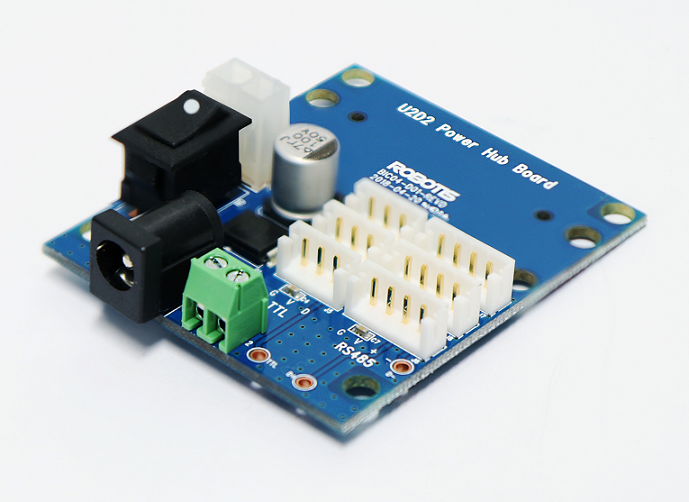
Combined with U2D2, it can supply various kinds of external power supply to supply stable power to DYNAMIXEL.
Specifications
| Item | Details |
|---|---|
| Operating Voltage | 3.5V ~ 24.0V |
| Maximum Current | 10.0A |
![]()
DANGER
(Ignoring these warnings may cause serious injury or death)
- Never place items containing water, flammables/open flames, or solvents near the product.
- Never place fingers, arms, toes, and other body parts near product during operation.
- Cease operation and remove power from the product if the product begins to emit strange odors, noises, or smoke.
- Keep product out of reach of children.
- Check input polarity before installing or energizing wiring or cables.
![]()
CAUTION
(Ignoring these warnings may cause mild injury or damage to the product)
- Always comply with the product’s offical operating environment specifications including input voltage, current, and operating temperature.
- Do not insert blades or other sharp objects during product operation.
![]()
ATTENTION
(Ignoring these warnings may cause minor injury or damage to the product)
- Do not disassemble or modify the product.
- Do not drop the product or apply strong impacts.
- Do not connect or disconnect DYNAMIXEL cables while power is being supplied.
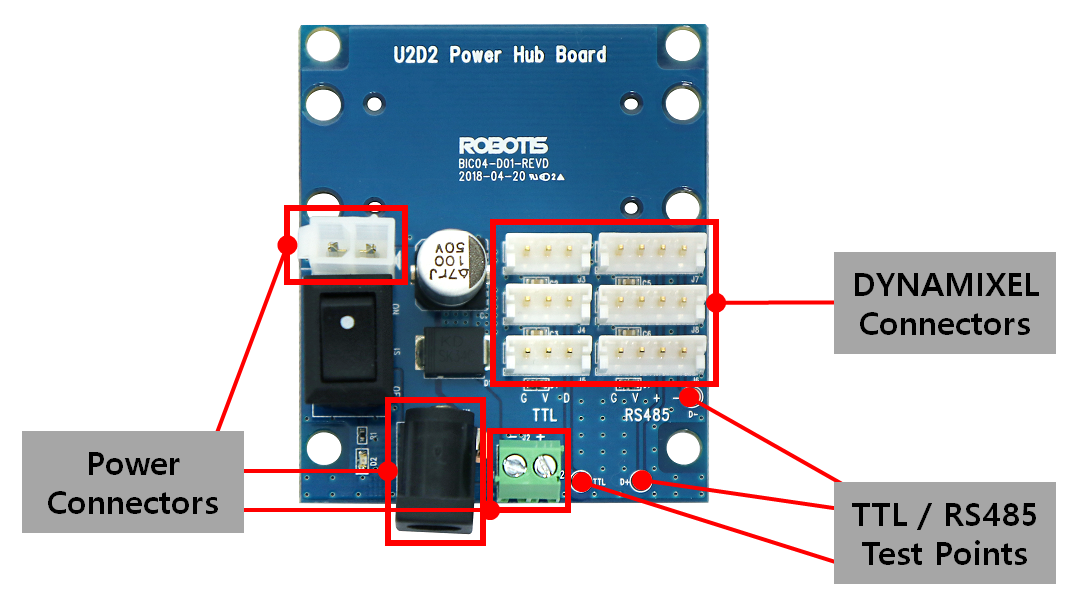
Layout
Description
-
DYNAMIXEL Connectors: 3 and 4-pins JST connectors are installed for communication. See Connector Information for more details.
-
TTL/RS485 Test Points: TTL data line, RS485 D +, D-line signals can be easily identified via the test points
-
Power Connectors: U2D2 PHB provides three different types of power connectors to supply a diverse voltage and current to DYNAMIXEL.
- SMPS DC Connector (2.5mm ID / 5.5mm OD, Center Positive)
- MOLEX Power connector (See Connector Information for more details)
- PCB Screw Terminal Block Connector
- Left: -
- Right: +
CAUTION:
- Be sure to check the polarity of the terminal block connector when using an external power supply, to enhance the user safety.
- Some pins stick out on the bottom of the board, which are prone to touch the floor. To prevent from touching a floor, assemble the board with the supplied supporters following How to Assemble instruction.
How to Assemble
-
Assemble four(4) plastic supporters at each corner of the
U2D2 Power Hub Boardas shown below.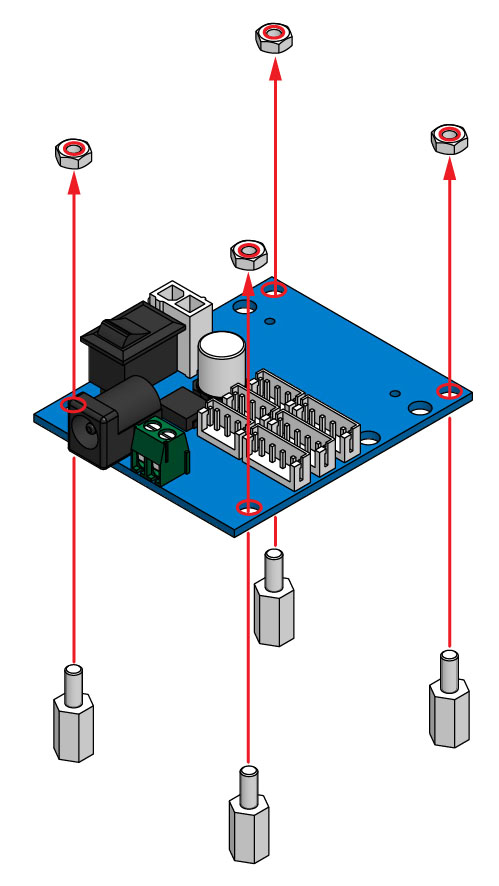
-
Use plastic rivets to mount
U2D2on theU2D2 Power Hub Board.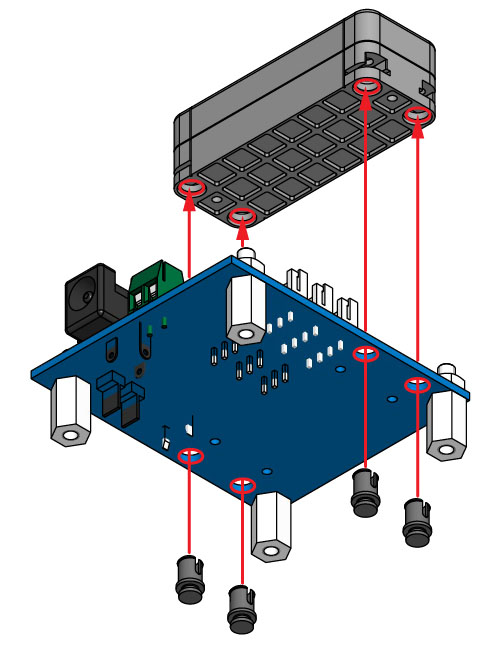
-
Connect
U2D2andU2D2 Power Hub Boardwith 3P or 4P cables (Both 3P and 4P cables can be connected at the same time).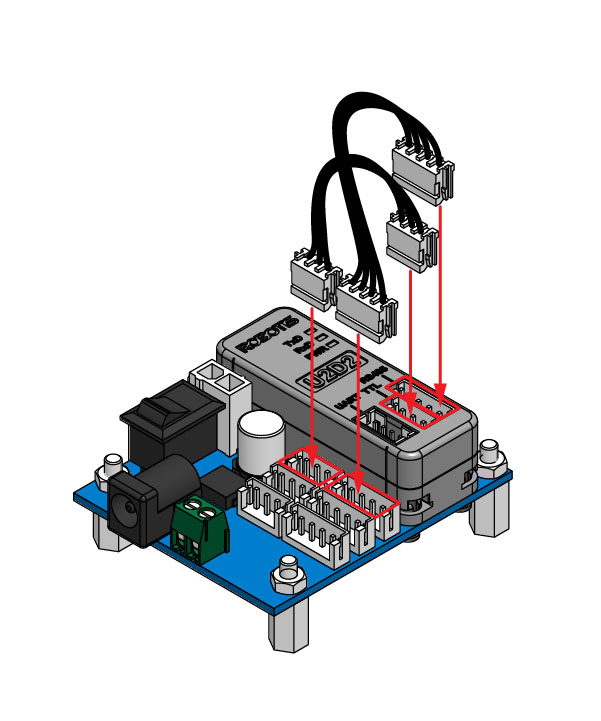
-
Connect additional cables that will connect
U2D2andDYNAMIXEL(Depending on DYNAMIXEL model, converting cables may be required).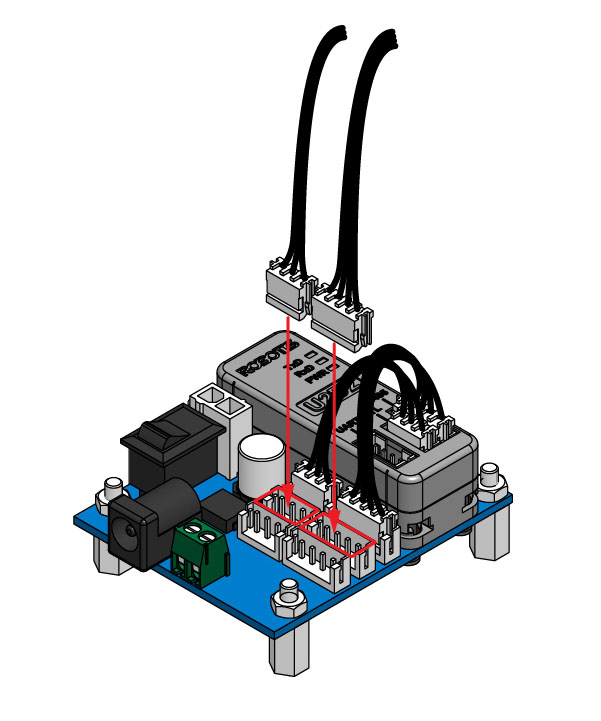
-
Connect the other side of the cable to
DYNAMIXEL(Depending on DYNAMIXEL model, converting cables may be required).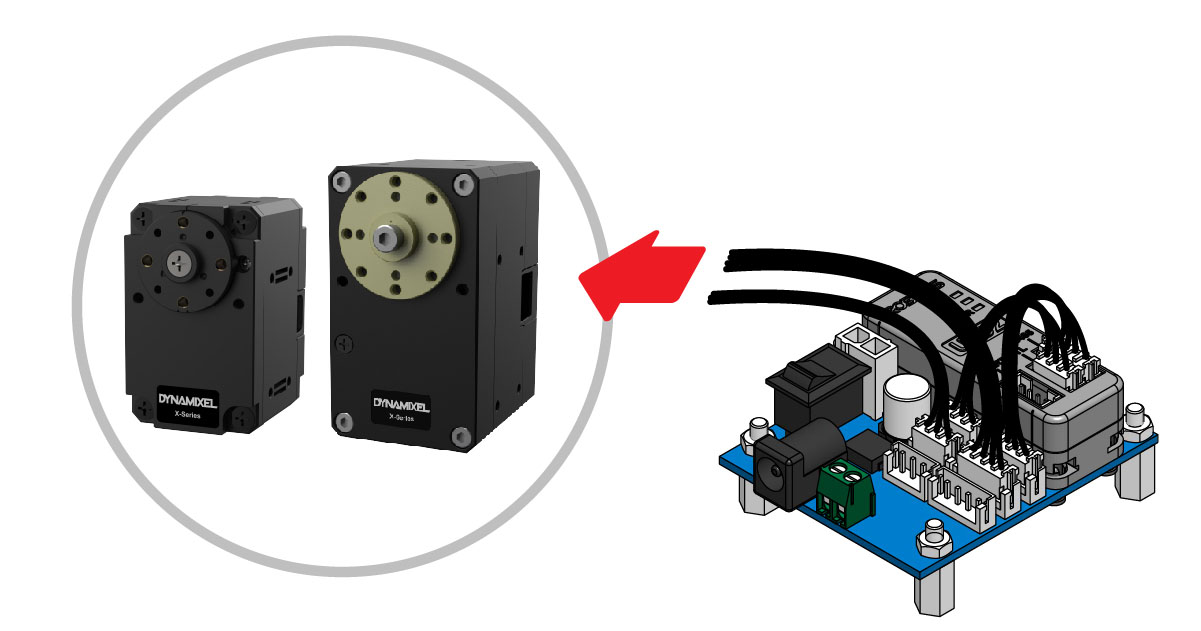
-
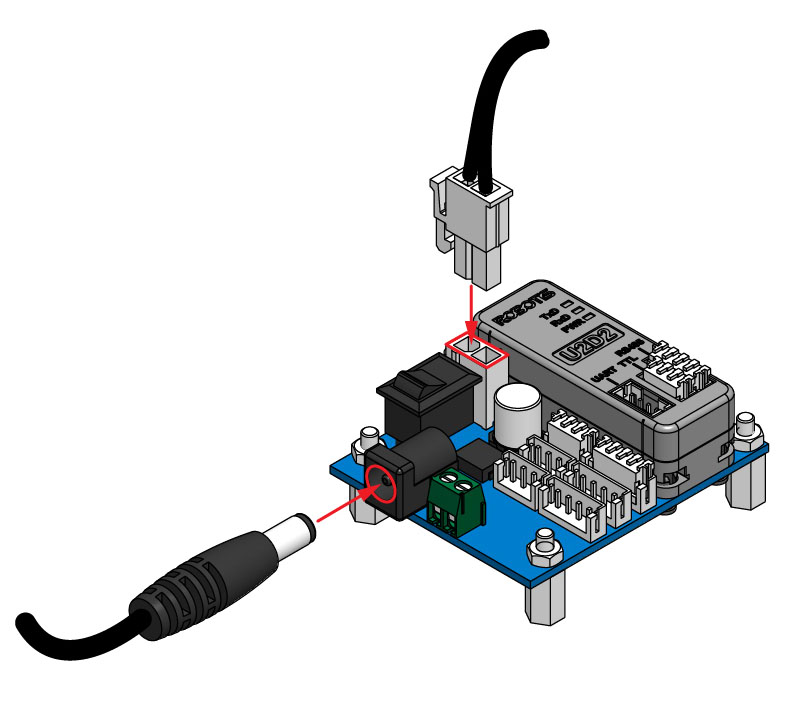
Connect power to
U2D2 Power Hub Board.DANGER : Do NOT use multiple power inputs at the same time. Select ONLY one of the power source to connect.
WARNING : Check the Recommended Voltage for DYNAMIXEL before supplying the power.
-
Turn the power switch on
U2D2 Power Hub Boardto supply power to DYNAMIXEL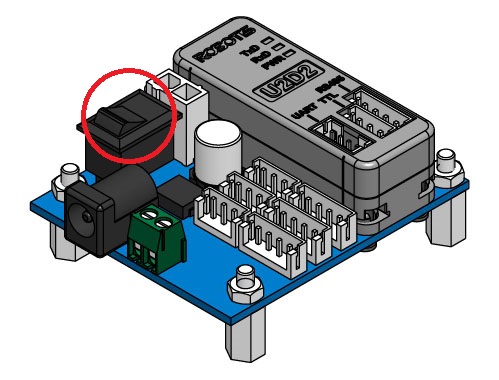
Connector Information
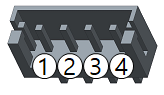
| Item | TTL | RS-485 | Power |
|---|---|---|---|
| Pinout | 1 GND2 VDD3 DATA |
1 GND2 VDD3 DATA+4 DATA- |
1 GND2 VDD |
| Diagram |  |
 |
 |
| Housing | 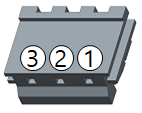 JST EHR-03 |
 JST EHR-04 |
 MOLEX 39-01-2020 |
| PCB Header |  JST B3B-EH-A |
 JST B4B-EH-A |
 MOLEX 39-28-1023 |
| Crimp Terminal | JST SEH-001T-P0.6 | JST SEH-001T-P0.6 | MOLEX 39-00-0038 |
| Wire Gauge for DYNAMIXEL | 21 AWG | 21 AWG | 20 AWG |