
USB2DYNAMIXEL
Introduction
How to Use
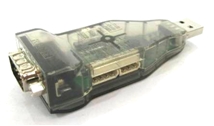
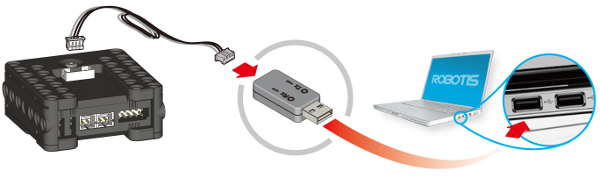
USB2DYNAMIXEL is a device used to operate DYNAMIXEL directly from PC. USB2DYNAMIXEL is connected to USB port of PC, and 3P and 4P connectors are installed so that various DYNAMIXEL’s can be conntected. Also, USB2DYNAMIXEL can be used to change from USB port to Serial port on the PC without serial port such as notebook computer, etc. The function is very useful in the cases when DYNAMIXEL exclusive controllers such as CM-2, CM-2+, CM-5, and CM-510 are connected to USB Port, or when ZIG2Serial is connected to USB port to control robots wirelessly.
DYNAMIXEL Control Using PC

Changing Serial Port
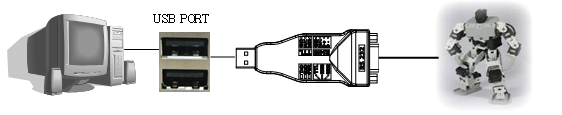
Wireless Communication

NOTE : Difference in voltage may cause unstable USB2DXL connections. Ensure that both connecting equipment and PC are properly grounded.
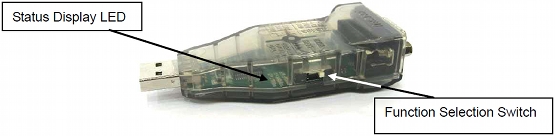
Layout

| Name | Description |
|---|---|
| Status Display LED | Display power supply, TXD(data writing), and RXD(data reading) status. |
| Function Selection Switch | Select the communication method of TTL, RS-485, and RS-232. |
| 3P Connector | Connect DYNAMIXEL’s of AX Series through TTL communication. |
| 4P Connector | Connect DYNAMIXEL’s of DX, RX Series through RS-485 communication. |
| Serial Connector | Change from USB port to Serial port through RS-232 communication. |
Pinout
The following pictures show the usage of connector pins used by USB2DYNAMIXEL. If you want to use each pin for your own purpose, please use them after you learn the usage of each pin.
-
PIN Figure of 4P / 3P Cable Connctors

-
PIN Figure of Serial Connector

Select Communication Mode
The communication mode can be selected by chaning the switch of USB2DYNAMIXEL as below.
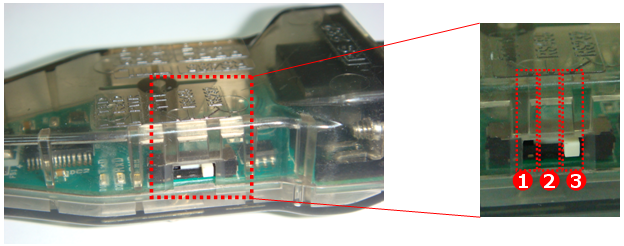
- TTL Communication : DYNAMIXEL’s using 3-pin port such as AX Series, AX-S1 etc.
- RS485 Communication : DYNAMIXEL’s using 4-pin port such as DX Series, RX Series, EX Series etc.
- RS232 Communication : Controllers using serial cable such as CM-5, CM-510 etc.
Tutorials
- USB2DYNAMIXEL SDK : Please refer to the DYNAMIXEL SDK.
Supply Power
USB2DYNAMIXEL does not supply power to DYNAMIXEL. Therefore, the power must be supplied separately to operate DYNAMIXEL as the following pictures. Please refer to the explanation page of each DYNAMIXEL regarding proper voltages for each DYNAMIXEL mode.
Warning
- For the stable power supply, we recommend using ROBOTIS controller or SMPS2Dynamixel.
- Connect your DYNAMIXEL to power supply while it’s off and turn on/off with the power switch.
Applying Power to DYNAMIXEL
Referring to PIN Figure, apply positive (+) voltage to the #2 PIN of the connector, and negative (-) voltage on #1 PIN of the connector.
Since the 2 connectors of DYNAMIXEL’s are equal, power can be applied at any of.)

Applying power between USB2DYNAMIXEL and DYNAMIXEL
If power cannot be applied as above, apply the power between USB2DYNAMIXEL and DYNAMIXEL as below.
Separate the power cable on the #2 PIN of USB2DYNAMIXEL connector, and then apply positive(+) voltage.
Connect additionally Y-cable to the power cable on the #1 PIN of USB2DYNAMIXEL connector, and then apply negative (-) voltage.

Check Driver
How to check whether the USB2DYNAMIXEL driver is installed correctly.
NOTE : USB2DYNAMIXEL and LN-101 uses an identical USB chipset.
-
Connect USB2DYNAMIXEL to the USB Port of PC.
-
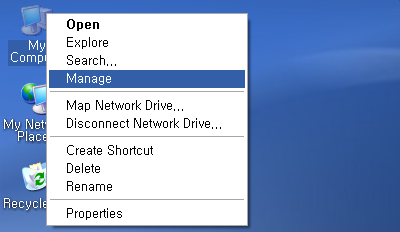
Select Manage in the popped-up menu shown by right-clicking My Computer.
-
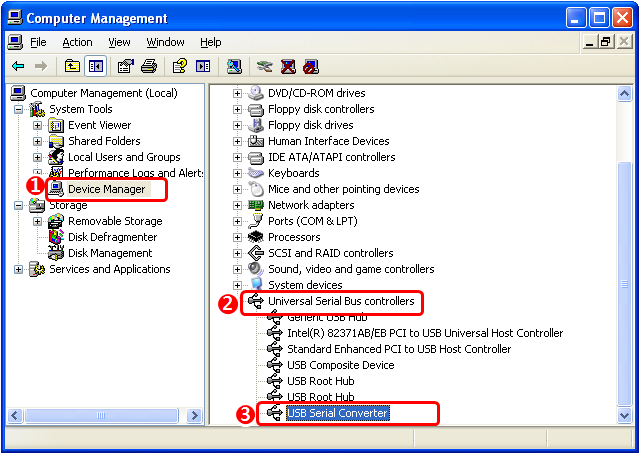
Check USB Serial Converter in Universal Serial Bus Controllers of Device Manager.
-
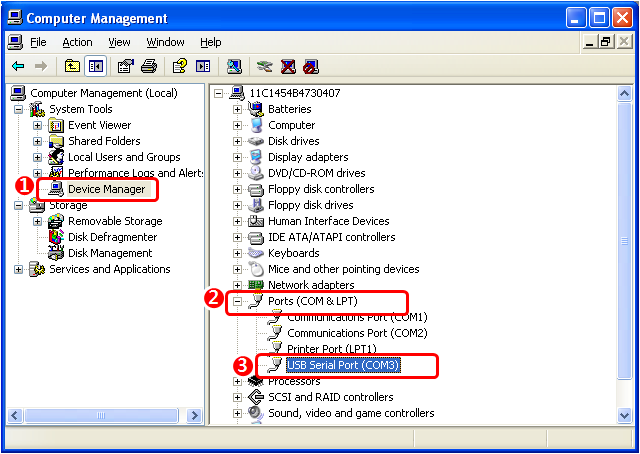
Check USB Serial Port(COMx) in the list of Ports(COM & LPT). COM Port number may vary depending on each system.
Install Driver Manually
If you installed RoboPlus, FTDI Driver (USB2DYNAMIXEL, USB Downloader (LN-101) driver) is installed together automatically. If you didn’t install the RoboPlus yet, or if the driver is not installed appropriately, please install it manually according to following procedures.
-
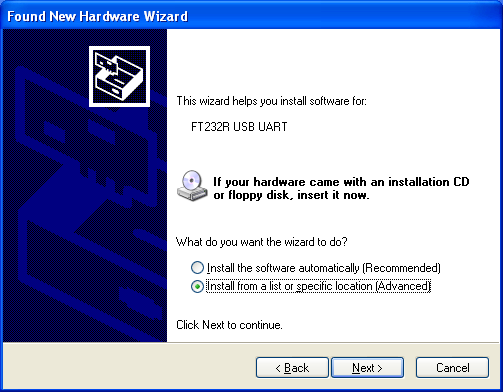
Connect a device to PC. If the driver is not installed yet, Found New Hardware Wizard will be popped up. Install from a list or specific location (Advanced)(S) -> Next(N)
-
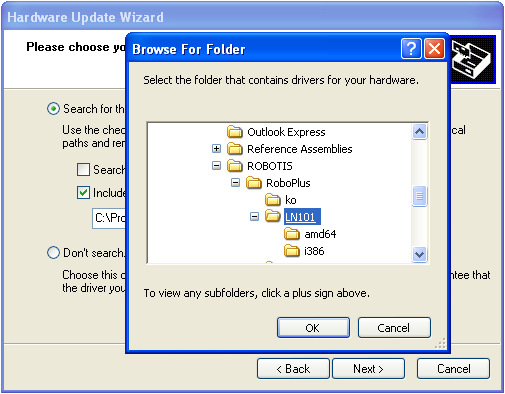
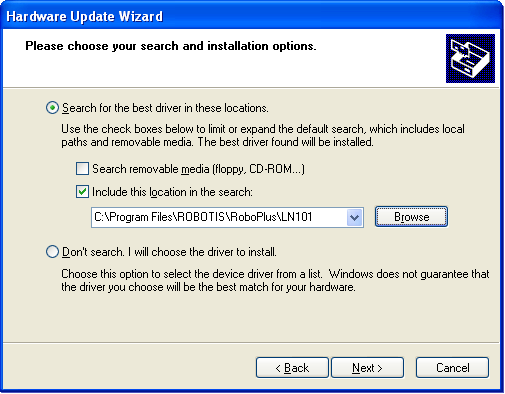
Decide the location of Driver. If RoboPlus S/W has been installed automatically, the driver is in LN101 folder of RoboPlus Installation folder. Or if you want to install the newest version, download the newest version VCP driver from FTDI Driver Download page.
-
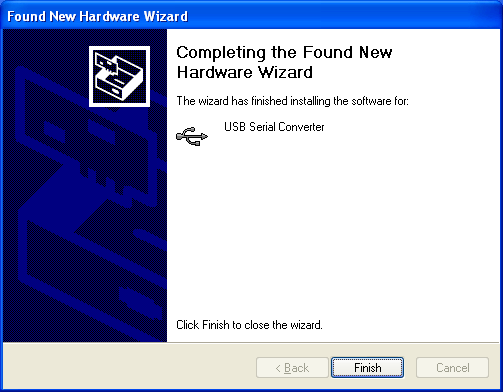
Click the Next(N) button to start the installation. Installation of USB Serial Converter driver is completed.
-
Install the USB Serial Port driver in the same way.
