
Examples
Device Setup(RH-P12-RN(A))
In order to run the example, RH-P12-RN(A) should be set as belows.
- ID = 1
- Baudrate = 2 Mbps
TIP: To change the values of the control table, use R+ Manager 2.0 (in Windows) or DYNAMIXEL Wizard 2.0 (in Windows, Linux or Mac OS.)
Communication Port Setup
The Serial COM Port for Windows example is set as “COM4”.
Please change the Serial COM Port to COM4 in the Device Manager or modify the DEVICE_NAME in the example source code.
In case of Linux example, the communication port is set as “/dev/ttyUSB0”.
If other communication port is used, the DEVICE_NAME in the example source code should be modified properly.
RH-P12-RN_Example/rh-p12-rna.cpp
...

#if defined(__linux__)
#define DEVICE_NAME             "/dev/ttyUSB0"
#elif defined(_WIN32) || defined(_WIN64)
#define DEVICE_NAME             "COM4"
#endif

...
Windows Example
Download
- Install Git Client at Git official website.
- Run Git Client.
- Download the repository using provided URL: https://github.com/ROBOTIS-GIT/RH-P12-RN_Example.
NOTE: Direct Download Link(.zip) is available at RH-P12-RN_Example-master.zip.
Build and Run
-
Install Visual Studio program.
The Windows example is tested on Visual Studio 2017
-
Open the solution with
RH-P12-RN_Example\win64\RH-P12-RN-Example.slnfile. -
Build solution and run.
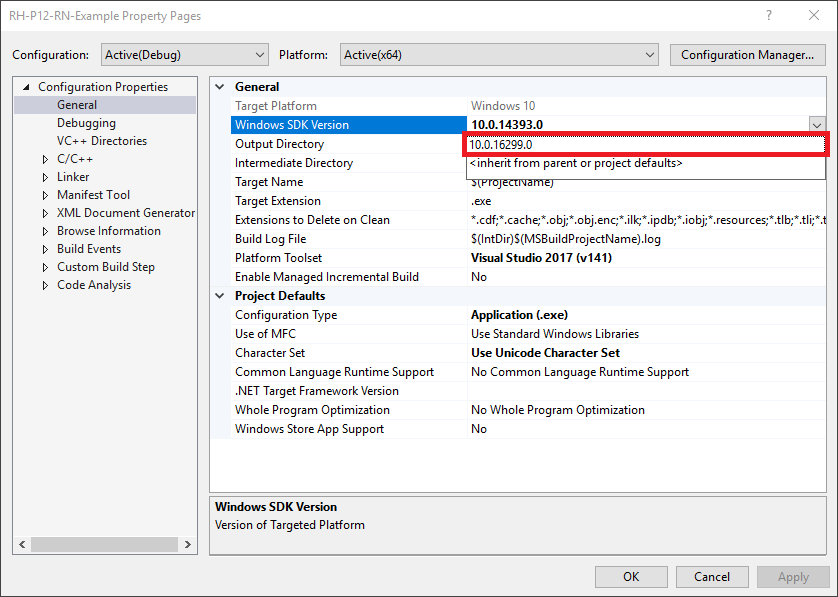
- Below error message might appear due to the difference of Windows SDK version.
 error MSB8036: The Windows SDK version 10.0.14393.0 was not found.
 Install the required version of Windows SDK or change the SDK version
 in the project property pages or by right-clicking the solution
 and selecting "Retarget solution".
In order to resolve the error, open the property page from the project and select installed Windows SDK version, then rebuild the code.
- Below error message might appear due to the difference of Windows SDK version.
Execution Screen
If execution fails, confirm the error message and proceed to Device Setup(RH-P12-RN(A)) or Communication Port Setup properly.
-
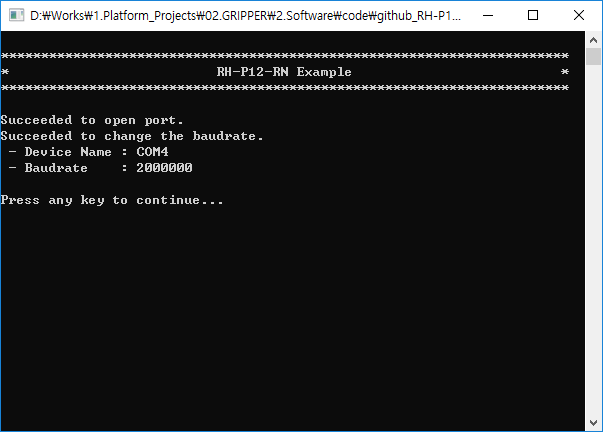
Upon successful execution of the Windows example, the communication port and the baudrate of connected device are listed as shown in the below image.
-
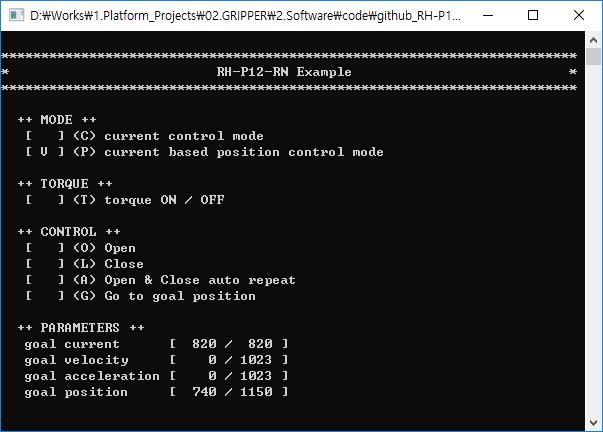
If RH-P12-RN is configured as Current-based Position Control Mode, below image will be displayed.
-
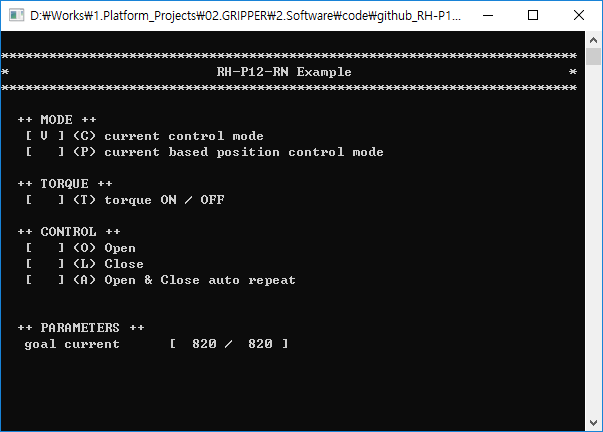
If RH-P12-RN is configured as Current Control Mode, below image will be displayed.
Operation
Refer to the images (Current-based Position Control Mode and Current Control Mode) at Execution Screen.
- Use
↑/↓key of your keyboard to move a previous/next option. - Use
Spacekey to check/uncheck options in the MODE / TORQUE / CONTROL menu. - Shortcut keys in the parenthesis(
C,P,T,O,L,A) can check/uncheck options. - In order to change PARAMETERS value,
[and]keys increase/decrease by 1 whereas{and}keys increase/decrease by 10.
Each option is described as belows.
++ MODE ++
- (C) current control mode : Current Control Mode is used when checked
- (P) current based position control mode : Current-based Position Control Mode is used when checked
++ TORQUE ++
- (T) torque ON / OFF : Enable Torque when checked, Disable Torque when unchecked
++ CONTROL ++
- (O) Open : Open the gripper when checked, and check will be cleared automatically.
- (L) Close : Close the gripper when checked, and check will be cleared automatically.
- (A) Open & Close auto repeat : Repeat open and close motion when checked.
- (G) go to goal position : goal position in the PARAMETERS will be applied immediately when checked.
++ PARAMETERS ++
- goal PWM : Setting value will be written in the goal PWM address of the RH-P12-RN.
- goal current : Setting value will be written in the goal PWM address of the RH-P12-RN.
- goal velocity : Setting value will be written in the goal velocity address of the RH-P12-RN.
- goal position : Setting value will be written in the goal position address of the RH-P12-RN when (G) go to goal position is checked.
Linux Example
Follow the steps to operate RH-P12-RN(A) by using Linux Example. Enter the given commands using Terminal.
Preperation
- Install DYNAMIXEL SDK.
$ git clone https://github.com/ROBOTIS-GIT/DynamixelSDK $ cd DynamixelSDK/c++/build/linux64 $ sudo make install - Register USER_ID to dialout group.
$ sudo usermod -aG dialout USER_ID - Restart or log out, and log in to validate the change in order to gain access to /dev/ttyUSB0
Download
$ git clone https://github.com/ROBOTIS-GIT/RH-P12-RN_Example
Build
$ cd RH-P12-RN_Example/linux64
$ make
Run
$ ./rh-p12-rna_example
Execution Screen
If execution fails, confirm the error message and proceed to Device Setup(RH-P12-RN(A)) or Communication Port Setup properly.
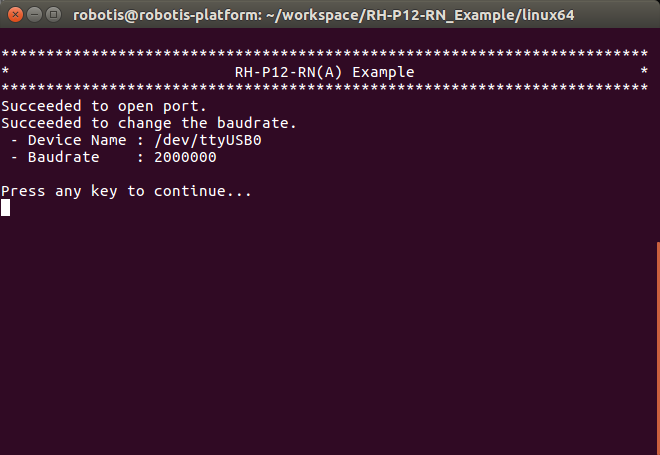
-
Upon successful execution of the Windows example, the communication port and the baudrate of connected device are listed as shown in the below image.
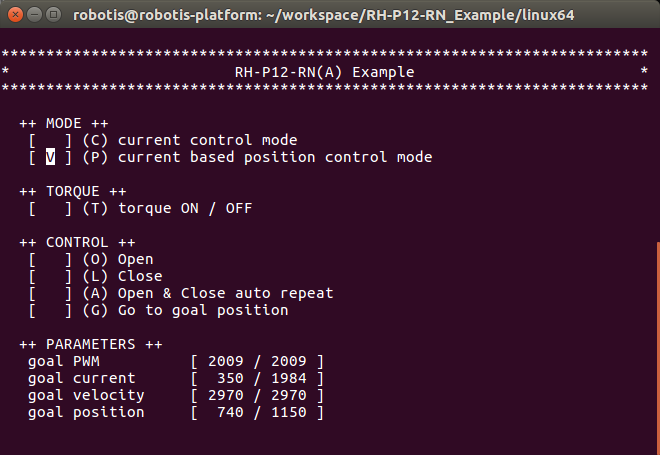
-
If RH-P12-RN(A) is configured as Current-based Position Control Mode, below image will be displayed.
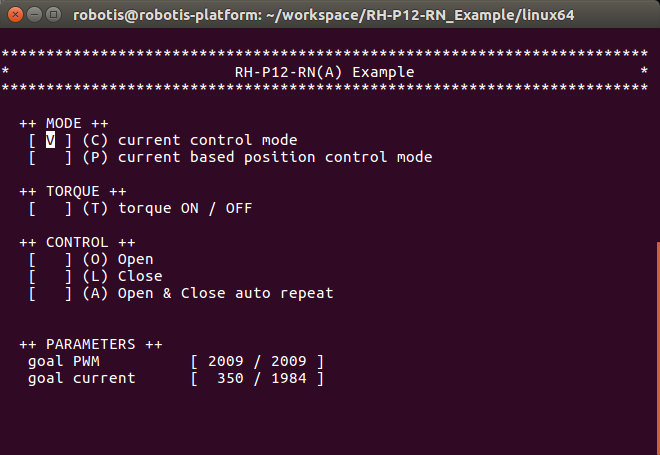
-
If RH-P12-RN(A) is configured as Current Control Mode, below image will be displayed.
-
Each option is identical to the Operation of Windows Example
ROS GUI Example
Follow the steps to operate RH-P12-RN(A) by using Linux Example. Enter the given commands using Terminal.
Preperation
- Create real-time scheduling priority (rtprio) for USER_GROUP (your user group)
$ sudo bash -c 'echo "@USER_GROUP - rtprio 99" > /etc/security/limits.d/robotis-rtprio.conf' - Register USER_ID (your user ID) to dialout group in order to gain access to /dev/ttyUSB0
$ sudo usermod –aG dialout USER_ID - Restart or log out, and log in to validate the change in order to gain access to /dev/ttyUSB0
Download
$ cd ~/catkin_ws/src
$ git clone https://github.com/ROBOTIS-GIT/DynamixelSDK
$ git clone https://github.com/ROBOTIS-GIT/ROBOTIS-Framework
$ git clone https://github.com/ROBOTIS-GIT/ROBOTIS-Framework-msgs
$ git clone https://github.com/ROBOTIS-GIT/RH-P12-RN-A
Build
$ cd ~/catkin_ws
$ catkin_make
Run
- Open the new terminal and run manager.
$ roslaunch rh_p12_rn_a_manager rh_p12_rn_a_manager.launch - Open the new terminal and run GUI example.
$ rosrun rh_p12_rn_a_gui rh_p12_rn_a_gui
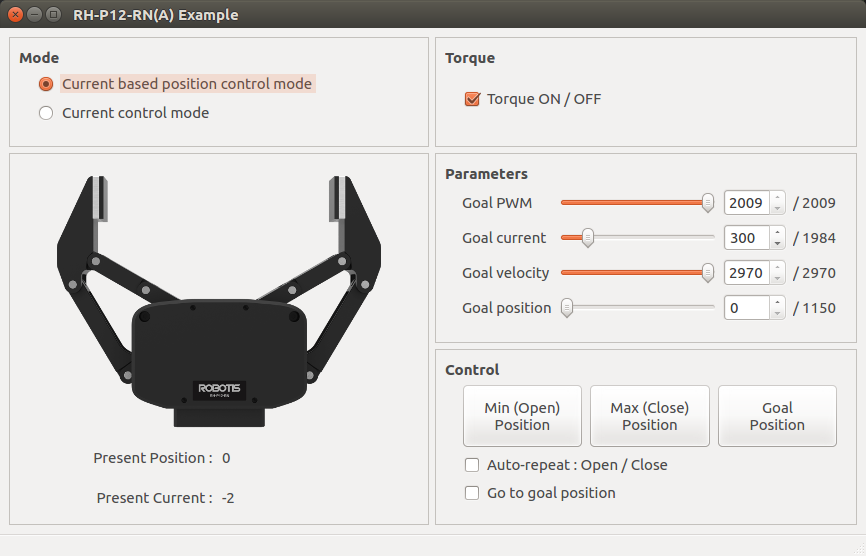
-
If RH-P12-RN is configured as Current-based Position Control Mode, below GUI window will be displayed.
-
If RH-P12-RN is configured as Current Control Mode, below GUI window will be displayed.
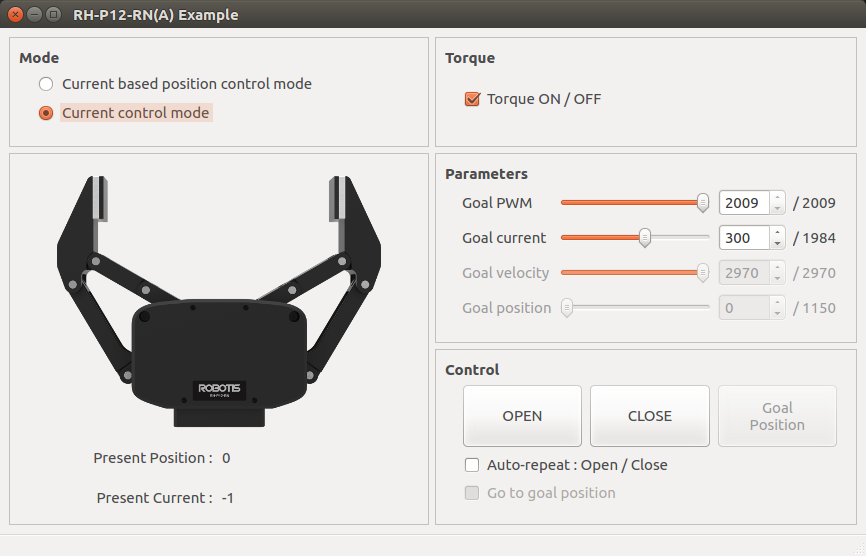
-
Each option is identical to the Operation of Windows Example