
Introduction
Congratulations on purchasing DARWIN-OP. DARWIN-OP will lead you to the robot world with virtually unlimited research possibilities and opportunities. Read this guide before getting with DARWIN-OP.
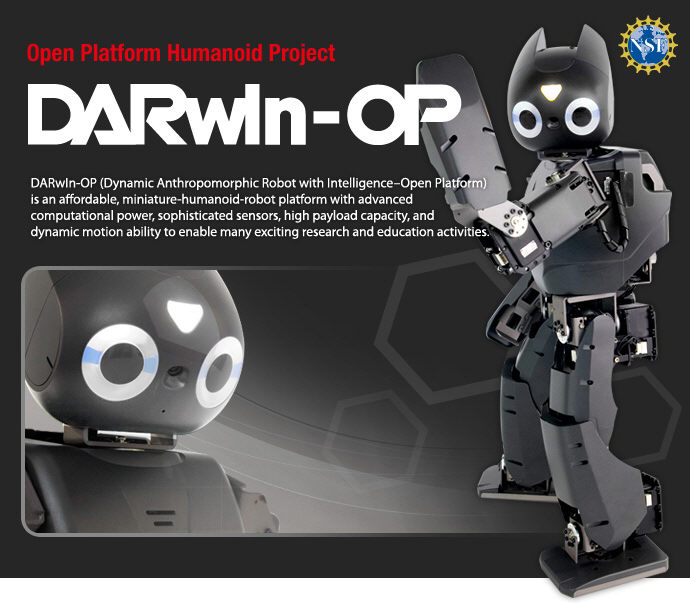
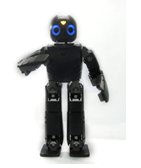
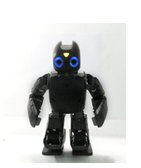
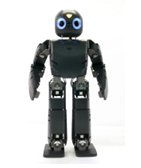
What is DARWIN-OP?
Safety Information
CAUTION : Exercise safety when using this product. Robotis is not responsible, in any ways, for any accidents due to user negligence.
- Please read the instructions carefully before getting started.
- This product may not be suitable for children aged below 15.
- Do not use any other tools other than the ones provided with the kit.
- Face the robot away from you during operations.
- Do not place your fingers at the robot’s joints.
- Do not operate robot near water or direct sunlight.
Getting Started
Package Contents
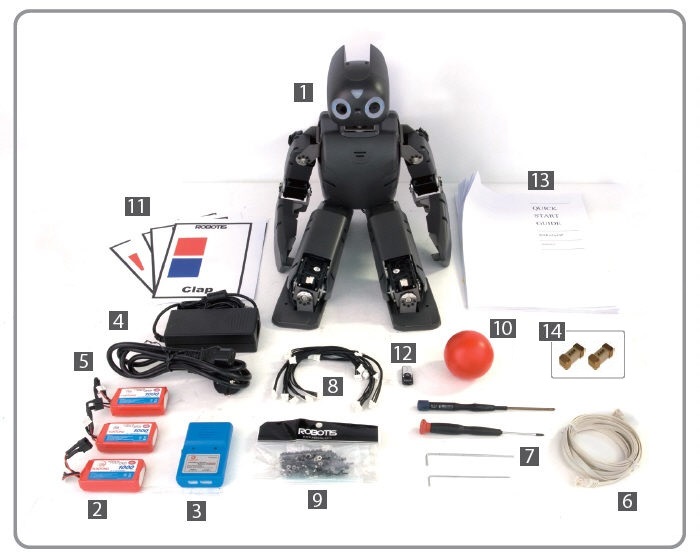
- Fully-assembled DARWIN-OP robot
- 3 battery packs
- 1 battery pack charger
- 1 DC power supply
- 1 power cable
- 1 ethernet cable
- 2 wrenches, 2 screwdrivers
- 1 set of spare cables
- 1 set of spare bolts and nuts
- 1 red ball
- 1 set of color patches (7 individual)
- 1 USB thumb drive (with installed recovery software)
- 1 quick start guide
- 2 spare fuses
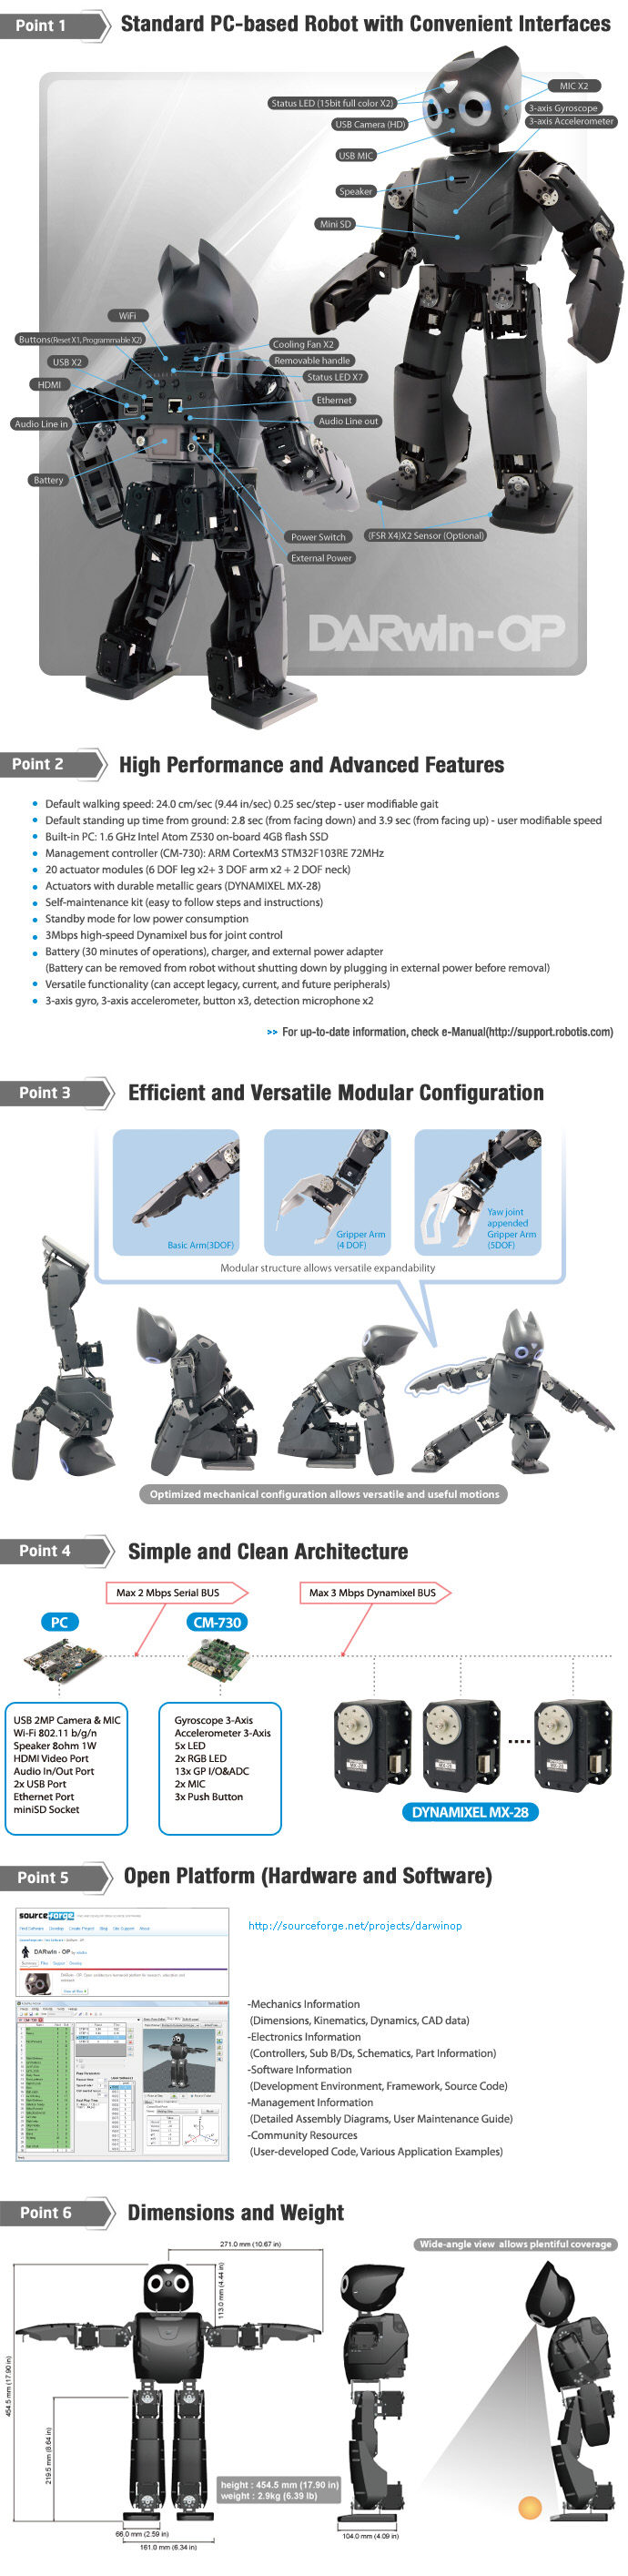
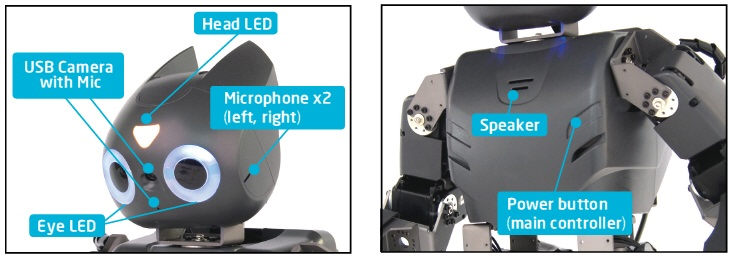
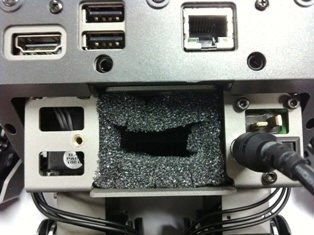
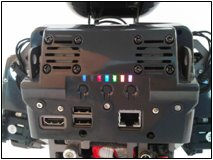
Layout

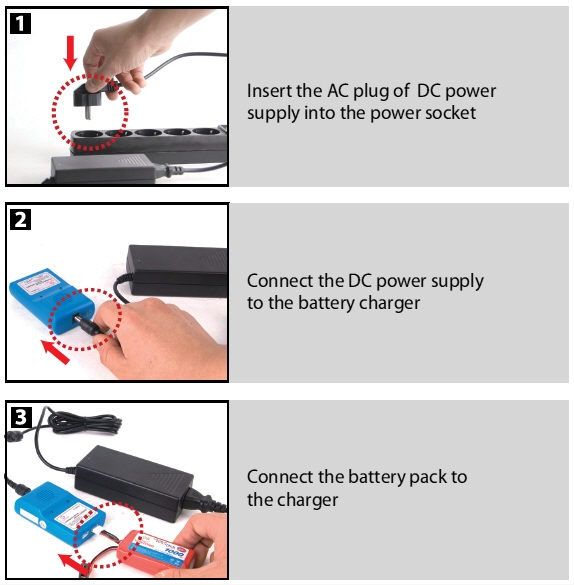
Charging Battery
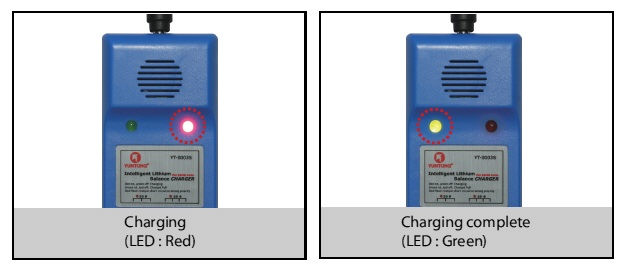
Charging Status
CAUTION : If the connection is unstable, please unplug the battery pack completely and plug the battery pack again.
CAUTION : Only use the supplied battery charger. Charging the battery pack with any other charger may cause damages.
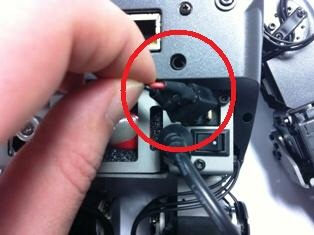
Battery Hot Swap
One distinguishing feature of DARWIN-OP is its ability to change the battery pack without the need of shutting down. To switch battery pack, while operating, perform the following:
-
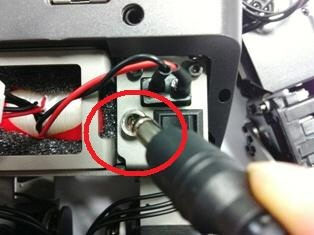
Connect the DC power to the DC jack.
-
Disconnect the battery cable from the battery jack.
-
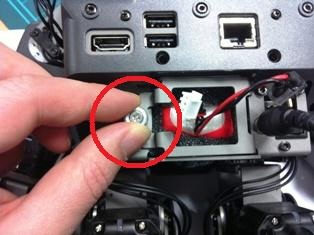
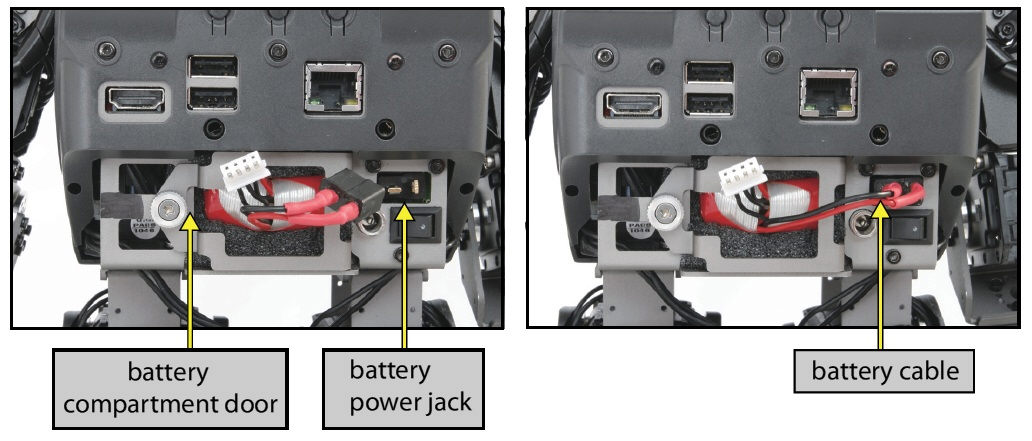
Unscrew the thumbscrew from the battery compartment door.

-
Remove the battery pack.
-
Insert a fully-charged battery pack; close and screw the thumbscrew.
-
Connect the battery cable to the battery jack(The connector is a standard deans jack with the same dimensions).

-
Remove DC power from the DC jack.

Operating
Preparation
The following procedure takes you through the set up process.
-
Set DARWIN-OP in the kneeling position as illustrated below
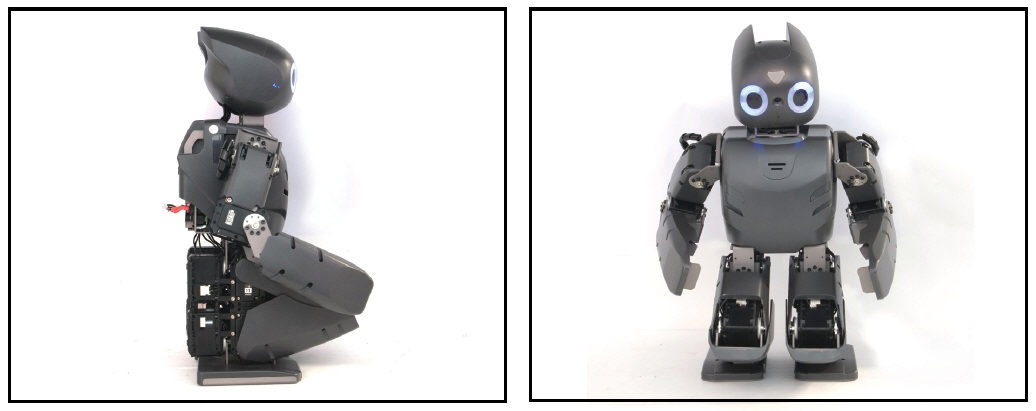
CAUTION : Setting DARWIN-OP in any position other than kneeling may cause physical damages.
-
If DC power (12V) supply is used to provide power to DARWIN-OP
Connect the AC plug of your power adapter into a power outlet and the DC connector into DARWIN-OP’s DC jack. The DC jack is located at the back and lower right side of DARWIN-OP.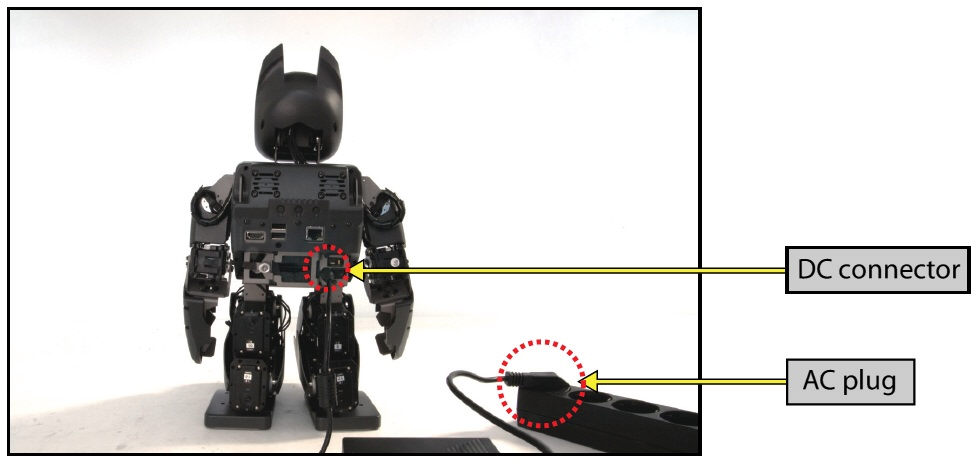
-
If Battery Pack (11.1V) is used instead of the DC power supply
You can select either DC power supply or battery pack to power on DARWIN-OP. If you want to use the battery pack please follow the steps below.
- Ensure the battery pack is fully charged.
- Open the battery back compartment door (unscrew the thumbscrew) and insert the battery pack. Close and secure the compartment (screw the thumbscrew) afterwards.
- Connect the battery pack cable to the battery power jack.
- Disconnect DC power supply.
NOTE : To prevent unexpected shut down ensure that DARWIN-OP is connected to at least 1 active power source.
-
Switching On
Turn rocker switch on located on the back lower right side of DARWIN-OP.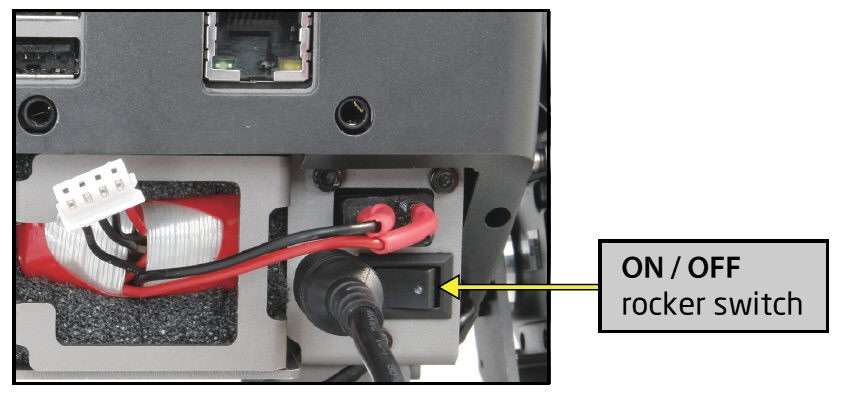
Once power is on the following will take place sequentially
| Status | Description |
|---|---|
 |
The eye LED is turned on Power is on |
 |
The head LED is turned on green The PC inside DARWIN-OP operating system is booting |
 |
The head LED is turned on amber Demo program is loaded and DARWIN-OP is ready to operate |
 |
Demo program is loaded and DARWIN-OP is ready to operate |
Demo Program
DARWIN-OP comes with preconfigured 4 modes of operations:
- Demonstration-ready mode
- Autonomous Soccer mode
- Interactive Motion mode
- Vision Processing mode
DARWIN-OP defaults to Demonstration-ready mode when turned on.
To switch between modes, press the MODE button. DARWIN-OP announces each mode with each pressing. Each mode has its own indicating LED.
To run each mode, press START button. After pressing START DARWIN-OP will stand up and begin operations.
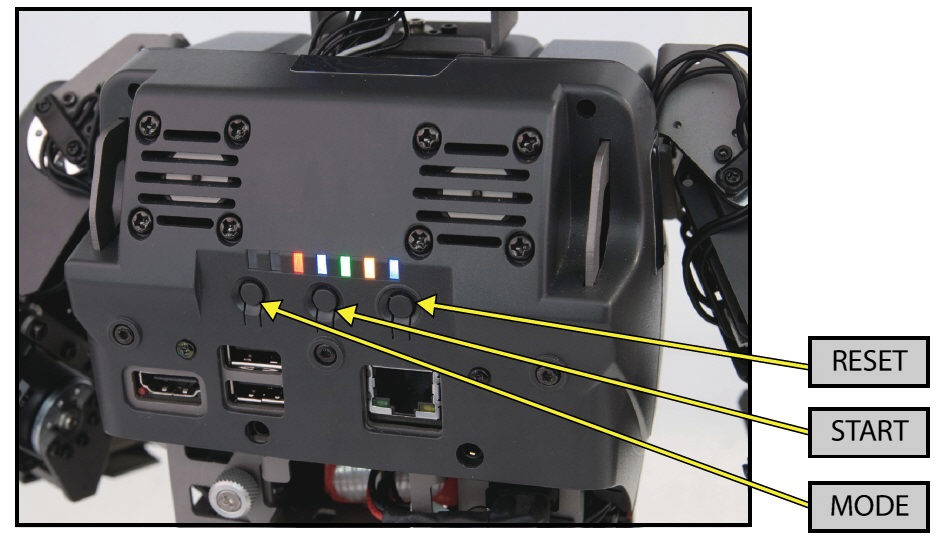
RESET Button
The RESET button resets the actuators, not the entire robot. Please keep in mind that the demo program is still running in the main controller.
CAUTION : The RESET button powers off all actuators. It is highly recommended that DARWIN-OP is set at kneeling position before pressing RESET or hold DARWIN-OP by its carrying handle. Pressing the RESET button while DARWIN-OP is moving may result in damages the the actuator(s) or/and robot itself.
Demonstration Ready Mode
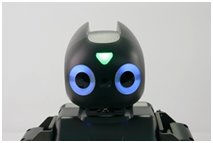
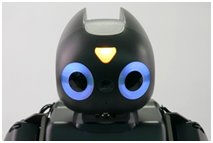
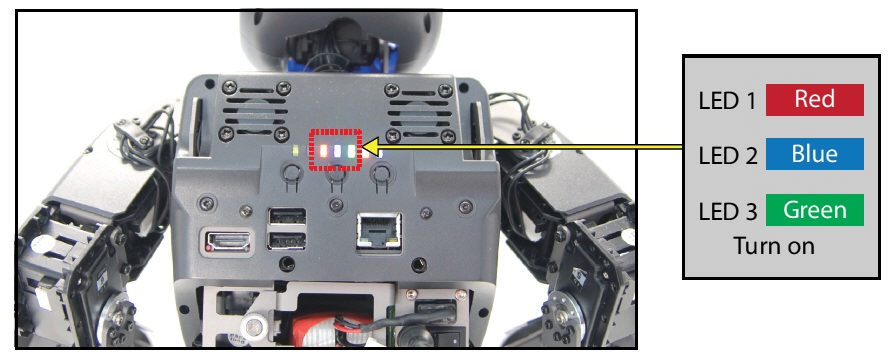
This is the default mode when you turn DARWIN-OP on. LED 1 (red), LED 2 (blue) and LED 3 (green) are on; the head LED changes from green to amber and DARWIN-OP announces “demonstration-ready mode.” DARWIN-OP is ready for action.
NOTE : DARWIN-OP remains in kneeling position and does not move under this mode. This is the best-suited mode to change power source.
If you wish to completely end the demo program without turning DARWIn-OP off please refer here.
Autonomous Soccer Mode
DARWIN-OP pursues and kicks a red ball (you can change the ball color), playing a soccer by itself. When DARWIN-OP falls down, either on its back or belly, it gets up resumes ball search and pursuit.
Start Autonomous Soccer Mode
-
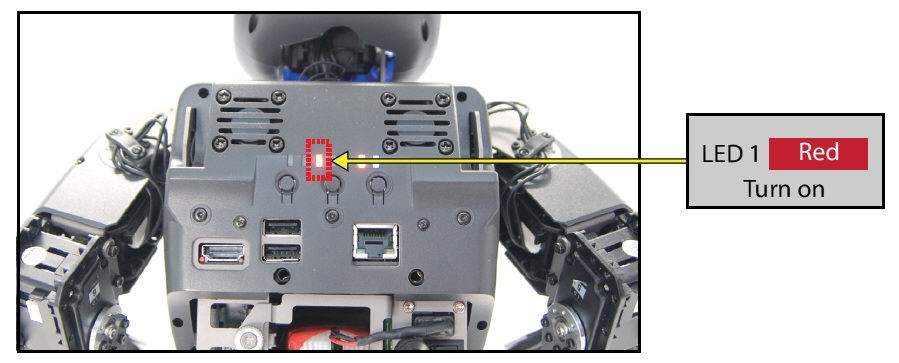
Press the “MODE” button until the LED 1 (red) is on. DARWIN-OP announces “Autonomous soccer mode.”
- Press the “START” button to begin. DARWIN-OP will stand up and announce “Start soccer demonstration.”
- Right after then DARWIN-OP announces either
- “sensor calibration complete” if you hear this message DARWIN-OP is ready to run under Soccer mode
- “sensor calibration failed” if you hear this message DARWIN-OP will remain standing until gyroscope sensors are properly calibrated followed by “sensor calibration complete” announcement. If sensor calibration cannot be completed then run demo program again.
- When DARWIN-OP sees the ball it walks towards the ball. Once the ball is close DARWIN-OP kicks the ball with either left or right foot. If DARWIN-OP falls during ball pursuit or kick it gets back up.
Stop Autonomous Soccer Mode
Press the “MODE” button DARWIN-OP returns to Demonstration-Ready Mode.
Interactive Motion Mode
DARWIN-OP performs pre-programmed motions sequentially while talking.
Start Interactive Motion Mode
-
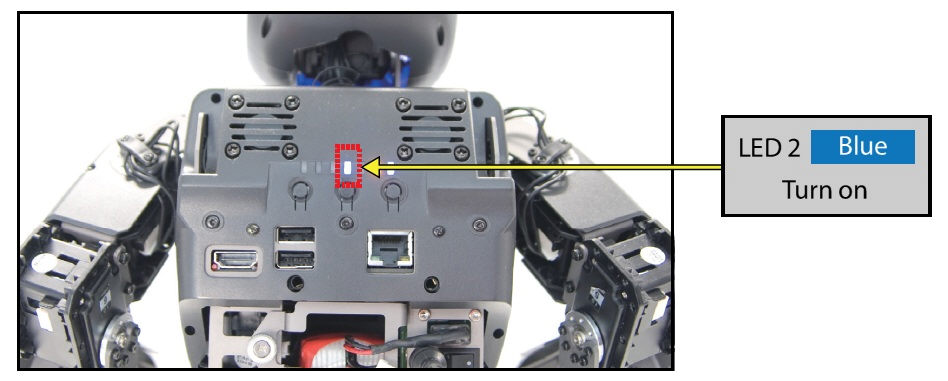
Press the “MODE” button until LED 2 (blue) is on. DARWIN-OP announces “Interactive motion mode.”
- Press the “START” button to begin. DARWIN-OP will stand up and announce “Start motion demonstration.”
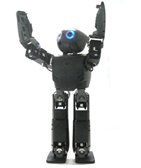
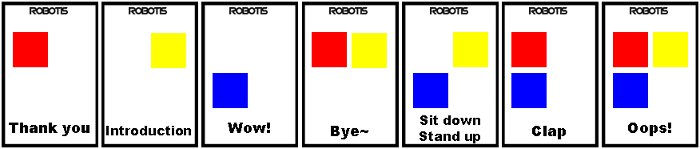
- DARWIN-OP performs the following actions sequentially
 |
 |
 |
 |
|---|---|---|---|
| 1. Thank you | 2. Introduction | 3. Wow | 4. Sit Down |
 |
 |
 |
 |
| 5. Stand Up | 6. Clap | 7. Oops | 8. Bye Bye |
Stop Interactive Motion Mode
Press the “MODE” button DARWIN-OP returns to Demonstration-Ready Mode.
Image Processing Mode
DARWIN-OP performs the same motions as Interactive motion mode, but individually, depending on the color(s) card. Use the supplied color cards.
Color Card Set
You may download the cards from here.
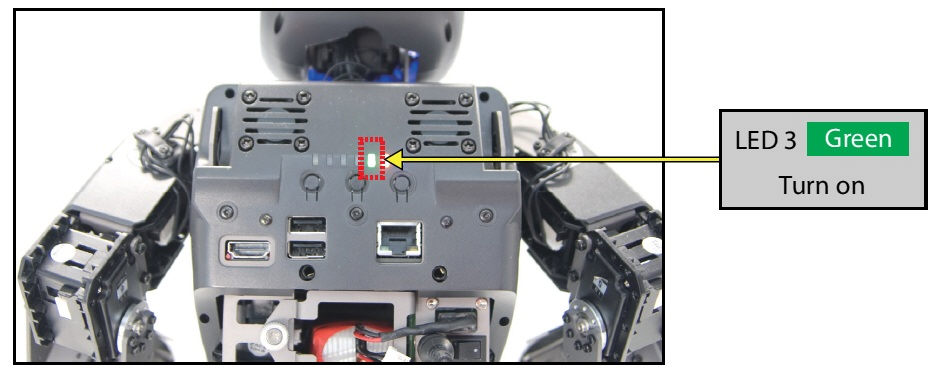
Start Vision Processing Mode
- Press the “MODE” button until the LED 3 (green) is on. DARWIN-OP announces “Vision processing mode.”
- Press the “START” button to begin. DARWIN-OP announces “Start vision processing demonstration” and gets up.
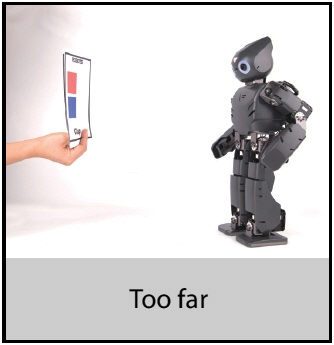
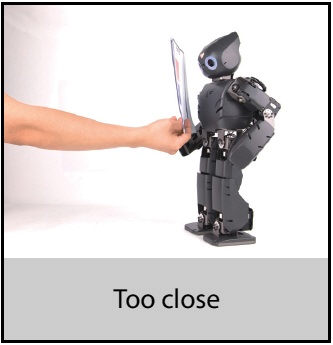
- Select a color(s) card and place it in front of DARWIN-OP. The card should be approximately 15cm (about 6in) in front of DARWIN-OP.

Stop Vision Processing Mode
Press the “MODE” button DARWIN-OP returns to Demonstration-Ready Mode.
If you experience difficulties with DARWIN-OP reading the card you may need to adjust color and white balance. For more information refer to Camera Calibration
Camera Calibration
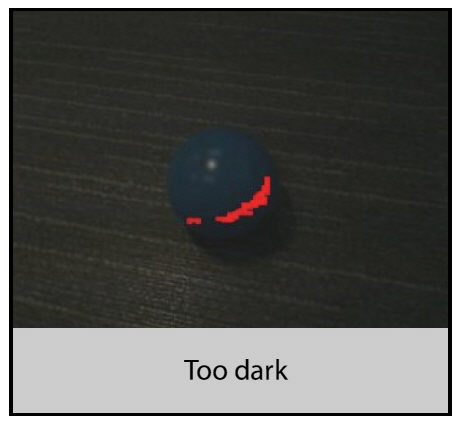
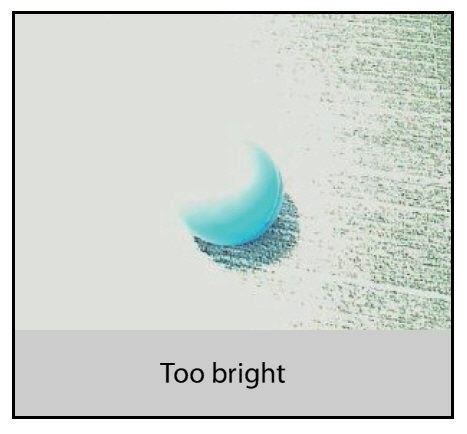
If it the lighting around DARWIN-OP is too bright or dark, it maybw difficult to operate DARWIN-OP.
You may change settings for color and white balance.
You may modify color settings to change ball color for Soccer Mode.
To be able to manipulate color settings you must:
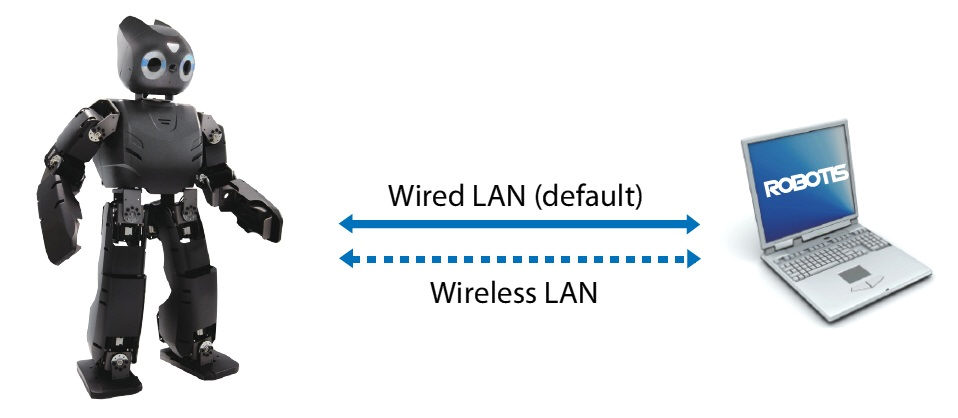
- Connect to DARWIN-OP via ether wired or wireless LAN.
- Check on the ‘Obtain an IP address automatically’ menu from Internet Protocol (TCP/IP) properties of ‘Local area connection properties’
- Have a web browser Firefox (recommenced) or Internet Explorer.
The following procedure to access color settings assumes a connection via wired LAN:
- Ensure you have a proper connection with DARWIN-OP.
- Open up your computer’s web browser.
NOTE : Please abstain from using Chrome web browser as it can cause memory leaks!
- On the address line type: http://192.168.123.1:8080
- Click on the increment/decrement buttons until you have desired settings. You can see the changes visually.

The following values are the default values.
| Ball | Red | Yellow | Blue | |
|---|---|---|---|---|
| Hue(0 ~ 360) | 356 | 0 | 60 | 225 |
| Tolerance(0 ~ 180) | 15 | 15 | 15 | 15 |
| Minimum Saturation(0 ~ 100) | 50 | 55 | 45 | 45 |
| Minimum Value(0 ~ 100) | 10 | 0 | 0 | 0 |
| Gain(0 ~ 255) | 255 | 255 | 255 | 255 |
| Exposure(0 ~ 10,000) | 1,000 | 1,000 | 1,000 | 1,000 |
HSV Color Space
The HSV(Hue, Saturation, Value) model, also known as HSB (Hue, Saturation, Brightness), define color space in terms of three constituent components:
Hue Scale
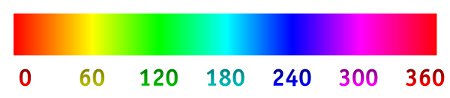
- Hue
- The color type (such as red, blue, or yellow)
- Ranges from 0-360 (but normalized to 0-100% in some applications)
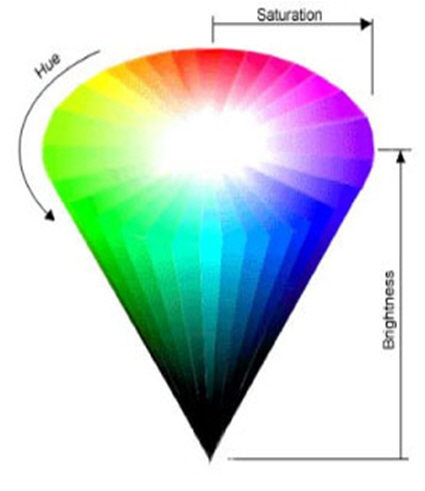
- Saturation (chroma)
- The “vibrancy” of the color
- Ranges from 0-100%
- This is sometimes called the “purity” by analogy to the colorimetric quantities excitation purity and colorimetric purity
- The lower the saturation of a color the more faded its appearance; thus useful to define desaturation as the qualitative inverse of saturation
- Value (intensity)
- The brightness of the color
- Ranges from 0-100%
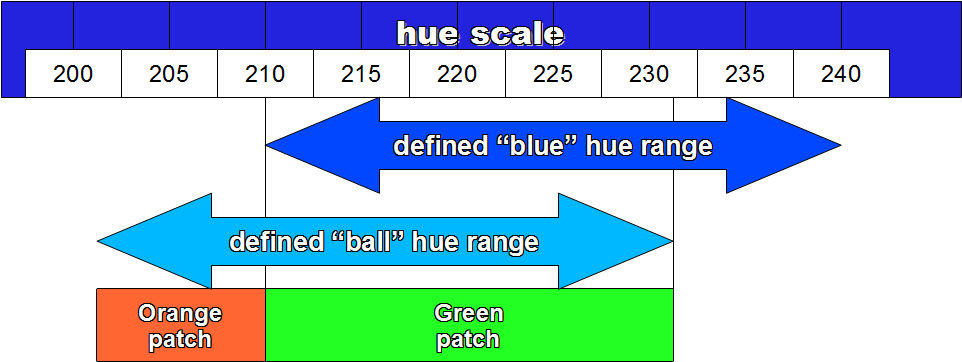
How do you know if color calibration for the ball has been properly adjusted for the desired color?
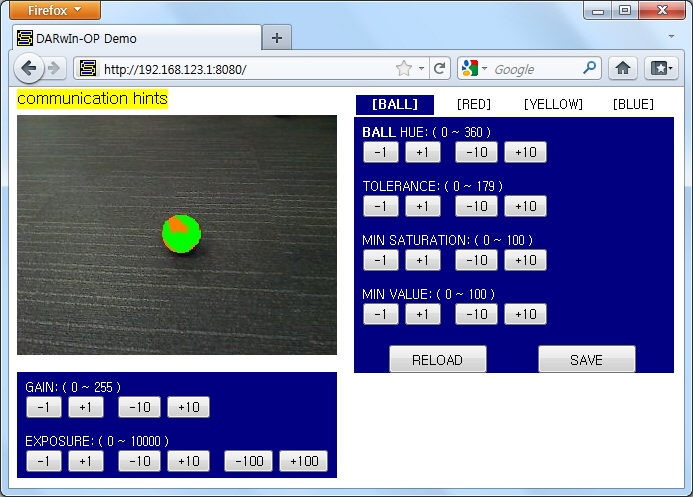
The illustration above depicts the ball covered in a patch of orange and green at the bottom right.
- Orange means that color calibration has been properly matched to the color of the ball desired. In this particular case the color of the ball is blue.
However, there is also a patch of green at the lower right portion of the ball.
- Green means that the hue tolerance range between the ball settings and one of the other colors settings (blue in this case) overlap.
Recall that the default hue for blue is 225 with a tolerance of 15. This gives blue a hue range from 210 to 240. In this example the hue value for the ball has been changed to 216 (for a blue ball) with tolerance at 15. This gives the ball hue range from 201 to 231.
Values between 210 and 231 overlap. This means that the hue value(s) at the lower right portion of the ball is between 210 and 231.
Shutdown
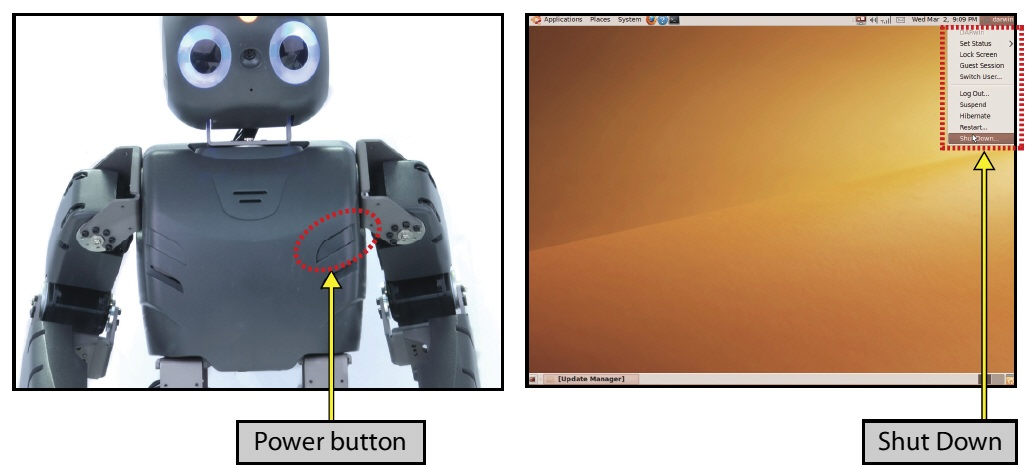
To shut down the computer inside DARWIN-OP perform one of the following: 1) Press the depression button (1st depression), located on the front left side of the chest, 3 times. 2) If you can connect a monitor and see the screen, click on “darwin” (located at the top right corner of the screen) and then click on “Shut Down.”
DARWIN-OP will announce ‘bye-bye” and begin shut-down procedure:
DARWIN-OP’s head LED will blink on and off (OS shutdown). Once the head LED stops blinking and remains off you may cut the power off. The eye LED’s remain on. Ignore the eye LED’s; turn power off.

NOTE : If you cut the power off while the head LED blink, then DARWIN-OP may have problems turning on the next time.