Introduction
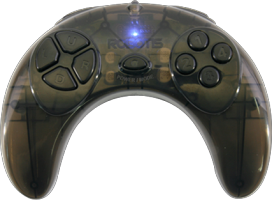
RC-100A/100B
CAUTION : RC-100A is DISCONTINUED.
This is a devices to communicate with the robot via IR, ZIGbee, or Bluetooth.
If nothing is mounted the default communications is via IR.
Mount the ZIG-100 to communicate via ZIGbee.
Mount the BT-100 to communicate via Bluetooth.
Caution
RC-100does NOT support Bluetooth(Only IR).RC-100Asupports BT-100/ZIG-100 modules and IR.RC-100Bsupports BT-100/BT-210/BT-410/ZIG-100 modules and IR.
NOTE :
- The RC-100 lights green and RC-100A lights blue when mounted with a ZIGbee or Bluetooth module.
- IR communication with AX-S1 is not supported.
- ZIG110 module is not supported.
- Do not connect multiple wireless modules.
Specifications
| Item | Description |
|---|---|
| Weight | 80g |
| Dimension | 138mm x 105mm x 36mm |
| Operation Voltage | 3.0V (DC) |
| Power Consumption | 0.07W |
| Battery | Alkaline(LR6) AA Battery x 2 |
| Button | 11 Buttons (Including POWER/MODE button) |
| Communication Mode | IR Communication(Basic) Zigbee Communication (When ZIG-100 is installed additionally) Bluetooth Communication (When BT-100 is installed additionally) |
How to Use
- Turning the power on
- POWER/MODE in the middle is the power button. Red LED flickers 2 times if the button is pressed.
- Turning the power off
- Pressing POWER/MODE button for more than 1 sec, red LED filckers 3 times (4 times when ZIG-100 is plugged), and then it is turned off.
- Automatic Powersave Mode
- If RC-100 is not used for more than 2 minutes, (if no buttons are pressed) the power is automatically turned off.
- Transmitting button-pressed status
- If the button of RC-100B is pressed, the packet related to the pressed button is transmitted to the receiving module which is synchronized by the connected transmitting module.
- Even at the moment of releasing all buttons, the packet which shows the buttons are not pressed is transmitted.
- Please refer to Remote Control Code Map on the packet.
- Check firmware version
- Firmware version 1.4 will blink blue LED 4 times when holding 5, 6 buttons while turning on the controller.
- Firmware version 1.4 will save the channel setting when power is off.
How to Connect
Installed IR Module of RC-100B
Wireless communication packet can be transmitted using IR-Receiver-installed CM-100A, CM-510 and CM-530.

RC-100A and Zig-100 Module
Wireless communication packet can be transmitted using ZIG-100 module-installed CM-5, CM2+.
Wireless communication packet can be transmitted using ZIG-110 module-installed CM-100A, CM-510, CM-530 and CM-700.
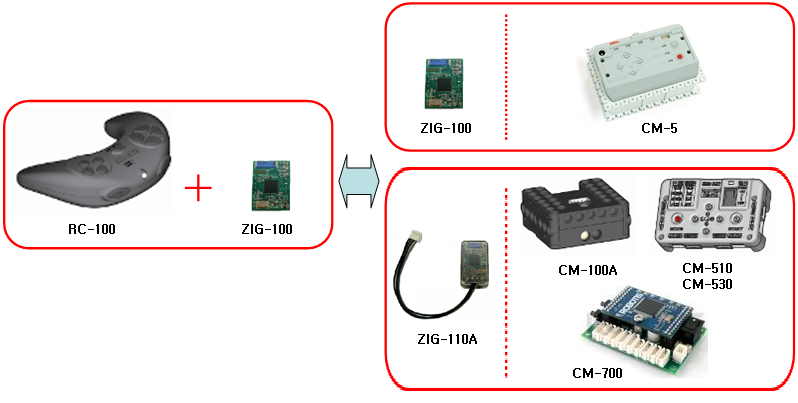
RC-100A/100B and Bluetooth Module
The BT-110A can be mounted onto CM-100A, CM-510, CM-530, and CM-700, and transmit data wirelessly.

Check Communication Mode
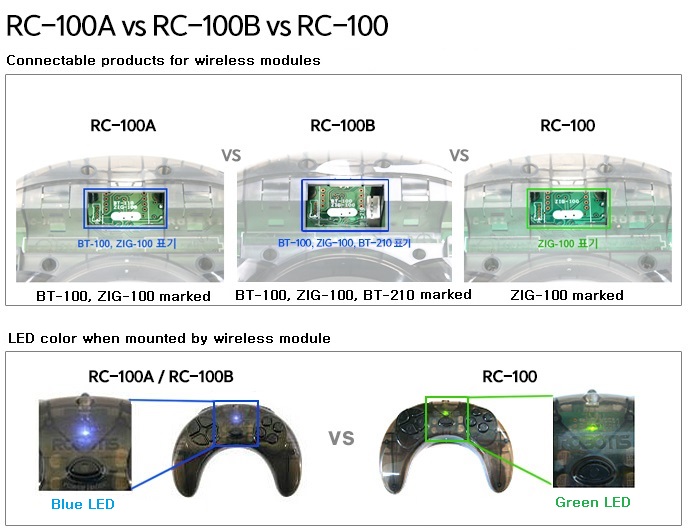
- LED color comparison(Using Built-in Infrared)
| RC-100A/100B | RC-100 |
|---|---|
| Red | Red |
| Blue | Green |
- Compatible Wireless Modules
| Modules | RC-100 | RC-100A | RC-100B |
|---|---|---|---|
| ZIG-100 Set | O | O | O |
| ZIG-110 Set | O | O | O |
| ZIG-110A Set | O | O | O |
| BT-110A Set | X | O | O |
| BT-100A + BT-210 Set | X | O | O |
| BT-210 Set | X | X | O |
| BT-410 Set | X | X | O |
How to Set IR Channel
Can set communication channel in between 1 ~ 8 for controlling by IR wireless communication. To connect the wireless communication, the channel setting of receiver should be the same with that of sender. Following is the method for IR wireless communication channel setting. (Please refer to RC-100 Channel Programming for setting controller channel)
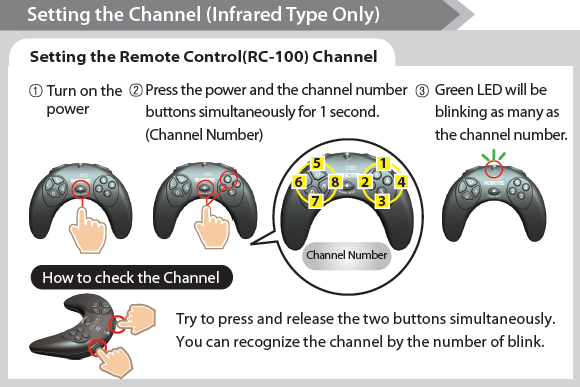
The controller with Firmware Version 1.4 saves channel setting when power is off.
Install ZIG-100/BT-100
-
Open the cover of the rc-100 and insert the zig-100 module properly. (You can insert both zig-100 and bt-100 into the RC-100A.)
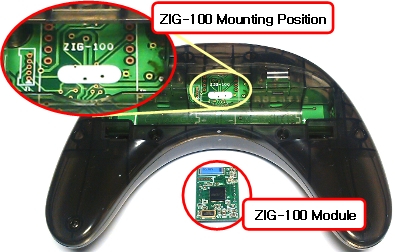
-
Insert the module as below so that the red-circled parts can contact each other.
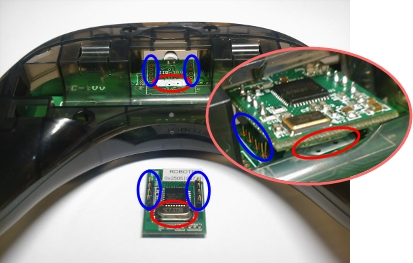
-
Press firmly to insert ZIG-100/BT-100 module using fingers or long stick etc.
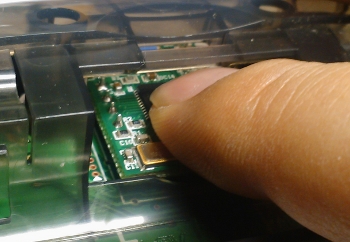
-
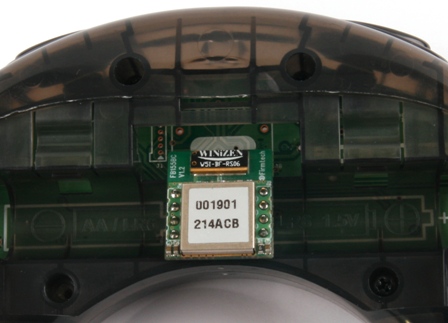
The following picture shows ZIG-100/BT-100 module is installed completely in RC-100A.
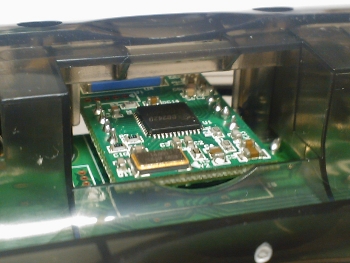
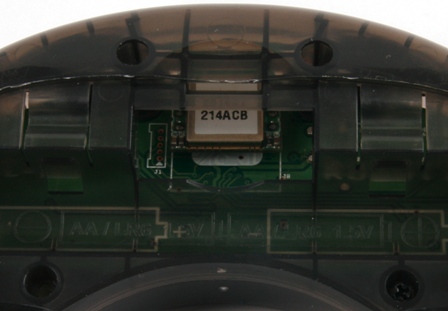
NOTE : During an impact the zig-100/bt-100 may be dismounted from the rc-100. In this case rc-100 defaults to IR communications.
How to Set Broadcasting Channel
It is possible to set 4 channels with buttons, if the ZIG-100 on RC-100Z was set at Broadcasting Mode (Multi: Multi communication mode).
Channels can be changed if you press the number buttons (1~4) together while MODE buttons are being pressed.
The red LED will blink as many as the channel no. , when the channel is changed.
CAUTION :
- At initial status, it is of no use to change the channel because it is automatically set at One: One communication mode, instead of Multi : Multi communication mode.
- The ZIG-100 communication can be discontinued for seconds when changing the channels.
- When you take away batteries, the channel will be reset at initial status automatically and you need to reset it.
Code Map
NOTE : Button 5 and 6 are not available under IR control mode.
When you press the buttons on RC-100, corresponding code value of each button will be sent out.
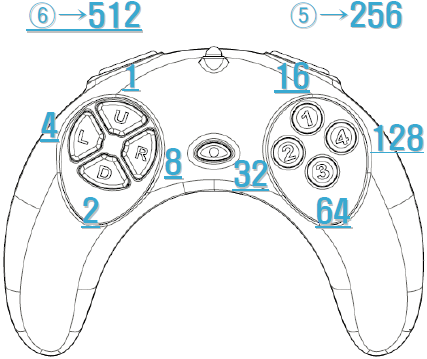
When more than 2 buttons are pressed, the sum of pressed code values will be sent.
ExampleButton U + Button 3 => Code value of Button U (1) + Code value of Button 3 (64) = Sending Value (65)ExampleButton 1 + Button 5 => Code value of Button 1 (16) + Code value of Button 5 (256) = Sending Value (272)
NOTE : There are 128 combination keys usable in IR Mode.There are 512 combinations keys usable in Zigbee Mode.
Communication Packet
The RC-100 uses the communication packet in the form below

~represents Inverse (1’s Complement)Example~0xAA -> 0x55, ~0xF0 -> 0x0FExampleDATA: 0x1234 ->Packet: 0xFF 0x55 0x34 0xCB 0x12 0xED
How to Insert Batteries
-
Open the lid on the backside.
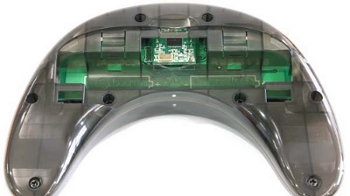
-
Insert 1 battery. (Please be careful with the terminal)
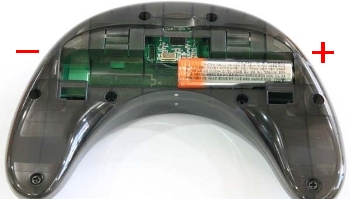
-
Insert the other battery.
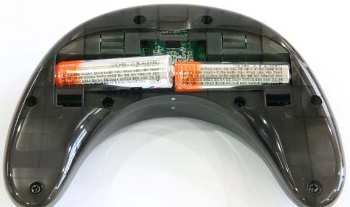
-
Press firmly to insert the batteries.
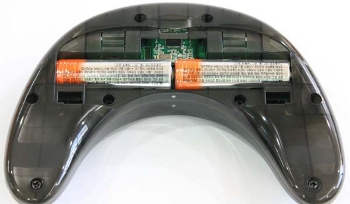
NOTE : If there are problems with the RC-100A’s Bluetooth or ZigBee and LED flashes try replacing the batteries with new ones.
Tutorials
-
RoboPlus Task
Control the robot via programs with RoboPlus Task -
Zigbee SDK
Control zigbee via Zigbee SDK (C language)


