Development
Getting Ready
Connect to OP
Direct Connection
You may connect to DARWIN-OP directly with conventional USB keyboard, USB mouse and HDMI-compatible display.
Via Wired Ethernet
From your computer go to your ethernet port settings and set the following:
- DHCP : auto
or
- DHCP : manual
- IP : 192.168.123.100 ( you can choose 192.168.123.2 ~ 192.168.123.255 )
- Subnet mask : 255.255.255.0
- Default gateway : 192.168.123.1
Then connect an ethernet cable from PC to DARWIN-OP.
Via Wireless Ethernet
You may also connect to DARWIN-OP via wireless LAN. You may need to be familiar with network settings to successfully connect to DARWIN-OP wirelessly. Connecting to DARWIN-OP wirelessly may be differentdepending on the access point/wireless router.
Example Procedure (first-time connection)
- Connect to DARWIN-OP either directly or via wired LAN
- If connected via wired LAN access DARWIN-OP with remote desktop (VNC)
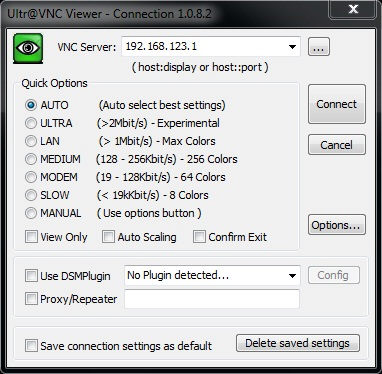
- Access DARWIN-OP’s Ubuntu’s desktop
- Access network connections (on the upper right part of the desktop) and select the wireless SSID
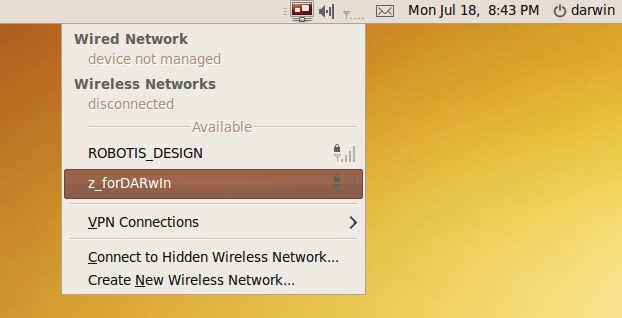
- Make sure you established connection

- Afterwards you will need to check for DHCP assigned IP address
- Open a terminal window and type ifconfig

- Check for inet addr under wlan0 (it is highly recommended that you write this number down).

- Use this number to connect to DARWIN-OP wirelessly. You may connect via any method using this number (VNC, PuTTY, SAMBA drive, ZOC, etc).
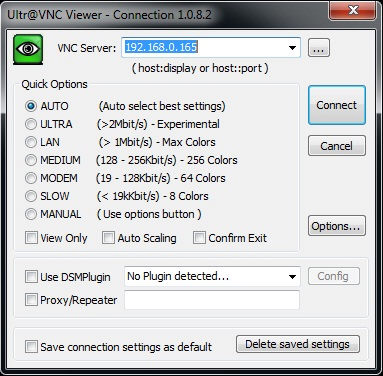
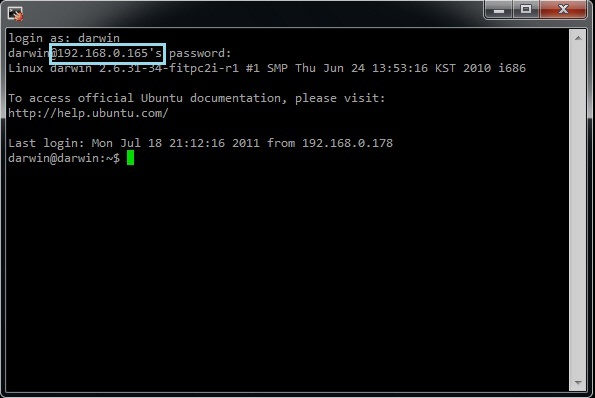
- You can save the wifi settings by properly shutting down DARWIN-OP. Shut-down information can be found here. The shut-down procedure is essential so that wifi connection settings are saved in the PC. The next time connecting to DARWIN-OP wirelessly you may skip steps 1 through 8.
Attention
- It is possible to establish wireless connection to DARWIN-OP automatically as long as the the wireless IP address remains unchanged. You may need to peridically check for any changes in your access point/wireless router’s DHCP. Please consult your access point/wireless router for further information.
- It is highly recommended that wifi signal strength remains above 50% for optimized throughput. A weak signal may adversely affect wifi performance (for example MJPEG streaming).
- Make sure that there are no other devices operating that cause harmful interference with the wifi signal (for example microwave ovens).
- If you have trouble connecting wirelessly you may need to check wifi settings by connecting to DARWIN-OP directly or via wired LAN, or checking the settings of your access point/wireless router.
Terminal Client (SSH)
You may use existing terminal client software (i.e. PuTTY, ZOC, etc) to connect to DARWIN-OP.
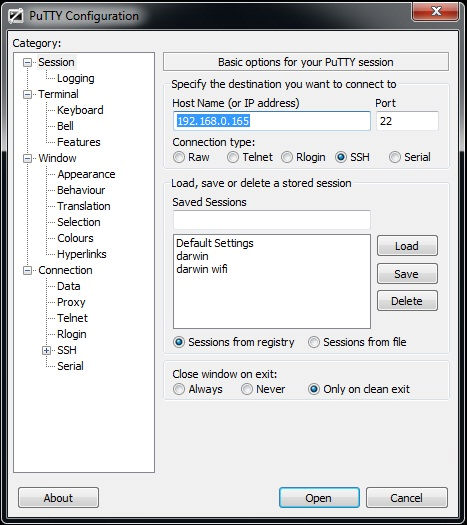
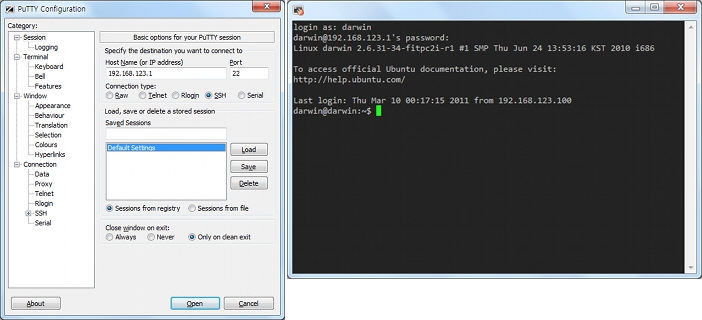
- Example with PuTTY
- Execute PuTTY
- On IP address input : 192.168.123.1
- Select SSH as the connection type
- For user name input : darwin
- For password input : 111111 (that is six 1’s)
ROBOTIS recommends that users connect via terminal client.
Remote Desktop (VNC)
You may connect via remote desktop if you prefer graphical interfaces.
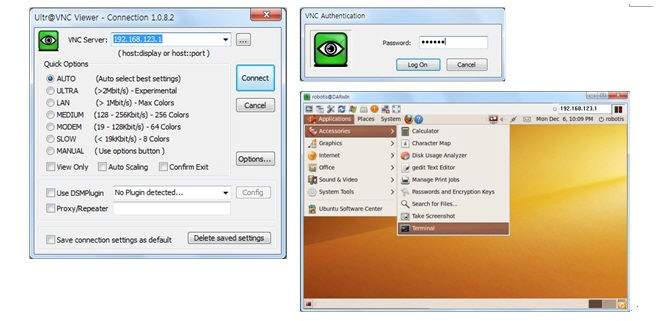
- Example with Ultra VNC Viewer
- Excute Ultra VNC Viewer
- On IP address input : 192.168.123.1
- For password input : 111111 (that is six 1’s)
Accessing DARWIN-OP via remote desktop may result inslower performance. This is a limitation from Intel’s platform.
Samba
Samba server is installed in DARWIN-OP. Samba is an implementation of the SMB/CIFS protocol for Unix systems, providing support for cross-platform file and printer sharing with Microsoft Windows, OS X, and other Unix systems.
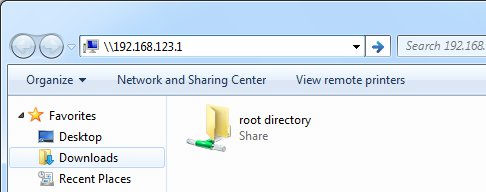
- Example with Microsoft Windows,
- Execute File explorer
- Type \192.168.123.1 on the address bar
- “root directory” is root directory( “/” ) of DARWIN-OP
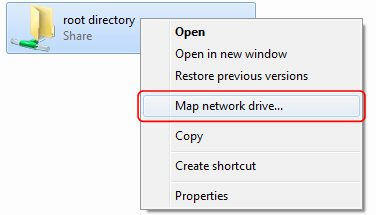
You can map network drive.
Source Code
You may find the source code directory at “/darwin” from DARWIN-OP’s PC.

The pre-installed source code may be updated without prior notice. Please check for updates periodically.
You may obtain updated source code at the following:
https://sourceforge.net/projects/darwinop/files/
You may also update the source code via Subversion with the command “svn up” from the directory /darwin in DARWIN-OP. This method assumes DARWIN-OP has internet access.

Terminate Demo Program
-
If you wish to run other programs, such as the tools, customization, continue running DARwIn-OP without the installed demo program; then you need to terminate the demo program.
-
The operating chapter mentions the “RESET” button and its function exclusively for the sub controller. However, the camera and executable program (the demo program) are not controlled by the sub controller; therefore, whenever you press the reset button the camera and program will remain unaffected and continue running.
Killing the demo program is necessary to free up PC resources taken by the camera and executable. To initiate a kill process following the procedure below:
- Open the terminal window (from DARwIn-OP or terminal client)
- Optain root user permission by typing ‘sudo su’ at the command line.
- Enter the password ‘111111’ (six ones) (assuming you’re under “darwin” username). Keep in mind that keystrokes are not shown on this step.
- Type ‘killall demo’.

Once the kill process is complete you may rerun the demo program or any other programs.
How to stop the demo program from running automatically every time DARwIn-OP is turned on.
The PC inside DARwIn-OP is set to run the demo program by default. However, users wishing to prevent this operation may do so by the following procedure:
- Go to the directory /etc
- With a text editor open the file rc.local (You shoud be root user.)
The file content looks like the image below.
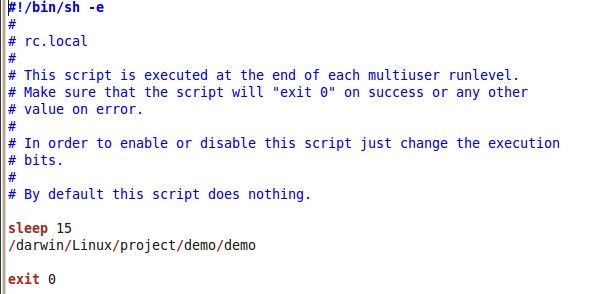
- Modify the file by adding # at the beggining of the /darwin/Linux/project/demo/demo
Afterwards the contents should look like the image below
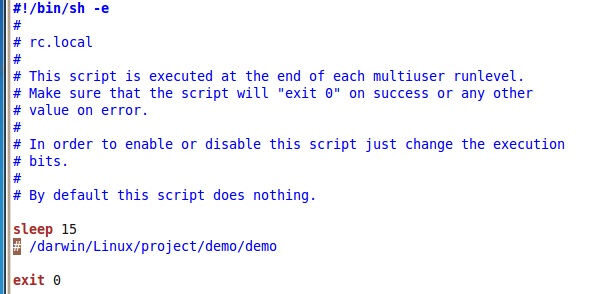
Adding the # sign means that the line has been commented out. After insertion of the # sign save the changes. On the next booting of DARwIn-OP the demo program will no longer run automatically.
Execute Demo Program
If you encounter an error with one or more actuators (LED blinking) during the demonstration program then you should immediately stop.
You may rerun the program without shutting down and restarting DARWIN-OP.
To rerun the demo program follow the procedure below:
- Press “RESET” on DARWIN-OP.
- Connect to DARWIN-OP either directly or via networking (recommended).
- Obtain root user privileges (sudo su procedure).
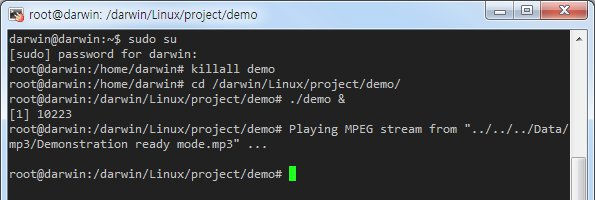
The illustration above depicts the re-execution of the demo program
NOTE :
- the execute command is ./demo & instead of the normal ./demo
- the line below reads: [1] 10223
What do point 1 and point 2 mean?
- Executing ./demo & instead of ./demo means that the demo program is background process; therefore allows you to close the current working terminal window and end any connections with DARWIN-OP while the program runs. The & sign makes it a background process.
[1]means only one process for “demo” is running and 10223 is the process number in Ubuntu. To end the demo program you may perform the killall procedure or just run kill 10223 (in this case).
Framework
CM730 References
PlatformCM730 Class
Interface classes for CM730 port control. Each platform gets its matching classes
Interfaces
virtual bool OpenPort( )
Opens CM730 port.
- Arguments : None
- Return : Returns “true” on success. On error, “false” is returned.
virtual void ClosePort( )
Closes CM730 port.
- Arguments : None
- Return : None
virtual void ClearPort( )
Discards data received but not read.
- Arguments : None
- Return : None
virtual int WritePort( unsigned char* packet, int numPacket )
Writes up to numPacket bytes from the buffer pointed packet to CM730 port.
- Arguments
| Name | Type | Description |
|---|---|---|
| packet | unsigned char* | write buffer pointer |
| numPacket | int | the number of bytes to write |
- Return : On success, the number of bytes written is returned. On error, -1 is returned.
virtual int ReadPort( unsigned char* packet, int numPacket )
Attempts to read up to numPacket bytes from CM730 port into the buffer starting at packet.
- Arguments
| Name | Type | Description |
|---|---|---|
| packet | unsigned char* | read buffer pointer |
| numPacket | int | the number of bytes to read |
- Return : On success, the number of bytes read is returned. On error, -1 is returned.
virtual void LowPriorityWait( )
Waits for low-priority Semaphore.
- Arguments : None
- Return : None
virtual void MidPriorityWait( )
Waits for middle-priority Semaphore.
- Arguments : None
- Return : None
virtual void HighPriorityWait( )
Waits for high-priority Semaphore.
- Arguments : None
- Return : None
virtual void LowPriorityRelease( )
Returns low-priority Semaphore.
- Arguments : None
- Return : None
virtual void MidPriorityRelease( )
Returns middle-priority Semaphore.
- Arguments : None
- Return : None
virtual void HighPriorityRelease( )
Returns high-priority Semaphore.
- Arguments : None
- Return : None
virtual void SetPacketTimeout( int lenPacket )
Sets packet reception timeout.
- Arguments
| Name | Type | Description |
|---|---|---|
| lenPacket | int | Waits for Packet bytes |
- Return : None
virtual bool IsPacketTimeout( )
Gets Packet timeout occurence.
- Arguments : None
- Return : Return “true” on timeout.
virtual double GetPacketTime( )
- Arguments : None
- Return : Return packet time.
virtual void SetUpdateTimeout( int msec )
Sets timeout refresh in control table.
- Arguments
| Name | Type | Description |
|---|---|---|
| msec | int | refresh time |
- Return : None
virtual bool IsUpdateTimeout( )
Gets refresh timeout occurence.
- Arguments : None
- Return : Retrun “true” on timeout updated.
virtual double GetUpdateTime( )
- Arguments : None
- Return : Return updated time.
virtual void Sleep( int msec )
makes the calling process sleep until msec milliseconds have elapsed.
- Arguments
| Name | Type | Description |
|---|---|---|
| msec | int | timeout setting value (milliseconds) |
- Return : None
CM730 Class
Communication with CM-730 board. Class platform porting is necessary for proper functionality.
Enermerations & Defines
Communication Result
Output message of during link between DYNAMIXEL and CM730.
| Name | Description |
|---|---|
| SUCCESS | Successful communicationa with DYNAMIXEL |
| TX_CORRUPT | Problems with Instruction Packet |
| TX_FAIL | Port error, failed to send Instruction Packet |
| RX_FAIL | Port error, failed to receive Status Packet |
| RX_TIMEOUT | Timeout Status, failed to receive Packet (please check connections) |
| RX_CORRUPT | Status Packet error (bad communications link) |
Error bit flag
Status Packet Error flag
| Name | Value | Bit | Description |
|---|---|---|---|
| INPUT_VOLTAGE | 1 (0x01) | 1 | Input Voltage range in over the limit. |
| ANGLE_LIMIT | 2 (0x02) | 2 | Set Angle limit problem(s). |
| OVERHEATING | 4 (0x04) | 3 | Internal overheating. |
| RANGE | 8 (0x08) | 4 | Set value(s) out of range. |
| CHECKSUM | 16 (0x10) | 5 | Instruction Packet Checksum error. |
| OVERLOAD | 32 (0x20) | 6 | Excessive load detected. |
| INSTRUCTION | 64 (0x40) | 7 | Invalis Instruction Packet Instruction. |
Special ID#
Special ID’s
| Name | Value | Description |
|---|---|---|
| ID_CM | 200 | ID for Sub Controller |
| ID_BROADCAST | 254 | Communication with all connected device |
Address#
Control Table Address
| Name | Address | Description |
|---|---|---|
| P_MODEL_NUMBER_L | 0 (0x0) | Lowest byte of model number |
| P_MODEL_NUMBER_H | 1 (0x1) | Highest byte of model number |
| P_VERSION | 2 (0x2) | Information on the version of firmware |
| P_ID | 3 (0x3) | ID of CM730 |
| P_BAUD_RATE | 4 (0x4) | Baud Rate of CM730 |
| P_RETURN_DELAY_TIME | 5 (0x5) | Retrun Delay Time |
| P_RETURN_LEVEL | 16 (0x10) | Status Return Level |
| P_DXL_POWER | 24 (0x18) | DYNAMIXEL Power |
| P_LED_PANNEL | 25 (0x19) | LED of back pannel |
| P_LED_HEAD_L | 26 (0x1A) | Low byte of Head LED |
| P_LED_HEAD_H | 27 (0x1B) | High byte of Head LED |
| P_LED_EYE_L | 28 (0x1C) | Low byte of Eye LED |
| P_LED_EYE_H | 29 (0x1D) | High byte of Eye LED |
| P_BUTTON | 30 (0x1E) | Button |
| P_GYRO_Z_L | 38 (0x26) | Low byte of Gyro Z-axis |
| P_GYRO_Z_H | 39 (0x27) | High byte of Gyro Z-axis |
| P_GYRO_Y_L | 40 (0x28) | Low byte of Gyro Y-axis |
| P_GYRO_Y_H | 41 (0x29) | High byte of Gyro Y-axis |
| P_GYRO_X_L | 42 (0x2A) | Low byte of Gyro X-axis |
| P_GYRO_X_H | 43 (0x2B) | High byte of Gyro X-axis |
| P_ACCEL_X_L | 44 (0x2C) | Low byte of Accelerometer X-axis |
| P_ACCEL_X_H | 45 (0x2D) | High byte of Accelerometer X-axis |
| P_ACCEL_Y_L | 46 (0x2E) | Low byte of Accelerometer Y-axis |
| P_ACCEL_Y_H | 47 (0x2F) | High byte of Accelerometer Y-axis |
| P_ACCEL_Z_L | 48 (0x30) | Low byte of Accelerometer Z-axis |
| P_ACCEL_Z_H | 49 (0x31) | High byte of Accelerometer Z-axis |
| P_VOLTAGE | 50 (0x32) | Present Voltage |
| P_LEFT_MIC_L | 51 (0x33) | Low byte of Left Mic. ADC value |
| P_LEFT_MIC_H | 52 (0x34) | High byte of Left Mic. ADC value |
| P_ADC2_L | 53 (0x35) | Low byte of ADC 2 |
| P_ADC2_H | 54 (0x36) | High byte of ADC 2 |
| P_ADC3_L | 55 (0x37) | Low byte of ADC 3 |
| P_ADC3_H | 56 (0x38) | High byte of ADC 3 |
| P_ADC4_L | 57 (0x39) | Low byte of ADC 4 |
| P_ADC4_H | 58 (0x3A) | High byte of ADC 4 |
| P_ADC5_L | 59 (0x3B) | Low byte of ADC 5 |
| P_ADC5_H | 60 (0x3C) | High byte of ADC 5 |
| P_ADC6_L | 61 (0x3D) | Low byte of ADC 6 |
| P_ADC6_H | 62 (0x3E) | High byte of ADC 6 |
| P_ADC7_L | 63 (0x3F) | Low byte of ADC 7 |
| P_ADC7_H | 64 (0x40) | High byte of ADC 7 |
| P_ADC8_L | 65 (0x41) | Low byte of ADC 8 |
| P_ADC8_H | 66 (0x42) | High byte of ADC 8 |
| P_RIGHT_MIC_L | 67 (0x43) | Low byte of Right Mic. ADC value |
| P_RIGHT_MIC_H | 68 (0x44) | High byte of Right Mic. ADC value |
| P_ADC10_L | 69 (0x45) | Low byte of ADC 10 |
| P_ADC10_H | 70 (0x46) | High byte of ADC 10 |
| P_ADC11_L | 71 (0x47) | Low byte of ADC 11 |
| P_ADC11_H | 72 (0x48) | High byte of ADC 11 |
| P_ADC12_L | 73 (0x49) | Low byte of ADC 12 |
| P_ADC12_H | 74 (0x50) | High byte of ADC 12 |
| P_ADC13_L | 75 (0x51) | Low byte of ADC 13 |
| P_ADC13_H | 76 (0x52) | High byte of ADC 13 |
| P_ADC14_L | 77 (0x53) | Low byte of ADC 14 |
| P_ADC14_H | 78 (0x54) | High byte of ADC 14 |
| P_ADC15_L | 79 (0x55) | Low byte of ADC 15 |
| P_ADC15_H | 80 (0x56) | High byte of ADC 15 |
Constructions#
CM730(PlatformCM730 *platform )
- Arguments
| Name | Type | Description |
|---|---|---|
| platform | PlatformCM730 | - |
Methods#
bool Connect( )
Links CM-730.
- Arguments : None
- Return : true (sucess), false (failure)
void Disconnect( )
Releases CM-730.
- Arguments : None
- Return : None
int Ping( int id, int *error )
Check the existance of DYNAMIXEL with selected id.
- Arguments
| Name | Type | Description |
|---|---|---|
| id | int | DYNAMIXEL ID for checking |
| error | int* | Status packet error |
- Return : Communication Result
int ReadByte( int address, int *pValue, int *error )
Reads unit byte from CM-730 Control Table value
- Arguments
| Name | Type | Description |
|---|---|---|
| address | int | Control Table address |
| pValue | int* | saves read values |
| error | int* | Status packet error |
- Return : Communication Result
int ReadByte( int id, int address, int *pValue, int *error )
Reads unit byte from CM-730 Control Table value
- Arguments
| Name | Type | Description |
|---|---|---|
| id | int | DYNAMIXEL ID |
| address | int | Control Table address |
| pValue | int* | saves read values |
| error | int* | Status packet error |
- Return : Communication Result
int ReadWord( int address, int *pValue, int *error )
Reads 2 bytes from CM-730 Control Table value
- Arguments
| Name | Type | Description |
|---|---|---|
| address | int | Control Table address |
| pValue | int* | saves read values |
| error | int* | Status packet error |
- Return : Communication Result
int ReadWord( int id, int address, int *pValue, int *error )
Reads 2 bytes from CM-730 Control Table value
- Arguments
| Name | Type | Description |
|---|---|---|
| id | int | DYNAMIXEL ID |
| address | int | Control Table address |
| pValue | int* | saves read values |
| error | int* | Status packet error |
- Return : Communication Result
int ReadTable( int start_addr, int end_addr, unsigned char *table, int *error )
Reads 2 bytes from CM-730 Control Table value
- Arguments
| Name | Type | Description |
|---|---|---|
| start_addr | int | Control table start address |
| end_addr | int | Control table end address |
| table | unsigned char* | Read data buffer |
| error | int* | Status packet error |
- Return : Communication Result
int ReadTable( int id, int start_addr, int end_addr, unsigned char *table, int *error )
Reads CM-730 Control Table value from start_addr to end_addr
- Arguments
| Name | Type | Description |
|---|---|---|
| id | int | DYNAMIXEL ID |
| start_addr | int | Control table start address |
| end_addr | int | Control table end address |
| table | unsigned char* | Read data buffer |
| error | int* | Status packet error |
- Return : Communication Result
int WriteByte( int address, int value, int *error )
Writes unit byte to CM-730 Control Table
- Arguments
| Name | Type | Description |
|---|---|---|
| address | int | Control Table address |
| value | int | write value |
| error | int* | Status packet error |
- Return : Communication Result
int WriteByte( int id, int address, int *pValue, int *error )
Writes unit byte to CM-730 Control Table
- Arguments
| Name | Type | Description |
|---|---|---|
| id | int | DYNAMIXEL ID |
| address | int | Control Table address |
| value | int | write value |
| error | int* | Status packet error |
- Return : Communication Result
int WriteWord( int address, int value, int *error )
Writes 2 bytes to CM-730 Control Table
- Arguments
| Name | Type | Description |
|---|---|---|
| address | int | Control Table address |
| value | int | write value |
| error | int* | Status packet error |
- Return : Communication Result
int WriteWord( int id, int address, int value, int *error )
Writes 2 bytes to CM-730 Control Table
- Arguments
| Name | Type | Description |
|---|---|---|
| id | int | DYNAMIXEL ID |
| address | int | Control Table address |
| value | int | write value |
| error | int* | Status packet error |
- Return : Communication Result
int SyncWrite( int start_addr, int each_length, int number, int *pParam )
- Arguments
| Name | Type | Description |
|---|---|---|
| start_addr | int | - |
| each_length | int | - |
| number | int | - |
| pParam | int* | - |
- Return : Communication Result
int MakeWord( int lowbyte, int highbyte )
- Arguments
| Name | Type | Description |
|---|---|---|
| lowbyte | int | - |
| highbyte | int | - |
- Return : 2 bytes integer value
int GetLowByte( int word )
- Arguments
| Name | Type | Description |
|---|---|---|
| word | int | - |
- Return : low byte
int GetHighByte( int word )
- Arguments
| Name | Type | Description |
|---|---|---|
| word | int | - |
- Return : high byte
int MakeColor( int red, int green, int blue )
- Arguments
| Name | Type | Description |
|---|---|---|
| red | int | - |
| green | int | - |
| blue | int | - |
- Return : color value
Math References
Matrix3D Class
Enumerations & Defines
m00, m01 … m32, m33
Matrix3D hold data maps into a 4x4 matrix array. This array allows usage of enum to access each element.
m[m00], m[m01], m[m02], m[m03],
m[m10], m[m11], m[m12], m[m13],
m[m20], m[m21], m[m22], m[m23],
m[m30], m[m31], m[m32], m[m33]
The matrix is represented as follows.
m[0], m[1], m[2], m[3],
m[4], m[5], m[6], m[7],
m[8], m[9], m[10], m[11],
m[12], m[13], m[14], m[15]
MAXNUM_ELEMENT
The maximum number of an array
Constructions
Matrix3D( )
- Arguments : None
Matrix3D( const Matrix3D &mat )
- Arguments
| Name | Type | Description |
|---|---|---|
| mat | const Matrix3D& | copy Matrix3D |
Data Members
public double m[MAXNUM_ELEMENT]
matrix element arrays are defined by MAXNUM_ELEMENT.
Methods
void Identity( )
Matrix initialization.
- Arguments : None
- Return : None
bool Inverse( )
Computes inverses.
- Arguments : None
- Return : true (success), false (failure)
void Scale( Vector3D &scale )
Convertion and scaling
- Arguments
| Name | Type | Description |
|---|---|---|
| scale | Vector3D& | x, y, z coordinates scaling factor |
- Return : None
void Rotate( double angle, Vector3D &axis )
Rotation conversion.
- Arguments
| Name | Type | Description |
|---|---|---|
| angle | double | rotating angle (in degree units) |
| axis | Vector3D& | rotating axis |
- Return : None
void Translate( Vector3D &offset )
Motion conversion.
- Arguments
| Name | Type | Description |
|---|---|---|
| angle | double | rotating angle (in degree units) |
| axis | Vector3D& | rotating axis |
- Return : None
Point3D Transform( Point3D &point )
Point conversion.
- Arguments
| Name | Type | Description |
|---|---|---|
| point | Point3D& | point conversion |
- Return : Conversion results
void SetTransform( Point3D &point, Vector3D &angle )
Clears conversion information of position and angle information (defaults to existing conversion).
- Arguments
| Name | Type | Description |
|---|---|---|
| point | Point3D& | Origin coordinates (x, y, z) |
| angle | Vector3D& | Rotating axis (x, y, z) |
- Return : None
Operators
Matrix3D& operator = (const Matrix3D &mat)
- Copies the value of the current matrix
Matrix3D& operator *= (const Matrix3D &mat)
- Copies the value of the current matrix
Matrix3D& operator * (const Matrix3D &mat)
- Returns current matrix operation results
Includes
- #include “Point.h”
- #include “Vector.h”
Plane3D Class
Plane3D point class for 3D operations
Constructions
Plane3D( )
- Arguments : None
Point2D Class
Point2D point class for 2D operations
Constructions
Point2D( )
- Arguments : None
Point2D( double x, double y )
- Arguments
| Name | Type | Description |
|---|---|---|
| x | double | x-coordinate |
| y | double | y-coordinate |
Point2D( const Point2D &point )
- Arguments
| Name | Type | Description |
|---|---|---|
| point | const Point2D& | copies Point |
Data Members
public double X
- X-coordinate value
public double Y
- Y-coordinate value
Methods
static public double Distance( Point2D &pt1, Point2D &pt2 )
Returns the distance between 2 points
- Arguments
| Name | Type | Description |
|---|---|---|
| pt1 | Point2D& | Point1 distance |
| pt2 | Point2D& | Point2 distance |
- Return : Distance between 2 points
Operators
public Point2D& operator = ( const Point2D &point )
public Point2D& operator += ( const Point2D &point )
public Point2D& operator -= ( const Point2D &point )
public Point2D& operator += ( const double value )
public Point2D& operator -= ( const double value )
public Point2D& operator *= ( const double value )
public Point2D& operator /= ( const double value )
public Point2D operator + ( const Point3D &point )
public Point2D operator - ( const Point2D &point )
public Point2D operator + ( const double value )
public Point2D operator - ( const double value )
public Point2D operator * ( const double value )
public Point2D operator / ( const double value )
Point3D Class#
Point3D point class for 3D operations
Constructions
Point3D( )
- Arguments : None
Point3D( double x, double y, double z )
- Arguments
| Name | Type | Description |
|---|---|---|
| x | double | x-coordinate |
| y | double | y-coordinate |
| z | double | z-coordinate |
Point3D( const Point3D &point )
- Arguments
| Name | Type | Description |
|---|---|---|
| point | const Point3D& | copies Point |
Data Members
public double X
- X-coordinate value
public double Y
- Y-coordinate value
public double Z
- Z-coordinate value
Methods
static public double Distance( Point3D &pt1, Point3D &pt2 )
Returns the distance between 2 points.
- Arguments
| Name | Type | Description |
|---|---|---|
| pt1 | Point3D& | Point1 distance |
| pt2 | Point3D& | Point2 distance |
- Return : distance between 2 points
Operators
public Point3D& operator = ( const Point3D &point )
public Point3D& operator += ( const Point3D &point )
public Point3D& operator -= ( const Point3D &point )
public Point3D& operator += ( const double value )
public Point3D& operator -= ( const double value )
public Point3D& operator *= ( const double value )
public Point3D& operator /= ( const double value )
public Point3D operator + ( const Point3D &point )
public Point3D operator - ( const Point3D &point )
public Point3D operator + ( const double value )
public Point3D operator - ( const double value )
public Point3D operator * ( const double value )
public Point3D operator / ( const double value )
Vector3D Class
Vector class point for 3D operations
Constructions
Vector3D( )
- Arguments : None
Vector3D( double x, double y, double z )
- Arguments
| Name | Type | Description |
|---|---|---|
| x | double | x-coordinate |
| y | double | y-coordinate |
| z | double | z-coordinate |
Vector3D( const Point3D &pt1, const Point3D &pt2 )
- Arguments
| Name | Type | Description |
|---|---|---|
| pt1 | const Point3D& | Vector initial position |
| pt2 | const Point3D& | Vector final position |
Vector3D( const Vector3D &vector )
- Arguments
| Name | Type | Description |
|---|---|---|
| vector | const Vector3D& | copies Vector |
Data Members
public double X
- X-coordinate value
public double Y
- Y-coordinate value
public double Z
- Z-coordinate value
Methods
public double Length( )
Calculates vector length
- Arguments : None
- Return : Vector length
public void Normalize( )
Normalizes the vector
- Arguments : None
- Return : None
public double Dot( Vector3D &vector )
Performs vector dot products
- Arguments
| Name | Type | Description |
|---|---|---|
| vector | Vector3D& | Vector dot product |
- Return : Returns dot products
public Vector3D Cross( const Vector3D &vector )
Performs vector cross products
- Arguments
| Name | Type | Description |
|---|---|---|
| vector | const Vector3D& | vector cross product |
- Return : Returns cross products
public double AngleBetween( Vector3D &vector )
Computes the angle between vectors
- Arguments
| Name | Type | Description |
|---|---|---|
| vector | Vector3D& | Angles between vectors |
- Return : Value (0 ~ 180) in degrees.
public double AngleBetween( Vector3D &vector, Vector3D &axis )
Returns the angle between vectors axes
- Arguments
| Name | Type | Description |
|---|---|---|
| vector | Vector3D& | Angle between Vector |
| axis | Vector3D& | Angle between coordinates axes |
- Return : Value (-180 ~ 180) in degrees
Operators
public Vector3D& operator = ( const Vector3D &vector )
- Copies the current vector value
public Vector3D& operator += ( const Vector3D &vector )
- Sum of the results of 2 operations of current vector
public Vector3D& operator -= ( const Vector3D &vector )
- Subtraction of the results of 2 operations of current vector
public Vector3D& operator += ( const double value )
public Vector3D& operator -= ( const double value )
public Vector3D& operator *= ( const double value )
public Vector3D& operator /= ( const double value )
public Vector3D operator + ( const Vector3D &vector )
- Vector sum operation
public Vector3D operator - ( const Vector3D &vector )
- Vector subtraction operation
public Vector3D operator + ( const double value )
public Vector3D operator - ( const double value )
public Vector3D operator * ( const double value )
public Vector3D operator / ( const double value )
Includes
- #include “Point.h”
minINI Reference
MININI is a minimal INI file parser
minIni is a programmer’s library to read and write “INI” files in embedded systems.
The minIni library is distributed unter the Apache License, version 2.0, plus an aceptance clause to explicitly permit static linking of the library for commercial applications.
Get more informations : http://www.compuphase.com/minini.htm
Motion References
JointData Class
Motion Class shares data between classes
Enermerations & Defines
Joint ID
- Joint ID is the same as DYNAMIXEL ID
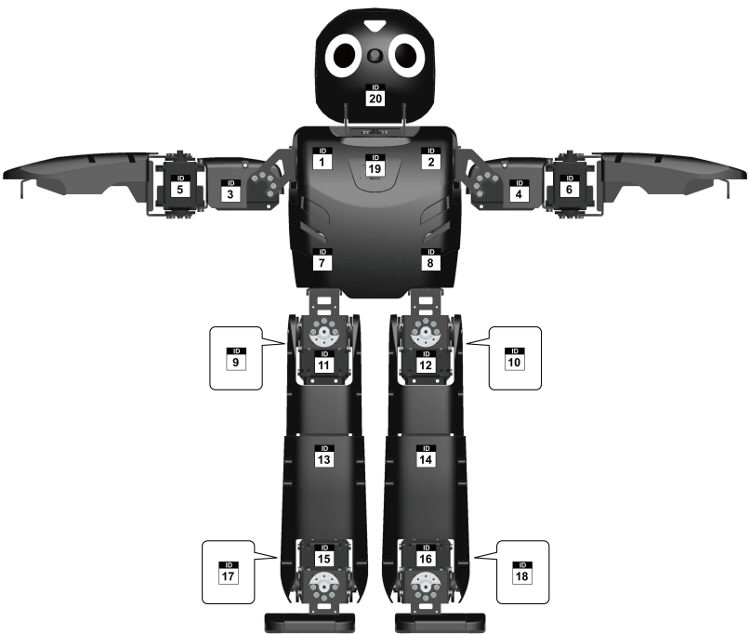
Compliance Slope
enum value can be used with Compliance Slope
| Name | Value |
|---|---|
| SLOPE_HARD | 16 |
| SLOPE_DEFAULT | 32 |
| SLOPE_SOFT | 64 |
| SLOPE_EXTRASOFT | 128 |
Constructions
JointData( )
- Arguments : None
Methods
void SetEnable( int id, bool enable )
Sets ID’s in Joint Enable.
- Arguments
| Name | Type | Description |
|---|---|---|
| id | int | Joint ID |
| enable | bool | use availability |
- Return : None
void SetEnableHeadOnly( bool enable )
Sets ID’s (the sample line below only enables the ID’s for the head and neck).
Head ID = { ID_HEAD_PAN, ID_HEAD_TILT }
- Arguments
| Name | Type | Description |
|---|---|---|
| enable | bool | use availability |
- Return : None
void SetEnableRightArmOnly( bool enable )
Sets the ID (the sample line below only enables the ID’s for the right arm).
Right Arm ID = { ID_R_SHOULDER_PITCH, ID_R_SHOULDER_ROLL, ID_R_ELBOW }
- Arguments
| Name | Type | Description |
|---|---|---|
| enable | bool | use availability |
- Return : None
void SetEnableLeftArmOnly( bool enable )
Sets the ID (the sample line below only enables the ID’s for the left arm).
Left Arm ID = { ID_L_SHOULDER_PITCH, ID_L_SHOULDER_ROLL, ID_L_ELBOW }
- Arguments
| Name | Type | Description |
|---|---|---|
| enable | bool | use availability |
- Return : None
void SetEnableRightLegOnly( bool enable )
Sets the ID (the sample line below only enables the ID’s for the right leg).
Right Leg ID = { ID_R_HIP_YAW, ID_R_HIP_ROLL, ID_R_HIP_PITCH, ID_R_KNEE, ID_R_ANKLE_PITCH, ID_R_ANKLE_ROLL }
- Arguments
| Name | Type | Description |
|---|---|---|
| enable | bool | use availability |
- Return : None
void SetEnableLeftLegOnly( bool enable )
Sets the ID (the sample line below only enables the ID’s for the left leg).
Left Leg ID = { ID_L_HIP_YAW, ID_L_HIP_ROLL, ID_L_HIP_PITCH, ID_L_KNEE, ID_L_ANKLE_PITCH, ID_L_ANKLE_ROLL }
- Arguments
| Name | Type | Description |
|---|---|---|
| enable | bool | use availability |
- Return : None
void SetEnableUpperBodyWithoutHead( bool enable )
Sets the ID (the sample lines below only enables the ID’s for the upper body without the head).
Right Arm ID = { ID_R_SHOULDER_PITCH, ID_R_SHOULDER_ROLL, ID_R_ELBOW }
Left Arm ID = { ID_L_SHOULDER_PITCH, ID_L_SHOULDER_ROLL, ID_L_ELBOW }
- Arguments
| Name | Type | Description |
|---|---|---|
| enable | bool | use availability |
- Return : None
void SetEnableLowerBody( bool enable )
Sets the ID (the sample lines below only enables the ID’s for the lower body).
Right Leg ID = { ID_R_HIP_YAW, ID_R_HIP_ROLL, ID_R_HIP_PITCH, ID_R_KNEE, ID_R_ANKLE_PITCH, ID_R_ANKLE_ROLL }
Left Leg ID = { ID_L_HIP_YAW, ID_L_HIP_ROLL, ID_L_HIP_PITCH, ID_L_KNEE, ID_L_ANKLE_PITCH, ID_L_ANKLE_ROLL }
- Arguments
| Name | Type | Description |
|---|---|---|
| enable | bool | use availability |
- Return : None
void SetEnableBodyWithoutHead( bool enable )
Sets the ID (the sample lines below only enable the body’s ID without the head and neck).
Right Arm ID = { ID_R_SHOULDER_PITCH, ID_R_SHOULDER_ROLL, ID_R_ELBOW }
Left Arm ID = { ID_L_SHOULDER_PITCH, ID_L_SHOULDER_ROLL, ID_L_ELBOW }
Right Leg ID = { ID_R_HIP_YAW, ID_R_HIP_ROLL, ID_R_HIP_PITCH, ID_R_KNEE, ID_R_ANKLE_PITCH, ID_R_ANKLE_ROLL }
Left Leg ID = { ID_L_HIP_YAW, ID_L_HIP_ROLL, ID_L_HIP_PITCH, ID_L_KNEE, ID_L_ANKLE_PITCH, ID_L_ANKLE_ROLL }
- Arguments
| Name | Type | Description |
|---|---|---|
| enable | bool | use availability |
- Return : None
void SetEnableBody( bool enable )
Sets the ID (the sample lines below set all ID’s in use individually).
Head ID = { ID_HEAD_PAN, ID_HEAD_TILT }
Right Arm ID = { ID_R_SHOULDER_PITCH, ID_R_SHOULDER_ROLL, ID_R_ELBOW }
Left Arm ID = { ID_L_SHOULDER_PITCH, ID_L_SHOULDER_ROLL, ID_L_ELBOW }
Right Leg ID = { ID_R_HIP_YAW, ID_R_HIP_ROLL, ID_R_HIP_PITCH, ID_R_KNEE, ID_R_ANKLE_PITCH, ID_R_ANKLE_ROLL }
Left Leg ID = { ID_L_HIP_YAW, ID_L_HIP_ROLL, ID_L_HIP_PITCH, ID_L_KNEE, ID_L_ANKLE_PITCH, ID_L_ANKLE_ROLL }
- Arguments
| Name | Type | Description |
|---|---|---|
| enable | bool | use availability |
- Return : None
public bool GetEnable( int id )
Returns the ID(s) of Joint Enable.
- Arguments
| Name | Type | Description |
|---|---|---|
| id | int | determines use availability of joint ID |
- Return : true/false
public void SetValue( int id, int value )
Sets ID joint value.
- Arguments
| Name | Type | Description |
|---|---|---|
| id | int | sets joint ID |
| value | int | sets motor value |
- Return : None
int GetValue( int id )
Returns ID joint value.
- Arguments
| Name | Type | Description |
|---|---|---|
| id | int | returns joint ID |
- Return : Motor value set
void SetAngle( int id, double angle )
Sets ID joint angle.
- Arguments
| Name | Type | Description |
|---|---|---|
| id | int | sets joint ID |
| angle | double | sets angle value |
- Return : None
double GetAngle( int id )
Returns ID joint angle.
- Arguments
| Name | Type | Description |
|---|---|---|
| id | int | returns joint ID |
- Return : Angle value set
void SetRadian( int id, double radian )
Sets ID joint angle in radians.
- Arguments
| Name | Type | Description |
|---|---|---|
| id | int | sets joint ID |
| radian | double | sets angle value in radians |
- Return : None
double GetRadian( int id )
Returns ID joint angle in radians.
- Arguments
| Name | Type | Description |
|---|---|---|
| id | int | returns joint ID |
- Return : Sets angle values in radians
void SetSlope( int id, int cwSlope, int ccwSlope )
Sets ID of CW/CCW (clockwise/counterclockwise) compliance slopes.
- Arguments
| Name | Type | Description |
|---|---|---|
| id | int | sets Joint ID |
| cwSlope | int | sets CW (clockwise) compliance slope value |
| ccwSlope | int | sets CCW (counterclockwise) compliance slope value |
- Return : None
void SetCWSlope( int id, int cwSlope )
Sets ID of CW compliance slope.
- Arguments
| Name | Type | Description |
|---|---|---|
| id | int | sets joint ID |
| cwSlope | int | sets CW compliance slope value |
- Return : None
int GetCWSlope( int id )
Returns CW compliance slope.
- Arguments
| Name | Type | Description |
|---|---|---|
| id | int | returns joint ID |
- Return : Sets CW compliance slope value
void SetCCWSlope( int id, int ccwSlope )
Sets ID of CCW compliance slope.
- Arguments
| Name | Type | Description |
|---|---|---|
| id | int | sets joint ID |
| ccwSlope | int | sets CCW compliance slope value |
- Return : None
int GetCCWSlope( int id )
Returns ID of CCW Compliance Slope.
- Arguments
| Name | Type | Description |
|---|---|---|
| id | int | returns Joint ID |
- Return : Sets CCW Compliance Slope value
Kinematics Class
Robot Kinematics class information
Constructions
Kinematics( )
- Arguments : None
Data Members
static const double CAMERA_DISTANCE
- (mm)
static const double EYE_TILT_OFFSET_ANGLE
- (degree)
static const double LEG_SIDE_OFFSET
- Gap between both feet (mm)
static const double THIGH_LENGTH
- Thigh length (mm)
static const double CALF_LENGTH
- Calf length (mm)
static const double ANKLE_LENGTH
- Ankle length (mm)
static const double LEG_LENGTH
- Leg length (mm)
- LEG_LENGTH = THIGH_LENGTH + CALF_LENGTH + ANKLE_LENGTH
Methods
Kinematics* GetInstance()
- Arguments : None
- Return : Kinematics private unique instance
Includes
- #include “Matrix.h”
- #include “JointData.h”
Action Class#
Enermerations & Defines
Max Numbers (enum)
Maximum values of each properties.
| Name | Value | Description |
|---|---|---|
| MAXNUM_PAGE | 256 | Maximum number of page |
| MAXNUM_STEP | 7 | Maximum number of step |
| MAXNUM_NAME | 13 | Maximum length of page name |
Schedule type (enum)
| Name | Value | Description |
|---|---|---|
| SPEED_BASE_SCHEDULE | 0x0 | - |
| TIME_BASE_SCHEDULE | 0x0a | - |
Bit mask (enum)
Position value bit mask.
| Name | Value | Description |
|---|---|---|
| RANGE_BIT_MASK | 0x03FF | Position value bit mask |
| INVALID_BIT_MASK | 0x4000 | Invalid position value bit mask |
| TORQUE_OFF_BIT_MASK | 0x2000 | Torque off bit mask |
struct PAGEHEADER
Header structure. (total 64 bytes)
| Name | Type | Length | Description |
|---|---|---|---|
| name | unsigned char[] | 14 | page name |
| reserved1 | unsigned char | 1 | reserved 1 |
| repeat | unsigned char | 1 | repeat count |
| schedule | unsigned char | 1 | schedule |
| reserved2 | unsigned char[] | 3 | reserved 2 |
| stepnum | unsigned char | 1 | Number of step |
| reserved3 | unsigned char | 1 | reserved 3 |
| speed | unsigned char | 1 | Speed |
| reserved4 | unsigned char | 1 | reserved 4 |
| accel | unsigned char | 1 | Acceleration time |
| next | unsigned char | 1 | Link to next |
| exit | unsigned char | 1 | Link to exit |
| reserved5 | unsigned char[] | 4 | reserved 5 |
| checksum | unsigned char | 1 | checksum |
| slope | unsigned char[] | 31 | CW/CCW compliance slope |
| reserved6 | unsigned char | 1 | reserved 6 |
struct STEP
Step Structure (total 64 bytes)
| Name | Type | Length | Description |
|---|---|---|---|
| position | unsigned short[] | 62 | Joint position |
| pause | unsigned char | 1 | Pause time |
| time | unsigned char | 1 | Time |
struct PAGE
Page Structure (total 512 bytes)
| Name | Type | Length | Description |
|---|---|---|---|
| header | PAGEHEADER | 64 | Joint position |
| step | STEP[] | 448 | Pause time |
Data Members
bool DEBUG_PRINT
- Enable/Disable debugging message print.
Methods
static Action* GetInstance( )
Method to obtain global reference for Instance.
- Arguments : None.
- Return : pointer of Action’s unique instance.
void Initialize( )
Initialize.
- Arguments : None
- Return : None
void Process( )
Process.
- Arguments : None
- Return : None
bool LoadFile( char* filename )
Load action information from designated action file.
- Arguments
| Name | Type | Description |
|---|---|---|
| filename | char* | Action file name to be read |
- Return : On success, true is returned. On fail, false is returned.
bool CreateFile( char* filename )
Create a file with assigned file name and save action information.
- Arguments
| Name | Type | Description |
|---|---|---|
| filename | char* | file name of the action file to create |
- Return : On success, true is returned. On fail, false is returned.
bool Start( int iPage )
Play action in the page.
- Arguments
| Name | Type | Description |
|---|---|---|
| iPage | int | page number of the action to play |
- Return : On success, true is returned. On fail, false is returned.
bool Start( char* namePage )
Play the action in the page name.
- Arguments
| Name | Type | Description |
|---|---|---|
| namePage | char* | page name of the action to play |
- Return : On success, true is returned. On fail, false is returned.
bool Start( int index, PAGE* pPage )
- Arguments
| Name | Type | Description |
|---|---|---|
| index | int | - |
| pPage | PAGE* | - |
- Return : On success, true is returned. On fail, false is returned.
void Stop( )
Stop playback.
- Arguments : None
- Return : None
void Brake( )
- Arguments : None
- Return : None
bool IsRunning( )
- Arguments : None
- Return : On action is running, true is returned. On action is stoped, false is returned.
bool IsRunning( int* iPage, int* iStep )
- Arguments
| Name | Type | Description |
|---|---|---|
| iPage | int* | - |
| iStep | int* | - |
- Return : On action is running, true is returned. On action is stoped, false is returned.
bool LoadPage( int index, PAGE* pPage )
- Arguments
| Name | Type | Description |
|---|---|---|
| index | int | - |
| pPage | PAGE* | - |
- Return : On success, true is returned. On fail, false is returned.
bool SavePage( int index, PAGE* pPage )
- Arguments
| Name | Type | Description |
|---|---|---|
| index | int | - |
| pPage | PAGE* | - |
- Return : On success, true is returned. On fail, false is returned.
void ResetPage( PAGE* pPage )
- Arguments
| Name | Type | Description |
|---|---|---|
| pPage | PAGE* | - |
- Return : None
Head Class
Methods
static Head* GetInstance( )
Method to obtain global reference for instance.
- Arguments : None
- Return : Pointer of Head class unique instance
void Initialize( )
Method to initialize variables and move head to default position.
- Arguments : None
- Return : None
void Process( )
- Arguments : None
- Return : None
double GetTopLimitAngle( )
- Arguments : None
- Return : Top limit
double GetBottomLimitAngle( )
- Arguments : None
- Return : Bottom limit
double GetRightLimitAngle()
- Arguments : None
- Return : Right limit
double GetLeftLimitAngle( )
- Arguments : None
- Return : Left limit
double GetPanAngle( )
- Arguments : None
- Return : Present pan angle value
double GetTiltAngle( )
- Arguments : None
- Return : Present pan angle value
void MoveToHome( )
- Arguments : None
- Return : None
void MoveByAngle( double pan, double tilt )
- Arguments
| Name | Type | Description |
|---|---|---|
| pan | double | pan angle value |
| tilt | double | tilt angle value |
- Return : None
void MoveByAngleOffset( double pan, double tilt )
- Arguments
| Name | Type | Description |
|---|---|---|
| pan | double | pan angle value |
| tilt | double | tilt angle value |
- Return : None
void InitTracking( )
- Arguments : None
- Return : None
void MoveTracking( Point2D err )
- Arguments
| Name | Type | Description |
|---|---|---|
| err | Point2D | - |
- Return : None
void MoveTracking( )
- Arguments : None
- Return : None
void LoadINISettings( minIni* ini )
- Arguments
| Name | Type | Description |
|---|---|---|
| ini | minIni* | - |
- Return : None
void LoadINISettings( minIni* ini, const std::string §ion )
- Arguments
| Name | Type | Description |
|---|---|---|
| ini | minIni* | - |
| section | const std::string& | - |
- Return : None
void SaveINISettings( minIni* ini )
- Arguments
| Name | Type | Description |
|---|---|---|
| ini | minIni* | - |
- Return : None
void SaveINISettings( minIni* ini, const std::string §ion )
- Arguments
| Name | Type | Description |
|---|---|---|
| ini | minIni* | - |
| section | const std::string& | - |
- Return : None
Walking Class#
Enermerations & Defines
Walking Phase
Phase number
| Name | Value |
|---|---|
| PHASE0 | 0 |
| PHASE1 | 1 |
| PHASE2 | 2 |
| PHASE3 | 3 |
Data Members
double X_OFFSET
double Y_OFFSET
double Z_OFFSET
double A_OFFSET
double P_OFFSET
double R_OFFSET
double PERIOD_TIME
double DSP_RATIO
double X_MOVE_AMPLITUDE
double Y_MOVE_AMPLITUDE
double Z_MOVE_AMPLITUDE
double A_MOVE_AMPLITUDE
bool A_MOVE_ATM_ON
bool BALANCE_ENABLE
double BALANCE_KNEE_GAIN
double BALANCE_ANKLE_PITCH_GAIN
double BALANCE_HIP_ROLL_GAIN
double BALANCE_ANKLE_ROLL_GAIN
double Y_SWAP_AMPLITUDE
double Z_SWAP_AMPLITUDE
double ARM_SWING_GAIN
int PELVIS_OFFSET
int HIP_PITCH_OFFSET
Methods
static Walking* GetInstance( )
method to obtain global reference for Instance.
- Arguments : None
- Return : pointer of Walking’s unique instance.
int GetCurrentPhase( )
- Arguments : None
- Return : Current phase number.
double GetBodySwingY( )
- Arguments : None
- Return : Y axis body swing value.
double GetBodySwingZ( )
- Arguments : None
- Return : Z axis body swing value.
void Initialize( )
Initialize.
- Arguments : None
- Return : None
void Start( )
- Arguments : None
- Return : None
void Stop( )
- Arguments : None
- Return : None
void Process( )
- Arguments : None
- Return : None
bool IsRunning( )
- Arguments : None
- Return : On walking is running, true is returned. On walking is stoped, false is returned.
void LoadINISettings( minIni* ini )
- Arguments
| Name | Type | Description |
|---|---|---|
| ini | minIni* | - |
- Return : None
void LoadINISettings( minIni* ini, const std::string §ion )
- Arguments
| Name | Type | Description |
|---|---|---|
| ini | minIni* | - |
| section | const std::string& | - |
- Return : None
void SaveINISettings( minIni* ini )
- Arguments
| Name | Type | Description |
|---|---|---|
| ini | minIni* | - |
- Return : None
void SaveINISettings( minIni* ini, const std::string §ion )
- Arguments
| Name | Type | Description |
|---|---|---|
| ini | minIni* | - |
| section | const std::string& | - |
- Return : None
MotionManager Class
Motion Module management class
Methods
static MotionManager* GetInstance( )
Method to obtain global reference for Instance.
- Arguments : None.
- Return : pointer of MotionManager’s unique instance.
bool Initialize( CM730* cm730 )
Initialize.
- Arguments
| Name | Type | Description |
|---|---|---|
| cm730 | CM730* | - |
- Return : On success, true is returned. On fail, false is returned.
bool Reinitialize( )
Reinitialize.
- Arguments : None.
- Return : On success, true is returned. On fail, false is returned.
void Process( )
Periodically performs a called function.
- Arguments : None
- Return : None
void SetEnable( bool enable )
Enable the motion manager
- Arguments
| Name | Type | Description |
|---|---|---|
| enable | bool | - |
- Return : None
bool GetEnable( )
Get enable status
- Arguments : None
- Return : Enable status
void AddModule( MotionModule *module )
Manager updates Motion Module.
- Arguments
| Name | Type | Description |
|---|---|---|
| module | MotionModule* | updates Motion Module |
- Return : None
void RemoveModule( MotionModule *module )
Removes Motion Module from Manager.
- Arguments
| Name | Type | Description |
|---|---|---|
| module | MotionModule* | removes Motion Module |
- Return : None
Includes
- #include <list>
- #include “MotionStatus.h”
- #include “MotionModule.h”
- #include “CM730.h”
MotionStatus Class
Motion Module Feedback controlfor each status class
Data Members
static const int FALLEN_F_LIMIT
- Forward fallen acceleration sensor value limit
static const int FALLEN_B_LIMIT
- Backward fallen acceleration sensor value limit
static const int FALLEN_MAX_COUNT
- Count
static JointData m_CurrentJoints
static int FB_GYRO
static int RL_GYRO
static int FB_ACCEL
static int RL_ACCEL
static int BUTTON
- Button value.
static int FALLEN
- Fallen status value.
Includes
- #include “JointData.h”
Vision References
BallFollower Class
Constructions
BallFollower( )
- Arguments : None
Data Members
int KickBall
- Ball position for kicking. ( -1 : Right, 0 : No ball, 1 : Left )
Methods
void Process( Point2D ball_pos )
Process
- Arguments
| Name | Type | Description |
|---|---|---|
| ball_pos | Point2D | - |
- Return : None
BallTracker Class
Constructions
BallTracker( )
- Arguments : None
Data Members
ColorFinder finder
- ColorFinder class for ball searching
Point2D ball_position
- Ball position search via ColorFinde
Methods
void LoadINISettings( minIni* ini )
- Arguments
| Name | Type | Description |
|---|---|---|
| ini | minIni* | - |
- Return : None
void LoadINISettings( minIni* ini, const std::string §ion )
- Arguments
| Name | Type | Description |
|---|---|---|
| ini | minIni* | - |
| section | const std::string& | - |
- Return : None
void SaveINISettings( minIni* ini )
- Arguments
| Name | Type | Description |
|---|---|---|
| ini | minIni* | - |
- Return : None
void SaveINISettings( minIni* ini, const std::string §ion )
- Arguments
| Name | Type | Description |
|---|---|---|
| ini | minIni* | - |
| section | const std::string& | - |
- Return : None
void LoadINISettings( minIni* ini )
- Arguments
| Name | Type | Description |
|---|---|---|
| ini | minIni* | - |
- Return : None
void LoadINISettings( minIni* ini, const std::string §ion )
- Arguments
| Name | Type | Description |
|---|---|---|
| ini | minIni* | - |
| section | const std::string& | - |
- Return : None
void SaveINISettings( minIni* ini )
- Arguments
| Name | Type | Description |
|---|---|---|
| ini | minIni* | - |
- Return : None
void Process( Image* camImg )
- Arguments
| Name | Type | Description |
|---|---|---|
| camImg | Image* | - |
- Return : None
ColorFinder Class
Constructions
ColorFinder( )
- Arguments : None
ColorFinder( int hue, int hue_tol, int min_sat, int min_val, double min_per, double max_per )
- Arguments
| Name | Type | Description |
|---|---|---|
| hue | int | Hue value |
| hue_tol | int | Tolerance in hue (differential) +- |
| min_sat | int | Minimum saturation (chroma) value |
| min_val | int | Minimum brightness (lumina) value |
| min_per | double | Minimum color pixel filtering |
| max_per | double | Maximum color pixel filtering |
Data Members
int m_hue
- Hue value for color ( 0 ~ 360 )
int m_hue_tolerance
- Tolerance value for color (hue differential) +- ( 0 ~ 180 )
int m_min_saturation
int m_min_value
double m_min_percent
double m_max_percent
std::string color_section
Image* m_result
Methods
void LoadINISettings( minIni* ini )
- Arguments
| Name | Type | Description |
|---|---|---|
| ini | minIni* | - |
- Return : None
void LoadINISettings( minIni* ini, const std::string §ion )
- Arguments
| Name | Type | Description |
|---|---|---|
| ini | minIni* | - |
| section | const std::string& | - |
- Return : None
void SaveINISettings( minIni* ini )
- Arguments
| Name | Type | Description |
|---|---|---|
| ini | minIni* | - |
- Return : None
void SaveINISettings( minIni* ini, const std::string §ion )
- Arguments
| Name | Type | Description |
|---|---|---|
| ini | minIni* | - |
| section | const std::string& | - |
- Return : None
Point2D& GetPosition( Image* hsv_img )
- Arguments
| Name | Type | Description |
|---|---|---|
| hsv_img | Image* | - |
- Return : Finds position through color.
Image Class#
Constructions
Image( int width, int height, int pixelsize )
- Arguments
| Name | Type | Description |
|---|---|---|
| width | int | Image pixel width |
| height | int | Image pixel height |
| pixelsize | int | bytes of pixel |
Data Members
static const int YUV_PIXEL_SIZE
- YUYV type image’s pixel size
static const int RGB_PIXEL_SIZE
- RGB type image’s pixel size
static const int HSV_PIXEL_SIZE
- HSV type image’s pixel size
unsigned char* m_ImageData
- pointer to aligned image data
int m_Width
- image width in pixels
int m_Height
- image height in pixels
int m_PixelSize
- pixel size in bytes
int m_NumberOfPixels
- number of pixels
int m_WidthStep
- size of aligned image row in bytes
int m_ImageSize
- image data size in bytes (=image->m_Height*image->m_WidthStep)
Operators
Image& operator = (Image &img)
FrameBuffer Class
Constructions
FrameBuffer( int width, int height )
- Arguments
| Name | Type | Description |
|---|---|---|
| width | int | Image buffer pixel width |
| height | int | Image buffer pixel height |
Data Members
Image* m_YUVFrame
- YUYV image frame buffer
Image* m_RGBFrame
- RGB image frame buffer
Image* m_HSVFrame
- HSV image frame buffer
ImgProcess Class
Methods
static void YUVtoRGB( FrameBuffer* buf )
- Arguments
| Name | Type | Description |
|---|---|---|
| buf | FrameBuffer* | - |
- Return : None
static void RGBtoHSV( FrameBuffer* buf )
- Arguments
| Name | Type | Description |
|---|---|---|
| buf | FrameBuffer* | - |
- Return : None
static void Erosion( Image* img )
- Arguments
| Name | Type | Description |
|---|---|---|
| img | Image* | - |
- Return : None
static void Erosion( Image* src, Image* dest )
- Arguments
| Name | Type | Description |
|---|---|---|
| src | Image* | - |
- Return : None
static void Dilation( Image* img )
- Arguments
| Name | Type | Description |
|---|---|---|
| img | Image* | - |
- Return : None
static void Dilation( Image* src, Image* dest )
- Arguments
| Name | Type | Description |
|---|---|---|
| src | Image* | - |
- Return : None
static void HFlipYUV( Image* img )
- Arguments
| Name | Type | Description |
|---|---|---|
| img | Image* | - |
- Return : None
static void VFlipYUV( Image* img )
- Arguments
| Name | Type | Description |
|---|---|---|
| img | Image* | - |
- Return : None
Linux Platform Porting
To enable motion under other platforms classes need to created
MotionManager for Platform
MotionManager implements inheritance. MotionManager periodic timer process requires Timer from Platform (by periodic calling).
PlatformCM730
PlatformCM730 implements inheritance. PlatformCM730 classes communicate with the sub-board (sub-controller’s). Communications is performed at the platform level and necessary for control. PlatformCM730 classes can be implemented by virtual method.
- Port control methods
- OpenPort
- ClosePort
- ClearPort
- WritePort
- ReadPort
- Multi-Thread for semaphore methods
- LowPriorityWait
- MidPriorityWait
- HighPriorityWait
- LowPriorityRelease
- MidPriorityRelease
- HighPriorityRelease
- Communications Timeout check methods
- SetPacketTimeout
- IsPacketTimeout
- SetUpdateTimeout
- IsUpdateTimeout
Camera for Platform
The camera acquires image data. The framework’s image’s data classes are ImgGray and ImgColor. The camera captures data and converts is to ImgColor class.
Etc class
If, necessary, you may create your own platform-dependent sources. For examaple, Network communications class source.
LinuxActionScript Class
Data Members
static bool m_stop
static bool m_is_running
Methods
static int ScriptStart( const char* filename )
- Arguments
| Name | Type | Description |
|---|---|---|
| filename | const char* | action script file name |
- Return : None
static int PlayMP3( const char* filename )
- Arguments
| Name | Type | Description |
|---|---|---|
| filename | const char* | mp3 file name |
- Return : None
CameraSettings Class
Constructions
CameraSettings( )
- Arguments : None
Data Members
int brightness
int contrast
int saturation
int gain
int exposure
LinuxCamera Class
Data Members
FrameBuffer* fbuffer
Methods
static LinuxCamera* GetInstance( )
method to obtain global reference for Instance.
- Arguments : None
- Return : pointer of LinuxCamera’s unique instance.
int Initialize( int deviceIndex )
- Arguments
| Name | Type | Description |
|---|---|---|
| deviceIndex | int | - |
- Return : On success, 1 is returned.
int v4l2GetControl( int control )
- Arguments
| Name | Type | Description |
|---|---|---|
| control | int | - |
- Return : control’s value.
int v4l2SetControl( int control, int value )
- Arguments
| Name | Type | Description |
|---|---|---|
| control | int | - |
| value | int | - |
- Return : On success, 0 is returned. On fail, -1 is returned.
int v4l2ResetControl( int control )
- Arguments
| Name | Type | Description |
|---|---|---|
| control | int | - |
- Return : On success, 0 is returned. On fail, -1 is returned.
void LoadINISettings( minIni* ini )
- Arguments
| Name | Type | Description |
|---|---|---|
| ini | minIni* | - |
- Return : None
void SaveINISettings( minIni* ini )
- Arguments
| Name | Type | Description |
|---|---|---|
| ini | minIni* | - |
- Return : None
void SetCameraSettings( const CameraSettings& newset )
- Arguments
| Name | Type | Description |
|---|---|---|
| newset | const CameraSettings& | - |
- Return : None
const CameraSettings& GetCameraSettings( )
- Arguments : None
- Return : Current camera settings
void SetAutoWhiteBalance( int isAuto )
- Arguments
| Name | Type | Description |
|---|---|---|
| isAuto | int | - |
- Return : None
unsigned char GetAutoWhiteBalance( )
- Arguments : None
- Return : Auto white balance value
void CaptureFrame( )
- Arguments : None
- Return : None
LinuxCM730 Class
Constructions
LinuxCM730( const char* name )
- Arguments
| Name | Type | Description |
|---|---|---|
| name | const char* | port name |
Methods
void SetPortName( const char* name )
- Arguments
| Name | Type | Description |
|---|---|---|
| name | const char* | port name |
- Return : None
const char* GetPortName( )
- Arguments : None
- Return : Port name
bool OpenPort( )
- Arguments : None
- Return : On success, true is returned. On fail, false is returned.
void ClosePort( )
- Arguments : None
- Return : None
void ClearPort( )
- Arguments : None
- Return : None
int WritePort( unsigned char* packet, int numPacket )
- Arguments
| Name | Type | Description |
|---|---|---|
| packet | unsigned char* | - |
| numPacket | int | packet length in byte |
- Return : Number of sending bytes
int ReadPort( unsigned char* packet, int numPacket )
- Arguments
| Name | Type | Description |
|---|---|---|
| packet | unsigned char* | - |
| numPacket | int | packet length in byte |
- Return : Number of reading bytes
void LowPriorityWait( )
- Arguments : None
- Return : None
void MidPriorityWait( )
- Arguments : None
- Return : None
void HighPriorityWait( )
- Arguments : None
- Return : None
void LowPriorityRelease( )
- Arguments : None
- Return : None
void MidPriorityRelease( )
- Arguments : None
- Return : None
void HighPriorityRelease( )
- Arguments : None
- Return : None
void SetPacketTimeout( int lenPacket )
- Arguments
| Name | Type | Description |
|---|---|---|
| lenPacket | int | - |
- Return : None
bool IsPacketTimeout( )
- Arguments : None
- Return : On timeout, true is returned. On waiting, false is returned.
double GetPacketTime( )
- Arguments : None
- Return : Calculated packet time.
void SetUpdateTimeout( int msec )
- Arguments
| Name | Type | Description |
|---|---|---|
| msec | int | timeout value |
- Return : None
bool IsUpdateTimeout( )
- Arguments : None
- Return
double GetUpdateTime( )
- Arguments : None
- Return
virtual void Sleep( int Miliseconds )
- Arguments
| Name | Type | Description |
|---|---|---|
| Miliseconds | int | sleep time in miliseconds |
- Return : None
LinuxMotionTimer Class
Methods
static void Initialize( MotionManager* manager )
- Arguments
| Name | Type | Description |
|---|---|---|
| manager | MotionManager* | - |
- Return : None
static void Start( )
- Arguments : None
- Return : None
static void Stop( )
- Arguments : None
- Return : None
static bool IsRunning( )
- Arguments : None
- Return : On timer is running, true is returned. On timer is stoped, false is returned.
static void msleep( int Miliseconds )
- Arguments
| Name | Type | Description |
|---|---|---|
| Miliseconds | int | - |
- Return : None
LinuxSocket Class#
Constructions
LinuxSocket( )
- Arguments : None
Data Members
static const int MAXHOSTNAME
static const int MAXCONNECTIONS
static const int MAXRECV
Methods
bool create( )
- Arguments : None
- Return : On success, true is returned. On fail, false is returned.
bool bind( const int port )
- Arguments
| Name | Type | Description |
|---|---|---|
| port | const int | - |
- Return : On success, true is returned. On fail, false is returned.
bool listen( ) const
- Arguments : None
- Return : On success, true is returned. On fail, false is returned.
bool accept( LinuxSocket& new_socket ) const
- Arguments
| Name | Type | Description |
|---|---|---|
| new_socket | LinuxSocket& | - |
- Return : On success, true is returned. On fail, false is returned.
bool connect( const std::string host, const int port )
- Arguments
| Name | Type | Description |
|---|---|---|
| host | const std::string | - |
| port | const int | - |
- Return : On success, true is returned. On fail, false is returned.
bool send( const std::string s ) const
- Arguments
| Name | Type | Description |
|---|---|---|
| s | const std::string | - |
- Return : On success, true is returned. On fail, false is returned.
bool send( void* data, int length ) const
- Arguments
| Name | Type | Description |
|---|---|---|
| data | void* | - |
| length | int | - |
- Return : On success, true is returned. On fail, false is returned.
int recv( std::string& s ) const
- Arguments
| Name | Type | Description |
|---|---|---|
| s | std::string& | - |
- Return
int recv( void* data, int length ) const
- Arguments
| Name | Type | Description |
|---|---|---|
| data | void* | - |
| length | int | - |
- Return
void set_non_blocking( const bool b )
- Arguments
| Name | Type | Description |
|---|---|---|
| b | const bool | - |
- Return : None
bool is_valid( ) const
- Arguments : None
- Return : On socket is valid, true is returned. On socket is invalid, false is returned.
LinuxSocketException Class
Constructions
LinuxSocketException( std::string s )
- Arguments
| Name | Type | Description |
|---|---|---|
| s | std::string | - |
Methods
std::string description( )
- Arguments : None
- Return
LinuxServer Class#
Constructions
LinuxServer( )
- Arguments : None
LinuxServer( int port )
- Arguments
| Name | Type | Description |
|---|---|---|
| s | std::string | - |
Methods
void accept( LinuxServer& sock )
- Arguments
| Name | Type | Description |
|---|---|---|
| sock | LinuxServer& | - |
- Return : None.
bool send( unsigned char* data, int length )
- Arguments
| Name | Type | Description |
|---|---|---|
| data | unsigned char* | - |
| length | int | - |
- Return : On success, true is returned. On fail, false is returned.
int recv( unsigned char* data, int length )
- Arguments
| Name | Type | Description |
|---|---|---|
| data | unsigned char* | - |
| length | int | - |
- Return
Operators
const LinuxServer& operator << ( const std::string& s ) const
- Send
const LinuxServer& operator << ( const int& i ) const
- Send
const LinuxServer& operator >> ( const std::string& s ) const
- Read
Streamer
- Get more informations: http://sourceforge.net/projects/mjpg-streamer/
Linux Tutorials
The following are required libraries for tools and tutorials.
- g++ : GNU C++ Compiler.
- manpages-dev : describes the Linux programming interface, including Linux system and library calls.
- libjpeg62-dev : library for JPEG files.
- libncurses5-dev : contains the header files, static libraries and symbolic links for developers.
You may install the abovementioned libraries by typing the line below at the command prompt.
$ sudo apt-get install g++ manpages-dev libjpeg62-dev libncurses5-dev
Tutorial source path : /darwin/Linux/project/tutorial
Build
darwin@darwin:~$ cd /darwin/Linux/project/tutorial/read_write/
darwin@darwin:/darwin/Linux/project/tutorial/read_write$ make
make -C ../../../build
...
g++ -o read_write main.o ../../../lib/darwin.a -lpthread -lrt
darwin@darwin:/darwin/Linux/project/tutorial/read_write$
Execute
/dev/ttyUSB0 requires root user priviledges. To obtain root user privileges type:
darwin@darwin:/darwin/Linux/project/tutorial/read_write$ sudo su
[sudo] password for darwin: ( input 111111 )
root@darwin:/darwin/Linux/project/tutorial/read_write# ./read_write
Read/Write
Main classes used in the tutorial
- LinuxCM730 : Inherited class from PlatformCM730 for the Linux platform. Use this class to control a usb-to-serial port file resource.
- CM730 : generates Read / Write packet, PlatformCM730 class inherited from the CM-730. Results sent to packet processing class.
Source code review
- Construct LinuxCM730 and CM730 class
  LinuxCM730 linux_cm730("/dev/ttyUSB0");
  CM730 cm730(&linux_cm730);
- Call connect() function to open port and turn on DYNAMIXEL power.
  if(cm730.Connect() == false)
  {
  printf("Fail to connect CM-730!\n");
  return 0;
  }
- Read 2 bytes value(Gyro sensor value) from CM730 control table.
  printf("GFB:");
  if(cm730.ReadWord(CM730::P_GYRO_Y_L, &value, 0) == CM730::SUCCESS)
  printf("%3d", value);
  else
  printf("---");
- Read 2 bytes value(Present position) from DYNAMIXEL control table and write the mirroring value.
  printf(" ID[%d]:", JointData::ID_R_SHOULDER_PITCH);
  if(cm730.ReadWord(JointData::ID_R_SHOULDER_PITCH, RX28M::P_PRESENT_POSITION_L, &value, 0) == CM730::SUCCESS)
  {
  printf("%4d", value);
  cm730.WriteWord(JointData::ID_L_SHOULDER_PITCH, RX28M::P_GOAL_POSITION_L, RX28M::GetMirrorValue(value), 0);
  }
  else
  printf("----");
Result
root@darwin:/darwin/Linux/project/tutorial/read_write# ./read_write
Read/Write Tutorial for DARwIn
GFB:512 GRL:512 AFB:504 ARL:508 BTN:0 ID[1]: 394 ID[3]: 444 ID[5]: 492
- GFB : Gyro sensor Y axis value
- GRL : Gyro sensor X axis value
- AFB : Acceleration sensor Y axis value
- ARL : Acceleration sensor X axis value
- BTN : Button status value
- ID[#] : Present position value of dynamixel ID #
Reads position values for the right arm. From values’ data the left arm mirrors the right arm.
Tutorial Procedure
NOTE : Before you begin ensure that DARWIN-OP is in a stable kneeling position. During this tutorial torque from all actuators will be released.
Press the “RESET” button and ensure you’ve perform the killall procedure (if necessary).
DARWIN-OP’s head LED must be in green and eye LED in blue before you begin.
Go to the directory /darwin/Linux/project/tutorial/read_write
Look for the file “read_write” If not type make and the compiler will autogenerate read_write.
Execute the read/write by typing ./read_write.
Once running the read/write you will see the following

- Grab DARWIN-OP’s right hand and move it around. You should notice that the left hand mimics the movement of the right hand.
- You should also notice that the head and eye LED constantly change color.
- You should also notice that the actuators controlling the left arm are stiff while all other actuators are loose.
- During this tutorial please exercise caution when moving the right arm as DARWIN-OP may fall due to the released torque from the rest of the body.
- GFB, GRL, AFB, ARL values will change if you move DARWIN-OP’s torso.
To do so grab DARWIN-OP by the handle and gently swing it around.
You should see the values change.
To end the tutorial hold the “CONTROL” key and press the C key. Afterwards press the “RESET” button from DARWIN-OP. The head LED returns to blue and eye LED to green.
Camera Capture & View
Main classes for the tutorial
- minIni : settings from ini files for loading and saving.
- LinuxCamera : Camera initialization, settings change, and capture classes..
- mjpg_streamer : compresses YUV image to jpeg. The web server streaming class allows view and control on a web browser page via command.
Source code review
MinIni class from the camera settings.
minIni* ini = new minIni(INI_FILE_PATH);
Camera device number generates LinuxCamera class. MinIni class reads settings values.
LinuxCamera::GetInstance()->Initialize(0);
LinuxCamera::GetInstance()->LoadINISettings(ini);
mjpg_streamer class confirms images.
mjpg_streamer* streamer = new mjpg_streamer(Camera::WIDTH, Camera::HEIGHT);
LinuxCamera class allows mjpg_streamer to stream frame captures on web browser.
while(1)
{
LinuxCamera::GetInstance()->CaptureFrame();
streamer->send_image(LinuxCamera::GetInstance()->fbuffer->m_YUVFrame);
}
Result
Connect to DARwIn-OP via IP address and port 8080 to stream motion images from the camera. (You may experience memory leaks with Chrome).
Camera’s gain and exposure values can be can be changed by clicking the buttons.
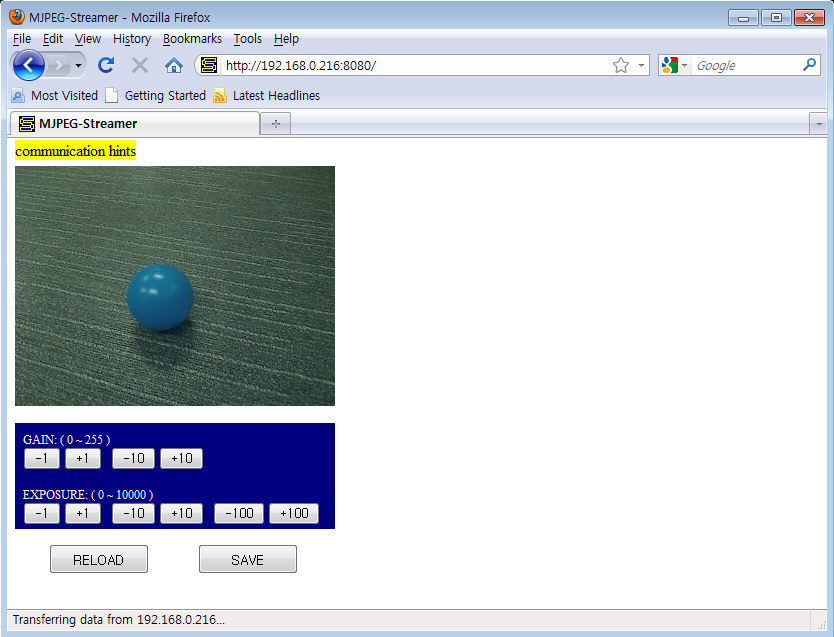
Tutorial Procedure
NOTE : Before you begin, ensure that DARwIn-OP is in a stable kneeling position. During this tutorial torque from all actuators will be released.
Press the “RESET” button and ensure you’ve perform the killall procedure (if necessary).
DARWIN-OP’s head LED must be in green and eye LED in blue before you begin.
Go to the directory /darwin/Linux/project/tutorial/camera
Look for the file “camera_tutorial”. If not type make and the compiler will autogenerate camera_tutorial.
Execute the camera tutorial by typing ./camera_tutorial.
Once running the camera tutorial you will see the following

From your computer open a web browser (Firefox recommended, do not use Chrome due to memory leak) and type http://192.168.123.1:8080 on the address bar.
The IP address 192.168.123.1 is the default IP address assuming you’ve established a wired LAN connection with DARwIn-OP.
From your browser you can modify GAIN and EXPOSURE values.
- The default values for GAIN is 255 and EXPOSURE is 1000.
- Lowering gain values will decrease image brightness
- Lowering exposure values will increase image contrast.
To end the tutorial hold the “CONTROL” key and press the C key. Afterwards press the “RESET” button from DARwIn-OP.
The head LED returns to blue and eye LED to green.
Close the web browser.
You may view the changes you’ve made by viewing the config.ini file from the current working directory (/darwin/Linux/project/tutorial/camera)
Image Processing
Main classes for the tutorial
- ColorFinder : HSV color space filters specific colors. ColorFinder finds the center of mass of the filtered pixels and returns the location. This process is done internally.
Source code review
ColorFinder class is generated by capture image. Image capture generates ColorFinder by by finding the center of mass of pixels by pixel position from a given color. Also, minIni class sets the default value of the color.
ColorFinder* finder = new ColorFinder();
finder->LoadINISettings(ini);
mjpg_streamer allows colors adjustment via web browser for ball_finder and ColorFinder.
httpd::ball_finder = finder;
From GetPosition function image color values from HSV color space Point2D returns the value for center of mass.
pos = finder->GetPosition(LinuxCamera::GetInstance()->fbuffer->m_HSVFrame);
Result
The preset allows location of center of mass for ball color.
root@darwin:/darwin/Linux/project/tutorial/color_filtering# ./color_filtering
posx: 169.000000, posy: 104.000000
From the capture screen color RGB(255, 0, 0) (color) replacement is shown
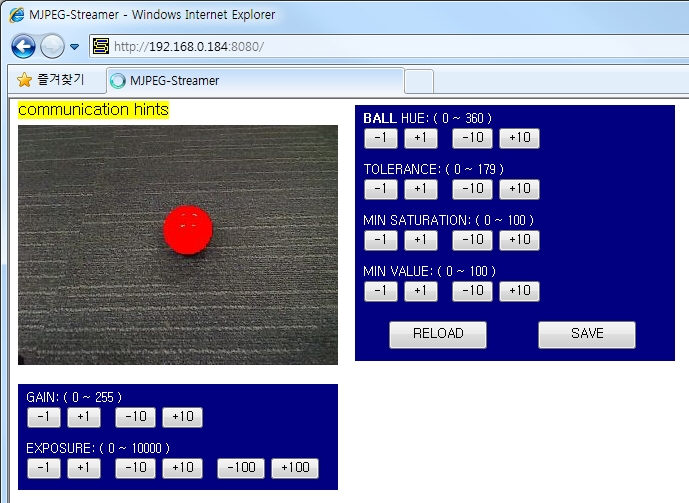
Tutorial procedure
NOTE : Before you begin, ensure that DARwIn-OP is in a stable kneeling position. During this tutorial torque from all actuators will be released.
Press the “RESET” button and ensure you’ve perform the killall procedure (if necessary).
DARWIN-OP’s head LED must be in green and eye LED in blue before you begin.
Go to the directory /darwin/Linux/project/tutorial/color_filtering
Look for the file “color_filtering”. If not type make and the compiler will autogenerate color_filtering.
Execute the image processing tutorial by typing ./color_filtering.
Once tutorial is running you will see the following screen

From your computer open a web browser (Firefox recommended, do not use Chrome due to memory leak) and type http://192.168.123.1:8080 on the address bar.
The IP address 192.168.123.1 is the default IP address and assuming you’ve established a wired LAN connection with DARWIN-OP.
The following values are the default values for the ball
- Hue: 356
- Tolerance: 15
- Minimum Saturation: 50
- Minimum Value: 10
- Gain: 255
- Exposure: 1000
You can change the color of the ball to the desired color by manipulating the parameters.
Example: chang the ball color from red (default) to blue.
Please refer to the table here for reference for values for blue.
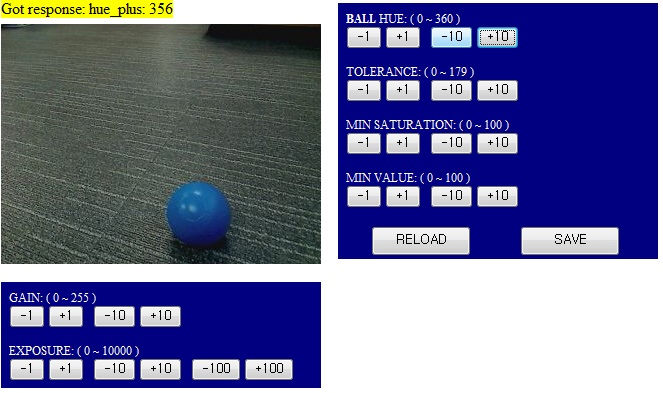
Under default values for the ball DARWIN-OP would view a blue ball like the image above.
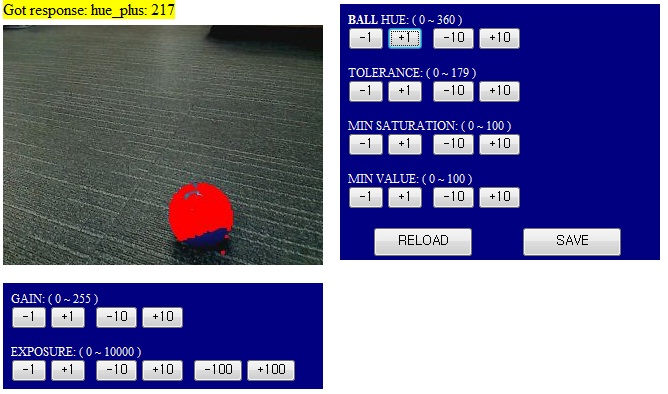
- After manipulating the values DARWIN-OP would view a blue ball like the image above. Notice that a bright reddish orange patch covers most of the blue ball. The orange patch over blue is an indication that DARWIN-OP detects blue as the target color.
- You will also notice the change in values for posx and posy. This is because DARWIN-OP is able to “detect” the ball therefore calculate the position of center of mass for the ball color.
- posx is the value for center of mass in horizontal position
- posy is the value for center of mass in vertical position.
- If you remove the ball you will see the values for posx and posy return to -1.000000
The following table represents change in values from red ball (default) to blue ball
| red (default) | blue (new values) | reference blue (from Color and White Balance Calibration) | |
|---|---|---|---|
| Hue | 356 | 217 | 225 |
| Tolerance | 15 | 15 | 15 |
| Minimum Saturation | 50 | 43 | 45 |
| Minimum Value | 10 | 0 | 0 |
| Gain | 255 | 255 | 255 |
| Exposure | 1000 | 1000 | 1000 |
NOTE : Remember that these values are in accordance to the HSV color space. The values assigned for the colors are arbitrary and you may choose any values to suit your needs.
To end the tutorial hold the “CONTROL” key and press the C key. Afterwards press the “RESET” button from DARWIN-OP.
Close the web browser.
You may view the changes you’ve made by viewing the config.ini file from the current working directory (/darwin/Linux/project/tutorial/color_filtering).
Head Control
Main classes for the tutorial
- BallTracker : transfer image capture from HSV color space.Ball location is possible via ColorFinder class. The head module controls head pan and tilt (aligns head in front of the ball).
- MotionManager : modules are inherited from MotionModule class. The module calls Process() function to calculate each joint values. The values are merged for synchronized writing.
- Head : modules are inherited from MotionModule class. The module allows head pan and tilt.
- LinuxMotionTimer : MotionManager calls Process() function at regular intervals.
Source code review
BallTracker class performs ball tracking. Also, the minIni class sets color values, where the values can be manipulated via web browser.
BallTracker tracker = BallTracker();
tracker.LoadINISettings(ini);
httpd::ball_finder = &tracker.finder;
Create DYNAMIXEL control CM730 class and Head class initializes MotionManager class.
LinuxCM730 linux_cm730(U2D_DEV_NAME);
CM730 cm730(&linux_cm730);
if(MotionManager::GetInstance()->Initialize(&cm730) == false)
{
printf("Fail to initialize Motion Manager!\n");
return 0;
}
MotionManager class registers Head class and initializes the timer. Only the head moves by tracking; body joints are disabled. Afterwards MotionManager is enabled.
MotionManager::GetInstance()->AddModule((MotionModule*)Head::GetInstance());
LinuxMotionTimer::Initialize(MotionManager::GetInstance());
MotionStatus::m_CurrentJoints.SetEnableBody(false);
MotionStatus::m_CurrentJoints.SetEnableHeadOnly(true);
MotionManager::GetInstance()->SetEnable(true);
Tracker
tracker.Process(LinuxCamera::GetInstance()->fbuffer->m_HSVFrame);
Result
Head pan and tilt joints aim at the center of mass of the captured color. the head is centered around the color.
Tutorial Procedure
NOTE : Before you begin, ensure that DARwIn-OP is in a stable kneeling position. During this tutorial torque from all actuators will be released.
Press the “RESET” button and ensure you’ve perform the killall procedure (if necessary).
DARWIN-OP’s head LED must be in green and eye LED in blue before you begin.
Go to the directory /darwin/Linux/project/tutorial/head_tracking
Look for the file “head_tracking”. If not type make and the compiler will autogenerate head_tracking.
Execute the head control tutorial by typing ./head_tracking.
Once running the tutorial you will see the following

DARWIN-OP’s head LED will change from green to amber.
- DARWIN-OP tracks the red ball. However, the body remains still and only the head moves (DYNAMIXEL ID 19 and 20).
- To get DARWIN-OP track the ball place the ball at a distance approximately 1 to 1.5 feet away from the head. Placing the ball too close to DARWIN-OP will cause the head to move out of control.
You may also change the color DArwIn-OP tracks by opening our web browser.
From your computer open a web browser (Firefox recommended, do not use Chrome due to memory leak) and type http://192.168.123.1:8080 on the address bar.
the IP address 192.168.123.1 is the default IP address and assuming you’ve established a wired LAN connection with DARWIN-OP.
By Default DARWIN-OP will track a red ball. Please refer to the table here for ball, red, blue, and yellow.
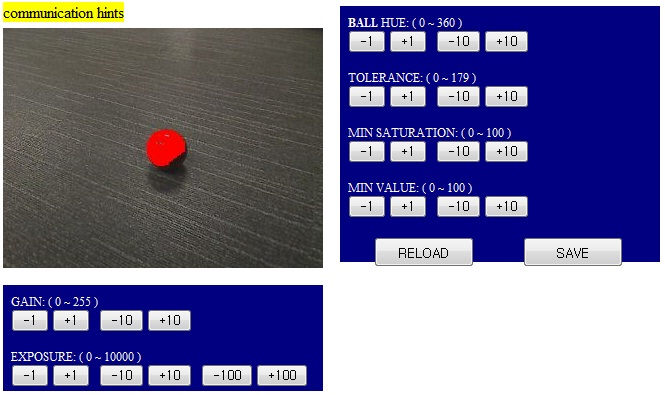
If you replace the red ball with another color DARWIN-OP will ignore it
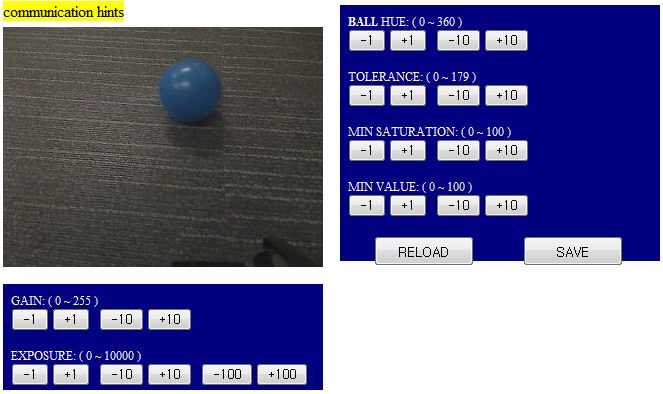
As you adjust the color of the ball, from the web browser, you can also see DARWIN-OP’s camera track the ball in real-time once values are properly adjusted.
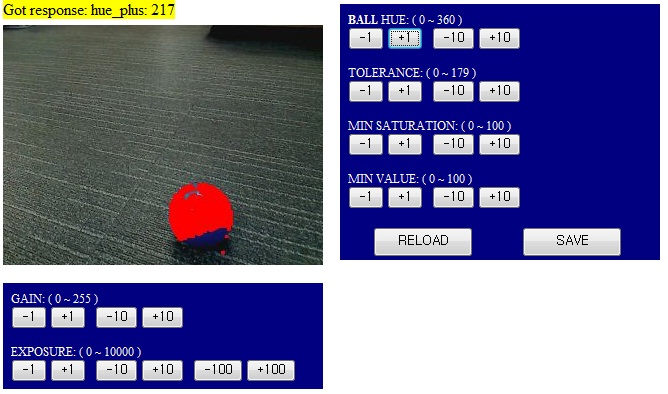
Over the course of the head control tutorial you will notice that the actuators LED blink as if they have an error. Disregard this notification during this tutorial.
To end the tutorial hold the “CONTROL” key and press the C key.
Press the “RESET” button on DARWIN-OP.
Close your web browser.
You may view the changes you’ve made by viewing the config.ini file from the current working directory (/darwin/Linux/project/tutorial/color_filtering).
Walking Control
Main classes for the tutorial
- Head control : main class
- BallFollower :
Source code review
Head tracking from BallTracker class and ball following generates BallFollower class.
BallTracker tracker = BallTracker();
tracker.LoadINISettings(ini);
httpd::ball_finder = &tracker.finder;

BallFollower follower = BallFollower();
Port initialization and opening, dynamixel power on
LinuxCM730 linux_cm730(U2D_DEV_NAME);
CM730 cm730(&linux_cm730);
if(MotionManager::GetInstance()->Initialize(&cm730) == false)
{
printf("Fail to initialize Motion Manager!\n");
return 0;
}
MotionManager head tracking registers head and walking modules, then timers are initialized.
MotionManager::GetInstance()->AddModule((MotionModule*)Head::GetInstance());
MotionManager::GetInstance()->AddModule((MotionModule*)Walking::GetInstance());
LinuxMotionTimer::Initialize(MotionManager::GetInstance());
Walking init captures poses.
int n = 0;
int param[JointData::NUMBER_OF_JOINTS * 5];
int wGoalPosition, wStartPosition, wDistance;

for(int id=JointData::ID_R_SHOULDER_PITCH; id<JointData::NUMBER_OF_JOINTS; id++)
{
wStartPosition = MotionStatus::m_CurrentJoints.GetValue(id);
wGoalPosition = Walking::GetInstance()->m_Joint.GetValue(id);
if( wStartPosition > wGoalPosition )
wDistance = wStartPosition - wGoalPosition;
else
wDistance = wGoalPosition - wStartPosition;

wDistance >>= 2;
if( wDistance < 8 )
wDistance = 8;

param[n++] = id;
param[n++] = CM730::GetLowByte(wGoalPosition);
param[n++] = CM730::GetHighByte(wGoalPosition);
param[n++] = CM730::GetLowByte(wDistance);
param[n++] = CM730::GetHighByte(wDistance);
}
cm730.SyncWrite(RX28M::P_GOAL_POSITION_L, 5, JointData::NUMBER_OF_JOINTS - 1, param);
Walking module disables parts of the head. MotionManager enables them.
Walking::GetInstance()->m_Joint.SetEnableHeadOnly(false);
MotionManager::GetInstance()->SetEnable(true);
Head tracking and ball following loop.
tracker.Process(LinuxCamera::GetInstance()->fbuffer->m_HSVFrame);
follower.Process(tracker.ball_position);
Result
Ball is tracked by head tracking, Walking towards the ball via walking module.
Tutorial Procedure
NOTE : Before you begin, ensure that DARwIn-OP is in a stable kneeling position. During this tutorial torque from all actuators will be released.
Press the “RESET” button and ensure you’ve perform the killall procedure (if necessary).
DARWIN-OP’s head LED must be in green and eye LED in blue before you begin.
Go to the directory /darwin/Linux/project/tutorial/ball_following
Look for the file “ball_following”. If not type make and the compiler will autogenerate ball_following.
Execute the walking control tutorial by typing ./ball_following.
The following message will appear on screen and DARWIN-OP will stand up from its kneeling position.

- DARWIN-OP’s head LED will change from green to amber.
- Place the ball (default red) in front of DARWIN-OP.
- Press the “ENTER” key to continue

- DARWIN-OP will walk towards the ball, but will not perform the kick.
- Watch the display as DARWIN-OP walks towards the ball but halts when is ready to kick.
- The line following “Start to press ENTER!” is DARWIN-OP surrent status. This line changes with DARWIN-OP’s motion. “[KICK] Right STOP” means that DARWIN-OP is ready to kick the ball with its right foot but has halted.
- Move the ball a little and DARWIN-OP will resume walking until is gets close enough ready to kick.

You may also change the ball color DArwIn-OP tracks by opening our web browser.
From your computer open a web browser (Firefox recommended, do not use Chrome due to memory leak) and type http://192.168.123.1:8080 on the address bar.
the IP address 192.168.123.1 is the default IP address and assuming you’ve established a wired LAN connection with DARWIN-OP.
To end the tutorial hold the “CONTROL” key and press the C key.
Press the “RESET” button on DARWIN-OP.
Close your web browser.
You may view the changes you’ve made by viewing the config.ini file from the current working directory (/darwin/Linux/project/tutorial/ball_following).
Action Control
Main classes for the tutorial
- Action
Action script file consisting of page number and MP3 file path. The OS reads the script file then executes the action and mp3 file playback (based from the script). (LinuxActionScript class). MotionModule’s action is processed by Action class. MotionManager Timer is synchronizes with the action’s process.
Source code review
Action loads the saved file.
Action::GetInstance()->LoadFile(MOTION_FILE_PATH);
CM730 class creates action’s play, MotionManager initializes and registers Action class.
LinuxCM730 linux_cm730("/dev/ttyUSB0");
CM730 cm730(&linux_cm730);
if(MotionManager::GetInstance()->Initialize(&cm730) == false)
{
  printf("Fail to initialize Motion Manager!\n");
  return 0;
}
MotionManager::GetInstance()->AddModule((MotionModule*)Action::GetInstance());
LinuxMotionTimer is initialized and MotionManager is enabled.
LinuxMotionTimer::Initialize(MotionManager::GetInstance());
MotionManager::GetInstance()->SetEnable(true);
Init pose(page 1) is initilalized and waits until action is complete.
Action::GetInstance()->Start(1);
while(Action::GetInstance()->IsRunning()) usleep(8*1000);
LinuxActionScript class passes and initializes the script file, then waits for the execution and completion from the script.
LinuxActionScript::ScriptStart("script.asc");
while(LinuxActionScript::m_is_running == 1) sleep(10);
Result
Execution of the pre-scripted sequence action and mp3 playback from the script file.
Tutorial Procedure
NOTE : Before you begin, ensure that DARwIn-OP is in a stable kneeling position. During this tutorial torque from all actuators will be released.
Press the “RESET” button and ensure you’ve perform the killall procedure (if necessary).
DARWIN-OP’s head LED must be in green and eye LED in blue before you begin.
Go to the directory /darwin/Linux/project/tutorial/action_script
Look for the file “action_script”. If not type make and the compiler will autogenerate action_script.
Execute the tutorial by typing ./action_script.
Once running the tutorial you will see the following

- Follow the instructions by pressing the “ENTER” key.
- DARWIN-OP stands up.
- The head LED goes from green to amber.
- DARWIN-OP performs Interactive Motion Mode once.
- The script outputs the action page and sound mp3 file on screen sequentially.
- The order goes as follows:
- Thank You
- Introduction
- WOW!
- Sit down
- Stand up
- Clap please!
- OOPS!
- Bye bye!
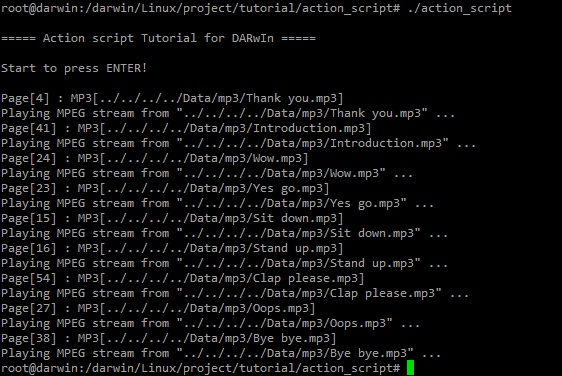
- Once DARWIN-OP finishes Interactive Motion Mode the tutorial ends automatically.
- DARWIN-OP’s head LED returns to green, but its body remains in standing position.
Grab DARWIN-OP’s handle.
Press the “RESET” button on DARWIN-OP to release torque from all actuators.
Carefully place DARWIN-OP in kneeling position.
FSR
Main classes used on the tutorial
- LinuxCM730 : Inherited class from PlatformCM730 for the Linux platform. Use this class to control a usb-to-serial port file resource.
- CM730 : generates Read / Write packet, PlatformCM730 class inherited from the CM-730. Results sent to packet processing class.
- mjpg_streamer : compresses YUV image to jpeg. The web server streaming class allows view and control on a web browser page via command.
Source code review
Construct LinuxCM730 and CM730 class
LinuxCM730 linux_cm730(U2D_DEV_NAME);
CM730 cm730(&linux_cm730);
Call connect() function to open port and turn on DYNAMIXEL power.
if(MotionManager::GetInstance()->Initialize(&cm730) == false)
{
  printf("Fail to initialize Motion Manager!\n");
  return 0;
}
MotionManager head tracking registers head and walking modules, then timers are initialized.
Walking::GetInstance()->LoadINISettings(ini);
MotionManager::GetInstance()->AddModule((MotionModule*)Head::GetInstance());
MotionManager::GetInstance()->AddModule((MotionModule*)Walking::GetInstance());
LinuxMotionTimer *motion_timer = new LinuxMotionTimer(MotionManager::GetInstance());
motion_timer->Start();
Walking init captures poses.
int n = 0;
int param[JointData::NUMBER_OF_JOINTS * 5];
int wGoalPosition, wStartPosition, wDistance;

for(int id=JointData::ID_R_SHOULDER_PITCH; id<JointData::NUMBER_OF_JOINTS; id++)
{
  wStartPosition = MotionStatus::m_CurrentJoints.GetValue(id);
  wGoalPosition = Walking::GetInstance()->m_Joint.GetValue(id);
  if( wStartPosition > wGoalPosition )
    wDistance = wStartPosition - wGoalPosition;
  else
    wDistance = wGoalPosition - wStartPosition;

  wDistance >>= 2;
  if( wDistance < 8 )
    wDistance = 8;

  param[n++] = id;
  param[n++] = CM730::GetLowByte(wGoalPosition);
  param[n++] = CM730::GetHighByte(wGoalPosition);
  param[n++] = CM730::GetLowByte(wDistance);
  param[n++] = CM730::GetHighByte(wDistance);
}
cm730.SyncWrite(RX28M::P_GOAL_POSITION_L, 5, JointData::NUMBER_OF_JOINTS - 1, param);
Read & print FSR value
left_fsr_x = cm730.m_BulkReadData[FSR::ID_L_FSR].ReadByte(FSR::P_FSR_X);
left_fsr_y = cm730.m_BulkReadData[FSR::ID_L_FSR].ReadByte(FSR::P_FSR_Y);
printf(" LX:%3d", MAX_FSR_VALUE-left_fsr_x);
printf(" LY:%3d", MAX_FSR_VALUE-left_fsr_y);
...
right_fsr_x = cm730.m_BulkReadData[FSR::ID_R_FSR].ReadByte(FSR::P_FSR_X);
right_fsr_y = cm730.m_BulkReadData[FSR::ID_R_FSR].ReadByte(FSR::P_FSR_Y);
printf(" RX:%3d", right_fsr_x);
printf(" RY:%3d", right_fsr_y);
In cm730.m_BulkReadData the MakeBulkReadPacket() function from /darwin/Framework/src/CM730.cpp for reading FSR values.
if(Ping(FSR::ID_L_FSR, 0) == SUCCESS)
{
  m_BulkReadTxPacket[PARAMETER+3*number+1] = 10; // length
  m_BulkReadTxPacket[PARAMETER+3*number+2] = FSR::ID_L_FSR; // id
  m_BulkReadTxPacket[PARAMETER+3*number+3] = FSR::P_FSR1_L; // start address
  number++;
}

if(Ping(FSR::ID_R_FSR, 0) == SUCCESS)
{
  m_BulkReadTxPacket[PARAMETER+3*number+1] = 10; // length
  m_BulkReadTxPacket[PARAMETER+3*number+2] = FSR::ID_R_FSR; // id
  m_BulkReadTxPacket[PARAMETER+3*number+3] = FSR::P_FSR1_L; // start address
  number++;
}
The weight from both feet shown with each feet showing its weight centered (red “+” sign).
int r_position_x = (98*(MAX_FSR_VALUE-right_fsr_x)/MAX_FSR_VALUE) + 24;
int r_position_y = (160*(MAX_FSR_VALUE-right_fsr_y)/MAX_FSR_VALUE) + 40;
int l_position_x = (98*left_fsr_x/MAX_FSR_VALUE) + 198;
int l_position_y = (160*left_fsr_y/MAX_FSR_VALUE) + 40;

memcpy(img_send->m_ImageData, img_position->m_ImageData, LinuxCamera::GetInstance()->fbuffer->m_RGBFrame->m_ImageSize);
if(left_fsr_x != 255 && left_fsr_y != 255)
draw_target(img_send, l_position_x, l_position_y, 255, 0, 0);
if(right_fsr_x != 255 && right_fsr_y != 255)
draw_target(img_send, r_position_x, r_position_y, 255, 0, 0);

if(left_fsr_x != 255 && left_fsr_y != 255 && right_fsr_x != 255 && right_fsr_y != 255)
draw_target(img_send, (l_position_x+r_position_x)/2, (l_position_y+r_position_y)/2, 0, 0, 255);

streamer->send_image(img_send);
Result

- LX : Left foot center point of the X-axis force
- LY : Left foot center point of the Y-axis force
- RX : Right foot center point of the X-axis force
- RY : Right foot center point of the Y-axis force
Connect to DARWIN-OP via IP address and port 8080.
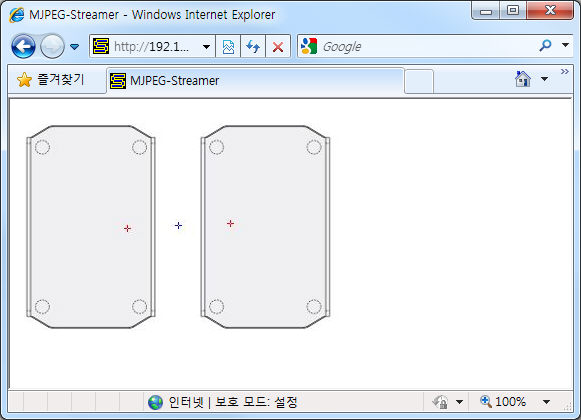
the red cross represent the weight centered on each foot; while the blue cross for both feet combined. DARWIN-OP can be aimed at several directions LX, LY, RX, RY. These values are modifiable. Press the space bar to goggle walking on and off.
Tutorial Procedure
NOTE : Before you begin, ensure that DARwIn-OP is in a stable kneeling position. During this tutorial torque from all actuators will be released.
Press the “RESET” button and ensure you’ve perform the killall procedure (if necessary).
DARWIN-OP’s head LED must be in green and eye LED in blue before you begin.
Go to the directory /darwin/Linux/project/tutorial/fsr
Look for the file “fsr”. If not type make and the compiler will autogenerate fsr.
Execute the fsr by typing ./fsr.
While running the fsr program yo may view the results as described above.
To end the tutorial hold the “CONTROL” key and press the C key. Afterwards press the “RESET” button from DARWIN-OP.
The head LED returns to blue and eye LED to green.
Tools
Tools, such as action editor, walking tuner, etc. can be found at /darwin/Linux/project
If you wish to use the tools is recommended that you connect to DARWIN-OP via SSH. Please go to “A. Ready” for example on how to connect.
Action Editor
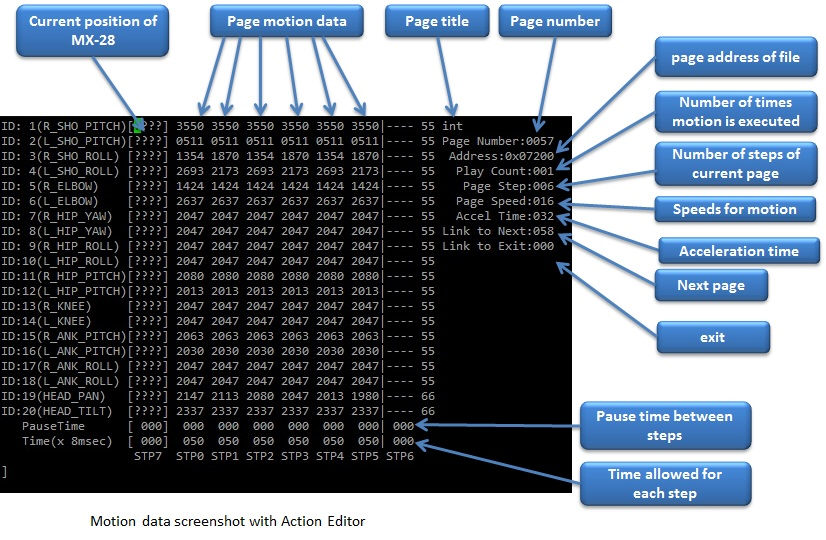
Action Editor allows the user to control and edit DARWIN-OP’s motions and poses via command line. This process is done by manipulating values of the MX-28 actuator(s).
For more information about the MX-28, please refer to MX-28 manual.
For more information about Actuator ID Map of DARWIN-OP, please refer to ID Map.
Before getting into Action Editor be aware of the motion data file residing in the source code.
Motion File
The motion file is a file that contains DARWIN-OP’s poses and motion data. The data is read and written as position of the MX-28; so manipulating/editing the file is a robot-low-level task. Since the motion file data is binaries file you cannot view its contents directly. You can view its contents with Action Editor or RoboPlus Motion.
ROBOTIS currently supplies 2 motion files with the source code. They are located in /darwin/Data directory. These are:
- ‘motion_1024.bin’ for MX-28 position sensor at 10-bit resolution (300 degrees available)
- ‘motion_4096.bin’ for MX-28 position sensor at 12-bit resolution (360 degrees available)
The motion file contains 256 pages. Each page can store up to 7 stages (or steps) of motion data. In the basic motion file provided not all pages are used. You may add you own motion if you like by making use of the empty pages.
- Page number: is the listed page number. If you want to create new motion poses you may use any empty page:
- Page title: we recommend you use a page title if you will make use on an empty page.
- Current position: This is the current position of the MX-28 for each ID. This data is represented by STP7 in Action Editor and Pose of Robot by Roboplus. Sometimes the position may read as ???? in Action Editor or OFF in Roboplus Motion. This means position of the MX-28 is not being read (and torque is off).
If you turn an MX-28 off you will not get current position reading until you turn it back on. You can turn off any or all MX-28 at will. This is very convenient to make robot poses rather than entering position values.
For example if you want to make a new robot pose simply turn any MX-28 off, make the robot pose, and turn the MX-28(s) back on at that robot pose. Once turning on you’ll get the pose values. - Steps or stages: each page can store up to 7 steps, from STP0 to STP6. However, some motions may require more than 7 stages to perform completely. Simply use multiple pages, and link them with Next. Note that STP7 in Roboplus is rightmost colum labeled Pose of the Robot.
- Next: is a link to indicate whether or not motion continues at a different page. To continue motions just list the page number where motion is to be continued. Number 0 indicates motion does not continue onto another page (default value). Linking page does not have to the in numerical order allowing you to link from one page to any other page.
- Play Count: is the number of times the motion of the page is to be played.
- Example: page 239 has a play count of 4 times then has a link to page 240. This means that motions on page 239 will be executed 4 times then move on to page 240 and continue with the motions on page 240.
- Exit: There may be times when a motion is stopped. If that’s the case the robot may be in an unstable position. Exit is much like Next, so Exit should be linked to a page where DARWIN-OP can return to a stable pose. Number 0 indicates no link to exit page linked (default value).
Tip when calling a motion requires multiple pages we strongly suggest that you call that motion from the starting page. For example “talk2” starts at page 41 and ends at page 47; this means you should call page 41 when calling “talk2.” Calling the subsequent pages for “talk2” (i.e. page 43) may cause the robot to perform abnormally.
It is strongly advised that you test your newly-created or edited motions for the sake of DARWIN-OP’s stability, by making small incremental changes in position, speed/time, and pause values.
Please use whichever program is most convenient for you. However, you may end up working with both. Always remember to save your work.
Contents and description of the motion file used for the demo programs.
Although there are many pages occupied with data. Not all pages are actually set in motion by DARWIN-OP. here is a list of the pages used along with a brief description of each page.
| page number | page title | brief description of page | number of pages | notes |
|---|---|---|---|---|
| 1 | init | DARWIN-OP initial standing pose | 1 | |
| 4 | hi | DARWIN-OP bowing greet | 1 | |
| 12 | rk | DARWIN-OP doing a right kick (from Soccer mode) | 1 | |
| 13 | lk | DARWIN-OP doing a left kick (from Soccer mode) | 1 | |
| 15 | sit down | DARWIN-OP on its knees | 1 | |
| 23 | d1 | DARWIN-OP “yes, go!” (from Interactive mode) | 1 | |
| 24 | d2 | DARWIN-OP “wow!” (from Iteractive mode) | 1 | |
| 27 | d3 | DARWIN-OP “ooops!” (from Interactive mode) | 1 | |
| 38 | d2 | DARWIN-OP “bye bye” (from Interactive mode) | 2 (38 and 39) | starting page |
| 41 | talk2 | DARWIN-OP “introduction” (partial, from Interactive mode) | 7 (41 through 47) | starting page |
| 54 | init | DARWIN-OP “clap please” (from Interactive mode) | 4 (54,55,56,58) | starting page, excludes page 57 |
Getting Started with Action Editor
WARNING : Before running Action Editor please verify angle resolution the actuators are currently loaded with.
For example, if the actuators resolution is 1024 then you can only work with motion file for 1024-resolution (motion_1024.bin)
Running another file may damage DARWIN-OP.
If you are unsure about which angle resolution the actuators are currently loaded with then refer to dxl_monitor.
To install the proper resolution for the actuator then refer to firmware_installer.
Action editor can be found at /darwin/Linux/project/action_editor
You can modify DARWIN-OP motion data as done in a terminal window.
- To read and write data go to the directory:
/darwin/Linux/project/action_editor - Make sure that there is an executable file named “action_editor”.
Please note that when running action editor the program will open the file motion_4096.bin by default.
The illustrations below are from the motion file ‘motion_1024.bin’ and ‘motion_4096.bin’.
Remember that motion files are located at/darwin/Data - If there is no said file then create it by typing make. The compiler will automatically generate the file.
- Run the program by typing ./action_editor. You will notice DARWIN-OP’s head LED changes from green to amber.
Reminder: remember the current angle resolution for the actuators. - Once in the program type help for further information
- From there you may follow the options given to you.
- To exit the program type exit.


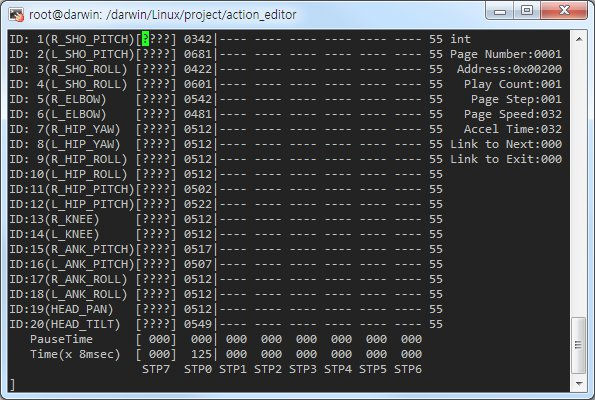
Please note the following:
- STP7 is the current value of the actuators. ???? means that torque has been released.
- PauseTime is the pause for motion playback for step STP[x].
- Time(x 8msec) is the time period for DARWIN-OP to complete step STP[x]. Each time unit account for 8ms of time.
After typing help the following list will appear.
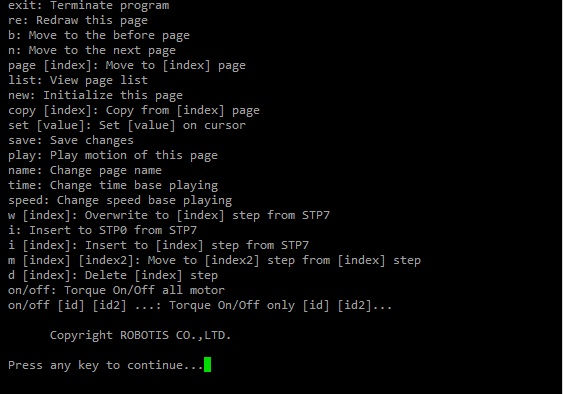
The menu options are very extensive so you may not be able to memorize every command. At any time you type help to invoke the options list.
- exit: exits the program. After exiting the program press the “RESET” button on DARwin-OP.
- re: refreshes the screen.
- b: moves to the previous page.
- n: moves to the next page.
- page [index]: moves to the [index] page. For example typing page 5 outputs data from page 5 on screen.
- list: outputs a list of pages.
- new: initializes current page by clearing all actuator position data.
- copy [index]: copies data from page [index] to current page. For example if you are on page 5 and want to copy page 9 then type copy 9.
- set [value]: sets position value on chosen actuator. For example If you want ID19 (head pan) to have a value of 512 then using the keyboard’s directional keys place the cursor on ID19 and type set 512.
- save: saves any changes you’ve made. the saved motion file (motion.bin can be found at /darwin/Data/
- play: plays motion(s) of current page.
-
name: changes the name of the current page. You can view the name of the page at the top right portion of the screen. For example, page 2 is titled ok; to change the name type name and press the “ENTER” key. name: will appear at the bottom of the screen. Input the desired name for the page, good for instance, and press the “ENTER” key again.
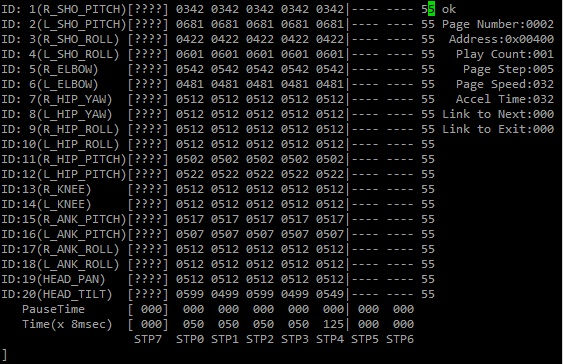
before changing the page name
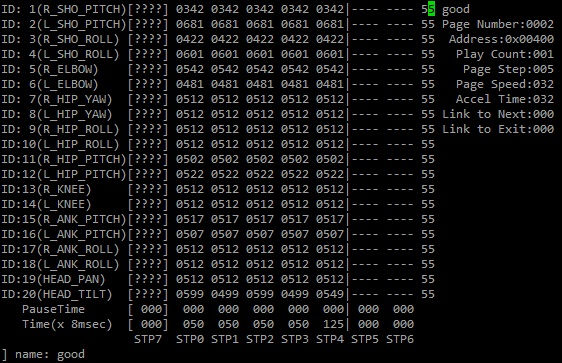
after changing the page name to good.
-
w [index]: overwrites STP[index] with data from STP7 (the very first column on the page). For example page 4 has data on 4 steps (4 columns excluding STP7). typing w 1 overwrites STP1 data with STP7 data.
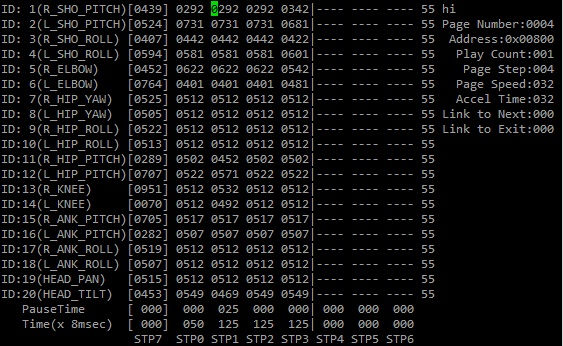
before typing w 1
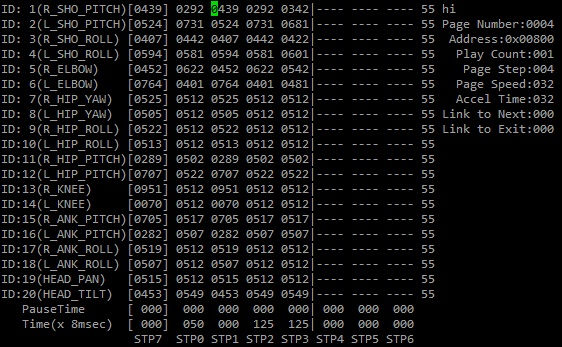
after applying w 1. Notice that STP1 data is identical to STP7.
- i: inserts data from STP7 to STP0. Moves data from STP[x] to STP[x + 1] if any.
- i [index]: inserts data from STP7 to STP[index]. Moves data from STP[index] to STP[index + 1] if any.
- m [index] [index2]: moves data from [index2] to [index].
- d [index]: deletes data from STP[index]. Moves data from STP[index] to STP[index - 1].
- on/off: turns on/off torque from all DYNAMIXEL’s.
-
on/off [index1] [index2] [index3] …: turns torque on/off from ID[index1] ID[index2] ID[index3]. For example off 20 releases torque from ID20. Notice that STP7 for ID20 will read [????]. Typing on 20 turns torque from ID20 on again and the screen outputs the current position data of ID20.
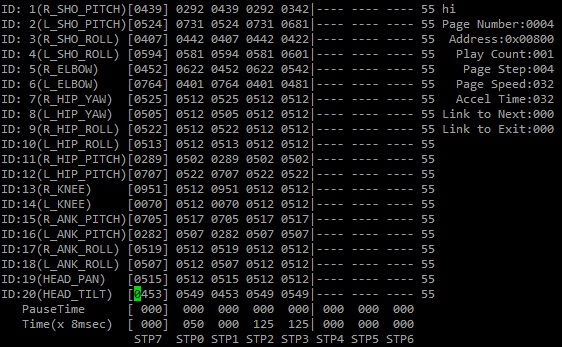
Before off 20 command. Value of ID20 is 549 (observe STP7).
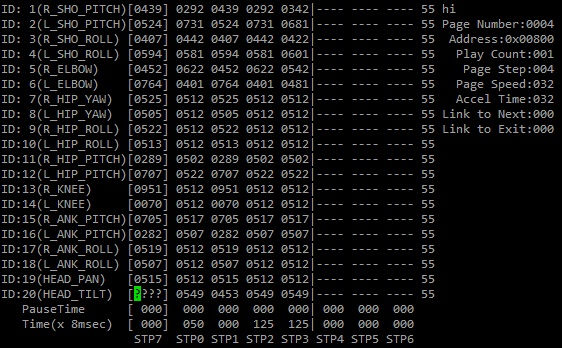
ID20 is off. Type re to refresh the screen. During this time you may manually move the head up and down.
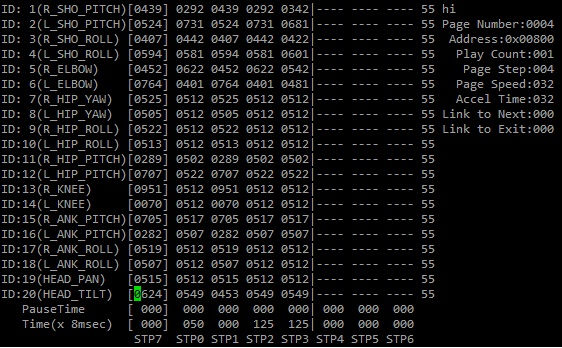
ID20 is on again after typing on 20. notice the value of ID20 is 624 and not 453 (the head has been tilted upwards a bit). Type re to refresh the screen.
Example motion editing with Action Editor
Let’s modify DARWIN-OP’s pose when kneeling. Let’s change the position of the left arm during kneeling. DYNAMIXEL’s for the left arm are ID 2, 4, and 6.
Tip Before you begin you may want to make a copy of “motion_4096.bin” file and save it elsewhere. If you don’t like with the changes you’ve made you can always revert back to the original data by overwriting the file.
- Run Action Editor
- Find the page where the kneeling (sit down) motion is by typing list
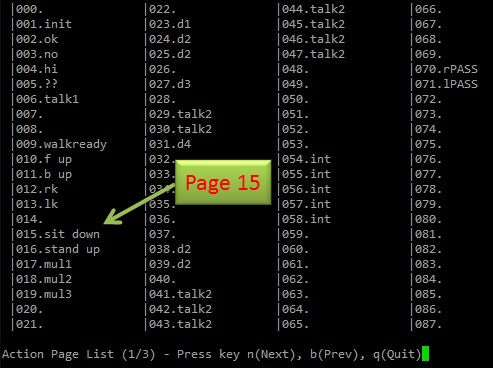
Notice that the motion data is on page 15.
- Exit the list and go tp page 15 by typing page 15.
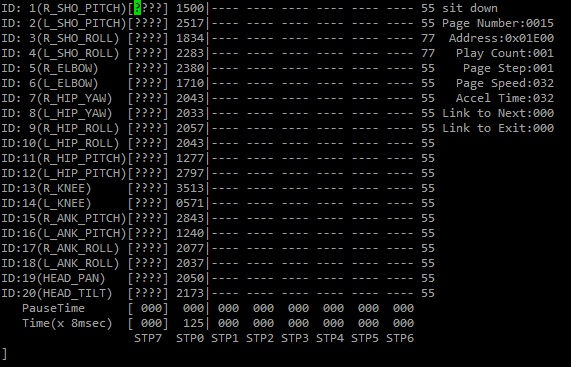
With the current data values from page 15 DARWIN-OP’s pose will look like this. Do so by typing play
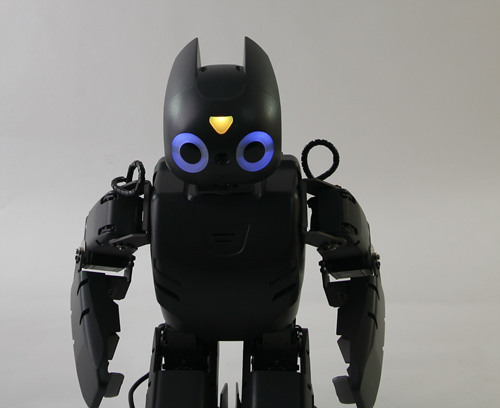
- Once on page 15 edit the values on ID 2, 4, 6. One of the easiest ways to edit values is to release the torque on DYNAMIXEL’s from the left arm.
- release the torque on ID 2, 4, and 6 by typing off 2 4 6
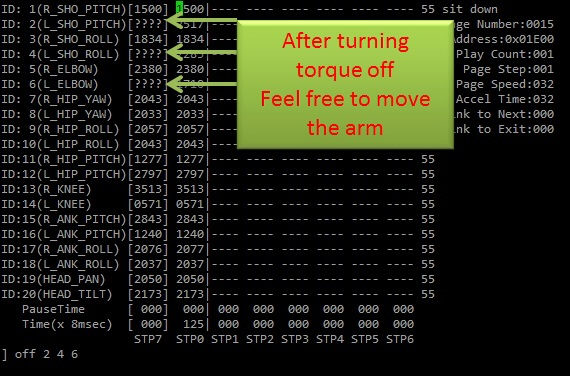
- after getting the desired pose turn torque on again by simple typing on. Afterwards match the values for ID2, ID4, ID6 on STP0 match those from STP7 (save your work).
- Type play and you you will notice the newly updated values for ID 2, 4, and 6
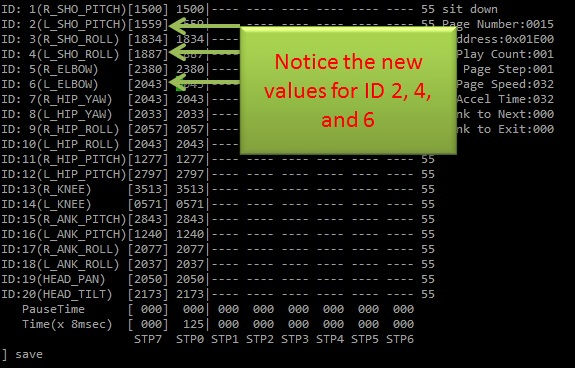
The values translate into DARWINOP pose as following
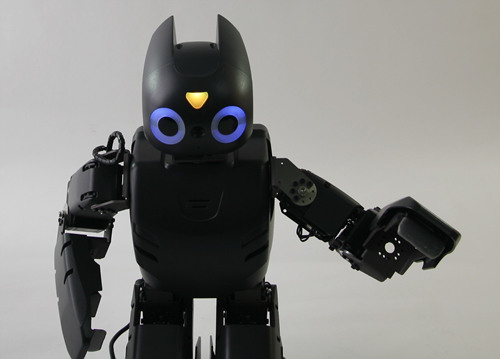
- Type save if you want this pose to be new sitting pose whenever DARWIN-OP is kneeling (sit down).
DYNAMIXEL Monitor
You may be able to reset the MX-28 actuators should you encounter an error in motion, actuator(s) is(are) malfunctioning, or perceive that actuator(s) is(are) malfunctioning.
Go to the directory /darwin/Linux/project/dxl_monitor
Make sure that there is an executable file named “dxl_monitor”.
If there is no said file then create it by typing make the compiler will automatically generate the file.
Run the program by typing ./dxl_monitor
Once in the program type help for information.
To exit the program type exit
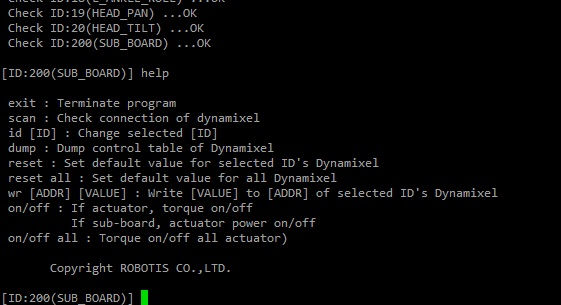
After inputting help the screen outputs the offered option.
- exit: exits the program. After exiting the program press the “RESET” button on DArwIn-OP.
- scan: outputs the current status of all DYNAMIXEL’s.
- id [ID]: go to DYNAMIXEL ID:[ID]. The default ID is ID:200 (CM-730 controller). For example, if you wish to go to ID20 (head tilt) then type id 20.

Now the current working ID is ID20.
- d: displays the current control table of the CM-730 and all DYNAMIXEL’s. Use this option if there is(are) any anomaly(anomalies) with DARWIN-OP.
- reset: defaults the value of current DYNAMIXEL. Use this option if the current actuator has an operating error or is malfunctioning.
- reset all: defaults the value of all DYNAMIXEL’s. Use this option if the current(s) or all Dymanixel(s) has(have) operating error(s) or is(are) malfunctioning.
- wr [ADDR] [VALUE]: writes value [VALUE] to address [ADDR] of current DYNAMIXEL. For further information on DYNAMIXEL addresses and values click here. For example, go to ID18 (left ankle roll) and type wr 25 1. This means that address 25 (LED) has been turned on (1). You will notice that the actuator on DARWIN-OP left foot LED is turned on. To turn the LED off type wr 25 0.

If all goes well you will see “Success to write!”
- on/off: turns torque on/off off current DYNAMIXEL.
- on/off all: turns torque on/off of all DYNAMIXEL’s.
To check the currently operating angle resolution perform the following:
- Select an eactuator by typeing id (ID number). For example id 3
- Type d to display the control table
- Look for CW_ANGLE_LIMIT, CCW_ANGLE_LIMIT, and GOAL_POSITON. if all of these values show 1023 or less, then resolution is 1024. if any of these values is between 0 and 4,095 then the resolution is 4096.
There may be an occasion that a given actuator may display values of 1023 or lower but you may not be sure whether the resolution is either 1024 or 4096. In such case make verifications on several actuators.
If all the verified values are 1023 or lower, then the resolution is 1024.
If any of the values display larger than 1023 then the resolution is 4096. - ALL DYNAMIXEL actuators installed in DARWIN-OP are set to either 1024 or 4096 resolution. Some actuators being set at 1024 and others at 4096 is not allowed. in such case the demo program will not run.
- To ensure all DYNAMIXEL actuators installed in DARWIN-OP are at the same resolution please refer to the firmware installer procedure.
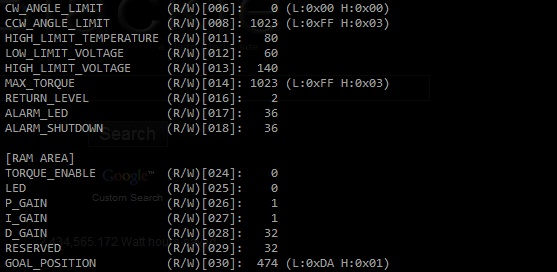
This illustration indicates a resolution of 1024.
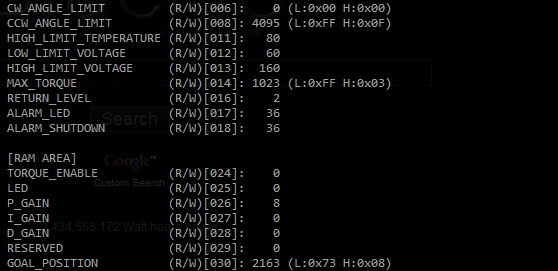
This illustration indicates a resolution of 4096.
RoboPlus
For DARWIN-OP support with RoboPlus Motion and DYNAMIXEL’s MX-28 at 4096-resolution you need version 1.0.23.0
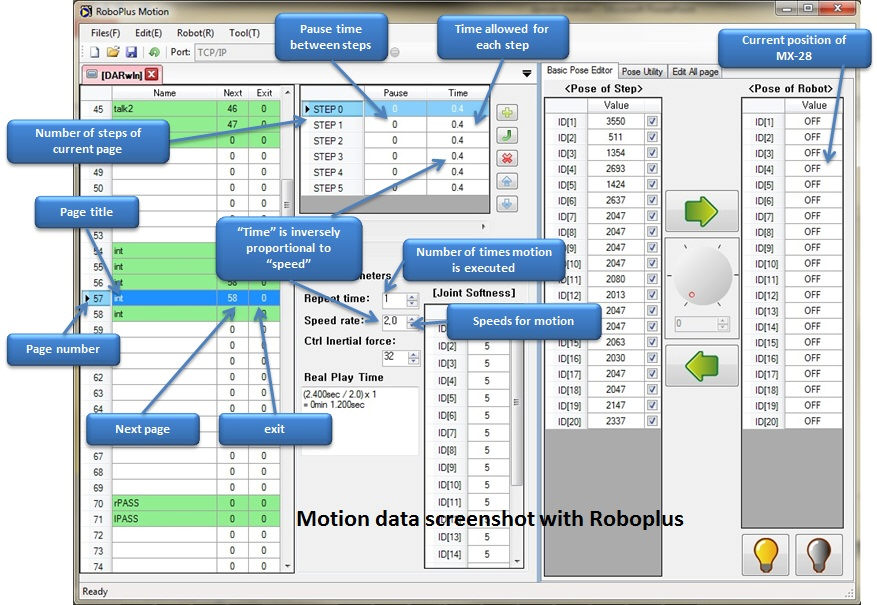
Warning
- RoboPlus Motion currently does not have a 3D model of DARWIN-OP. Please refrain from using the “Pose Utility” tab.
- Please refrain from using available Bioloid robots in the “Pose Utility” tab (i.e. Humanoid Type A), as none of these robots have matching kinematics nor dimensions with DARWIN-OP. Doing so it may damage the robot.
- Do not save any changes into a motion (.mtn) file [using the save as option]. The .mtn file used for Bioloid robot is incompatible with DARWIN-OP.
RoboPlus is a graphical alternative to Action Editor. You may use either program to edit DARWIN-OP’s motion. You may use Roboplus at one point and continue the same work with Action Editor and viceversa. In fact Roboplus Motion can perform the exact same functions of Action Editor.
Please refer to the motion file here.
You may find RoboPlus-related files at /darwin/Linux/project/roboplus
However, to properly execute this program DARWIN-OP must be connected to a computer via wired/wireless LAN with RoboPlus 1.0.23.0 or above.
NOTE : This section assumes that the actuators installed in DARWIN-OP are set at the resolution of 1024( MX-28 firmware version 26(0x1A) ). RoboPlus currently does not support MX-28 angle resolution of 4096 ( MX-28 firmware version 27(0x1B) or higher ).
This option allows you to edit DARWIN-OP’s motion file with RoboPlus Motion.
- Mac and Linux versions of RoboPlus are currently unavailable so this option will only work with Windows-based computers.
To modify motion data with RoboPlus perform the following:
- Go to
/darwin/Linux/project/roboplus - Type make to create an executable file if there is no executeble file
- Once executable file is complete type ./roboplus (the head LED will change from green to amber)
- From your PC start RoboPlus and select RoboPlus Motion
- On “Port” select TCP/IP and connect robot
- Once connected you may edit motion data.
- When finished disconnect DARWIN-OP from RoboPlus (Disconnected followed by Waiting messages will appear at the terminal window).
- You may close RoboPlus from your PC and abort the program by holding the “CONTROL” key and pressing the “C” key (once you abort the program the head LED will return to green).
The following illustrations will guide you to properly set the parameters for a successful connection with RoboPlus.
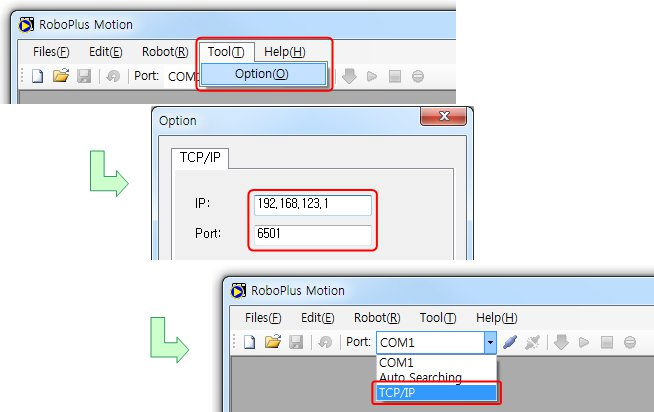
The illustrations on IP, under the TCP/IP tab, assumes you’ve establiched a connection with DARWIN-OP via wired LAN under default settings.
You may save any changes into a motion.bin file. The directory is /darwin/Data/motion_4096.bin
Example of motion editing with RoboPlus
Let’s change DARWIN-OP’s sitting pose further by changing the pose of the left arm. Let’s continue the work from Action Editor. Remember that you may continue any work done with Action Editor with Roboplus and viceversa.
Tips Before you begin you may want to make a copy of “motion_4096.bin” file and save it elsewhere. If you don’t like with the changes you’ve made you can always revert back to the original data by overwriting the file.
When interfacing with DARWIN-OP wirelessly make sure you:
- remember the IP address assigned by DHCP.
- have a strong wifi communications signal between your wireless access point/router and DARWIN-OP
- have a strong wifi communications signal between your wireless access point/router and your computer.
- keep devices that adversely affect communications signal between your access point/router and DARWIN-OP and computer (i.e. operating microwave ovens, active bluetooth devices).
- make sure you remember the IP address assigned by DHCP. If you don’t remember type ifconfig.

- Run Roboplus from DARWIN-OP2) After running Roboplus from DARWIN-OP run RoboPlus Motion from your PC
- In RoboPlus Motion click on “Tool(T)” and select “Option(O)”
- If necessary change the IP address to the one assigned by DHCP. Ensure that the port number is 6501
- On Port make sure to select TCP/IP as the port. Then click on the connect icon.
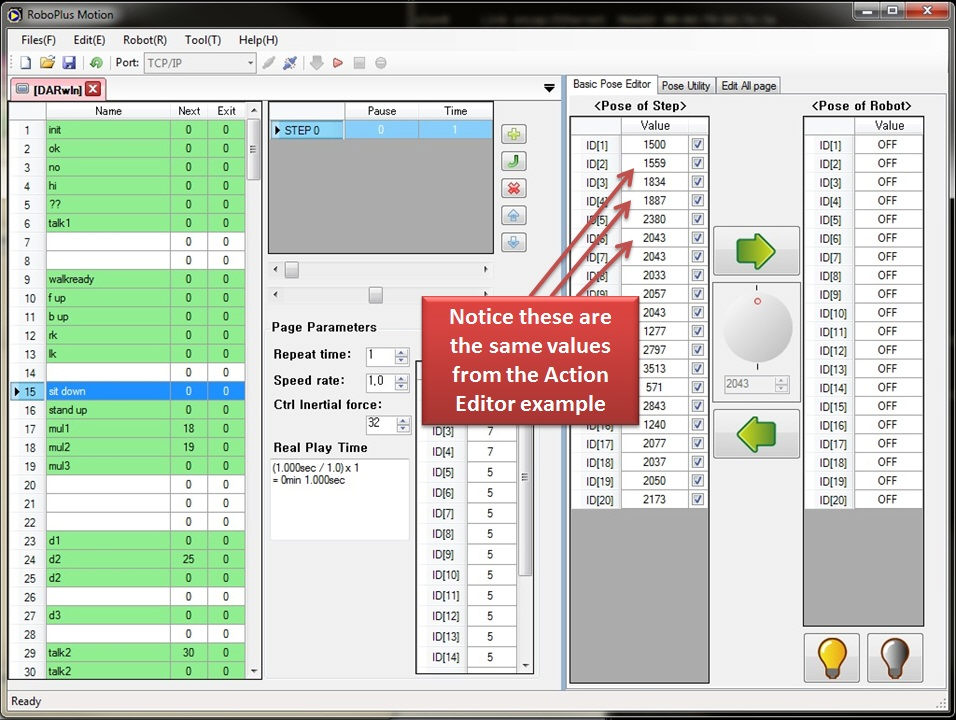
- Proceed with editing. For more information on RoboPlus Motion click here.
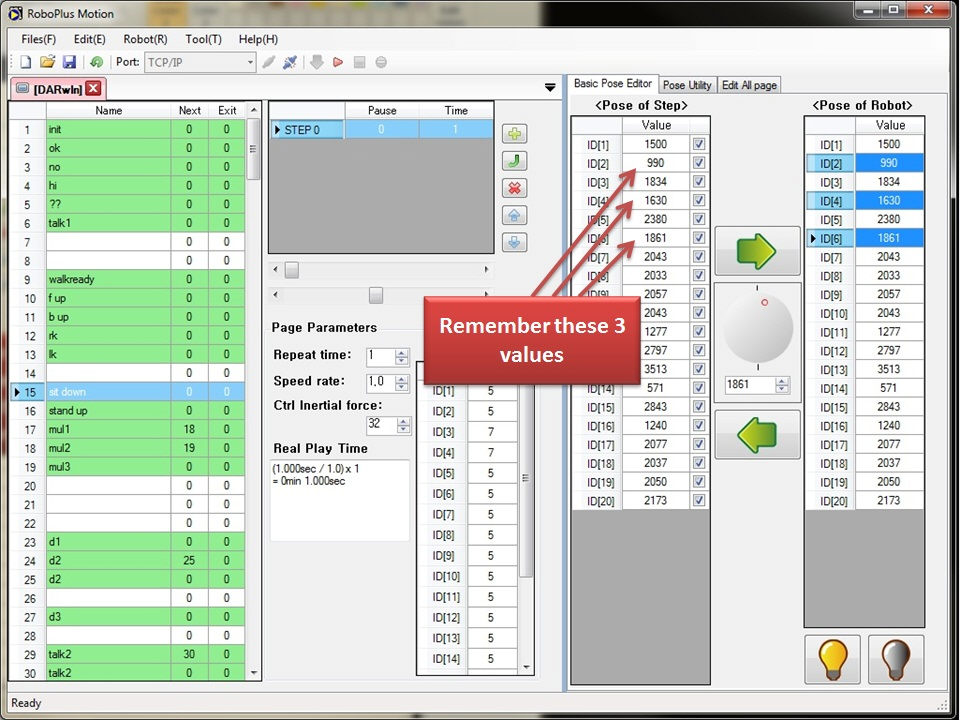
- To save changes click on the save icon or go to File(F) => Save(S). Do not select Save As(A), because the mtn file is not compatible with DARWIN-OP. When saving the changes the file is “motion_4096.bin” (located at /darwin/Data directory).
You may continue making changes with Action Editor.
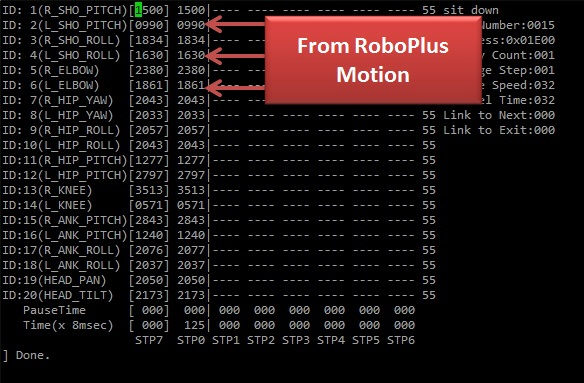
Walking Tuner
WARNING : Before you change any value(s) it is highly recommended that you become very familiar and proficient with DARWIN-OP. ROBOTIS is not responsible for any damages caused as result of changes in value due to lack or user expertise or user negligence.
Walk tuning files can be found at /darwin/Linux/project/walk_tuner
You may modify DARWIN-OP’s pace and other walking related items.
Before starting walking pace tuner ensure that DARWIN-OP is in the kneeling position.
Tip change value(s) in small increments. Large increments may cause DARWIN-OP to perform unexpectedly.
Tip Hold DARWIN-OP via the handle at all times during this program.
To tune walking parameters go to the directory /darwin/Linux/project/walk_tuner
- Make sure that there is an executable file named “walk_tuner”.
- If there is no said file then create it by typing make the compiler will automatically generate the file.
- Run the program by typing ./walk_tuner. You will notice DARWIN-OP’s head LED changes from green to amber.
- DARWIN-OP will stand up.
- Once in the program type help for information.
- From there you may follow the options given to you.
- To exit the program type exit
- You will see a message “Terminate Walking Tuner.” If so program has successfully ended.
- Hold DARWIN-OP so you prevent it from falling; press the “RESET” button to release torque from all actuators.
The following screen will appear after executing the program

Ensure you resize the window so that information displayed on screen is not truncated.
Command line-based
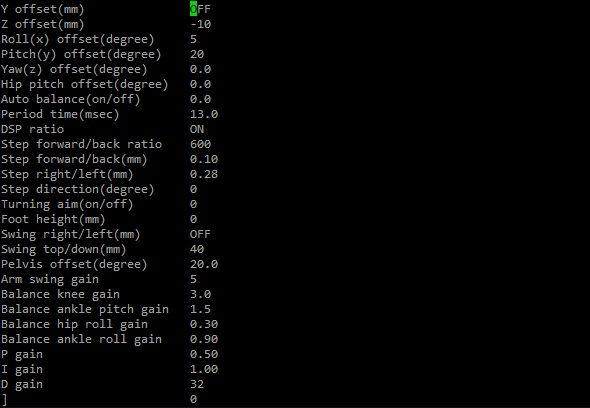
This screen is truncated (notice that Y offset (mm) has the OFF option instead of 5). To undo truncation just resize the window and type re to refresh the screen.
It is very important to have a proper size window for this program. Any misread in values due to improper window size by the user could result in undesired consequences.
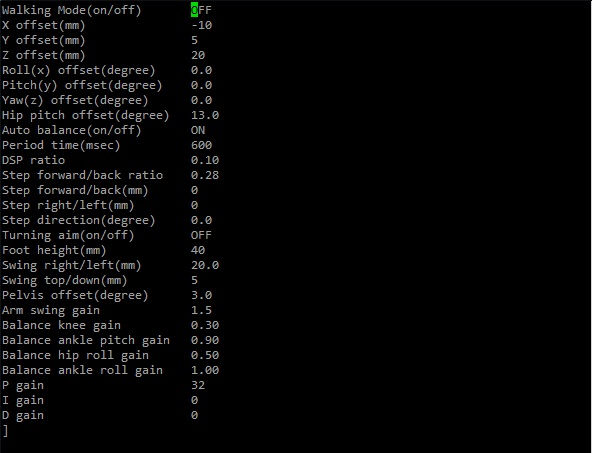
A properly resized window. notice that Y offset(mm) properly display the value of 5, whereas Walking Mode (on/off) displays OFF.
Type help to bring the help menu.

- exit: exits the program
- re: refreshes the screen
- save: saves any changes made ( /darwin/Data/config.ini ).
- mon: outputs and updates DARWIN-OP’s gyroscope and accelerometer values on screen

Pressing the space bar will reset the values enclose by ( and )
To observe changes in value for the gyroscope and accelerometer push DARWIN-OP gently and slightly forward, backwards, to the left, to the right; grab DARWIN-OP by the carrying handle and shake it very slightly.
To end and return to the starting screen press the “ESC” key.
The values from the screen are factory-default values. These values are arbitrary.
Use the up or down directional keys to scroll up or down.
Use the [ to decrease/switch values.
Use the ] key to increase/switch values.
Hold the shift key and press [ or ] to decrease or increase values by 10x.
-
Walking mode(on/off): Turns DARWIN-OP walking on and off.
-
X offset (mm): DARWIN-OP’s offset in the x-direction (front and back).
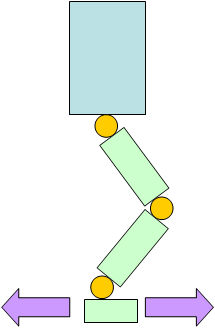
-
Y offset (mm): DARWIN-OP’s offset in the y-direction (left and right).
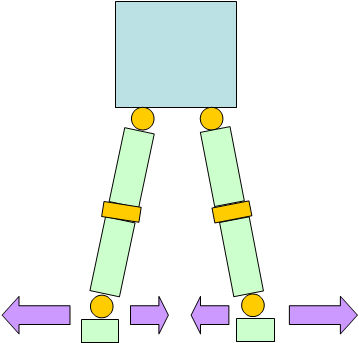
-
Z offset (mm): DARWIN-OP’s offset in the z-direction (up and down).

-
Roll(x) offset (degree): DARWIN-OP’s roll offset (x-coordinate).
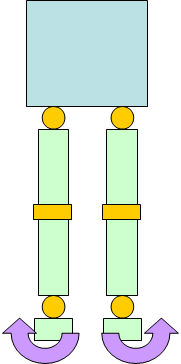
-
Pitch(y) offset (degree): DARWIN-OP’s pitch offset (y-coordinate).

-
Yaw(z) offset (degree): DARWIN-OP’s yaw offset (z-coordinate).
-
Hip pitch offset (motor): DARWIN-OP’s pitch offset (y-coordinate) at the hip level. Values are for DYNAMIXEL position values for ID11 and ID12.
- Auto balance (on/off): Turns DARWIN-OP balancing on and off.
-
Period time (msec): Time required for DArwIn-Op to complete two full steps (left and right foot)
-
DSP (Double Stance Period) ratio: time ratio of both feet on ground to one foot (either left or right) on ground.
-
Step forward/back (mm): Differential distance (x-direction) between DARWIN-OP’s left and right foot during walk.
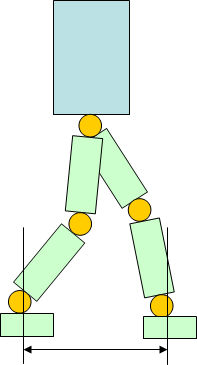
-
Step right/left (mm): Differential distance (y-direction) between DARWIN-OP’s left and right foot during walk.
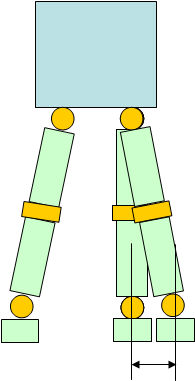
-
Step Direction (degree): Direction of DARWIN-OP’s stepping (towards left or right). The head also aims at the direction,
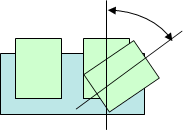
-
Turning aim on/off: DARWIN-OP aims at a point while stepping to the left or right.
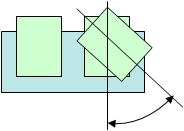
-
Foot height (mm): This is DARWIN-OP’s foot elevation during walk.
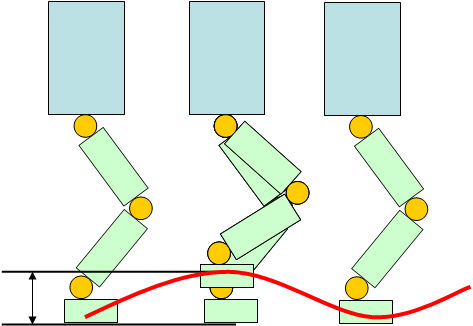
-
Swing right/left (mm): This is DARWIN-OP’s swing to either left or right during walk.
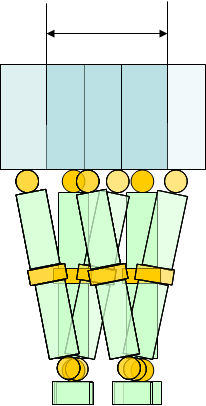
-
Swing top/down (mm): This is DARWIN-OP’s up and down body swing during walk.
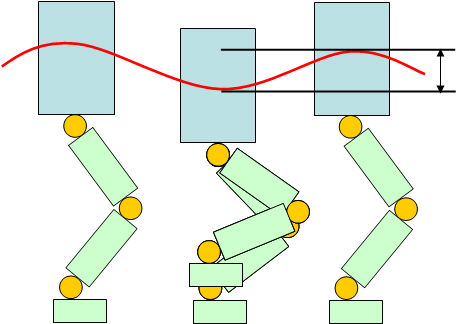
-
Pelvis offset (motor): DARWIN-OP’s roll offset (x-coordinate) at the pelvis level. Values are for DYNAMIXEL position values for ID9 and ID10.
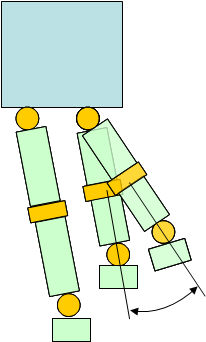
- Arm swing gain: Arm swing gain with respect to Step forward/back. If the left left moves forward then the right arm swings.
- Balance knee gain: Gain with respect to the gyroscope pitch.
- Balance ankle pitch gain: Gain with respect to the gyroscope pitch
- Balance hip roll gain: Gain with respect to the gyroscope roll.
-
Balance ankle roll gain: Gain with respect to the gyroscope roll.
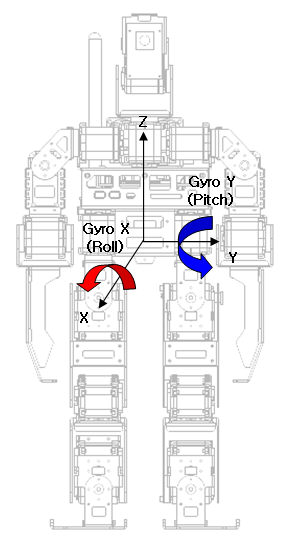
- P gain: Gain with respect to P (proportional) band for the MX28.
- I gain: Gain with respect to I (integral) action for the MX28.
- D gain: Gain with respect to D (differential) action MX28.
For more information on the MX series click here.
Web browser-based
One advantage of web browser-based walk tuner is the ability to tune DARWIN-OP’s walking with a conventional web browser. This option also allows you tune walking from a wifi capable mobile device and away from your desk.
Another advantage of web-based browser is that it offers the flexibility to tune walking parameters regardless of device, and operating system. You can tune walking with basically any device with wifi and an internet browser. You may start tuning from one device and continue tuning work with another.
You may perform walk tuner via wired or wireless LAN connection. However, with mobile devices you’ll need to be connected wirelessly.
Make sure to run Walk Tuner
Accessing walk tuner from a computer (wired/wireless)
- Ensure that Walk Tuner is running
- Open your web browser
- If you are interfacing with DARWIN-OP via wired LAN then type http://192.168.123.1:8080 on the address bar
- If you are interfacing with DARWIN-OP via wifi then type http://IP-address-from-DHCP:8080 on the address bar
Tip If you cannot remember the IP address provided by DHCP then on a new terminal window type ifconfig.
When interfacing with DARWIN-OP wirelessly make sure you:
- remember the IP address assigned by DHCP.
- have a strong wifi communications signal between your wireless access point/router and DARWIN-OP
- have a strong wifi communications signal between your wireless access point/router and your computer.
- keep devices that adversely affect communications signal between your access point/router and DARWIN-OP and computer (i.e. operating microwave ovens, active bluetooth devices).

- For this example, you need to type http://192.168.0.179:8080 on the address bar.
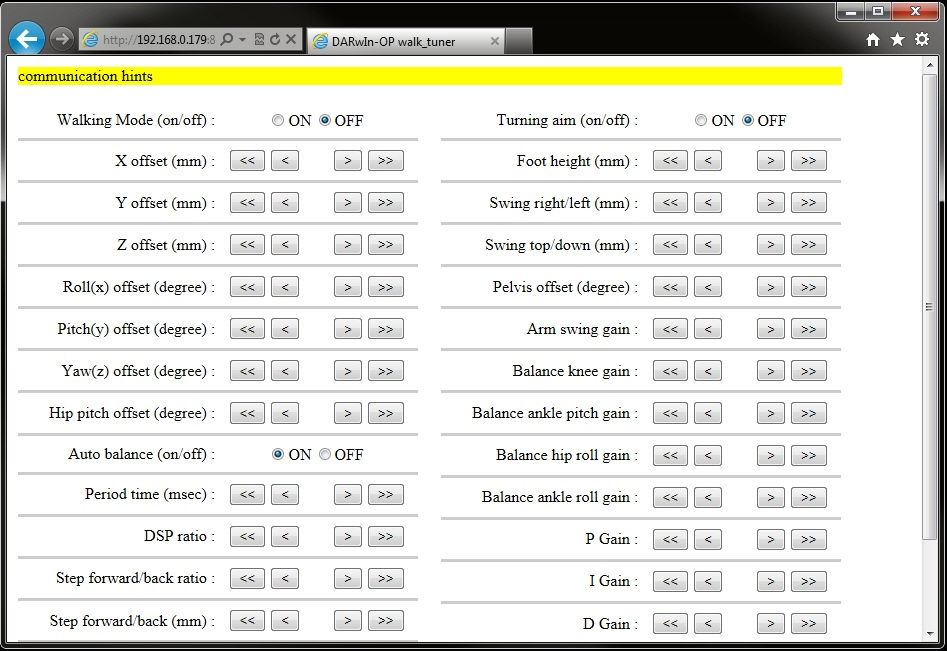
However, there may be times when some or all fields are empty
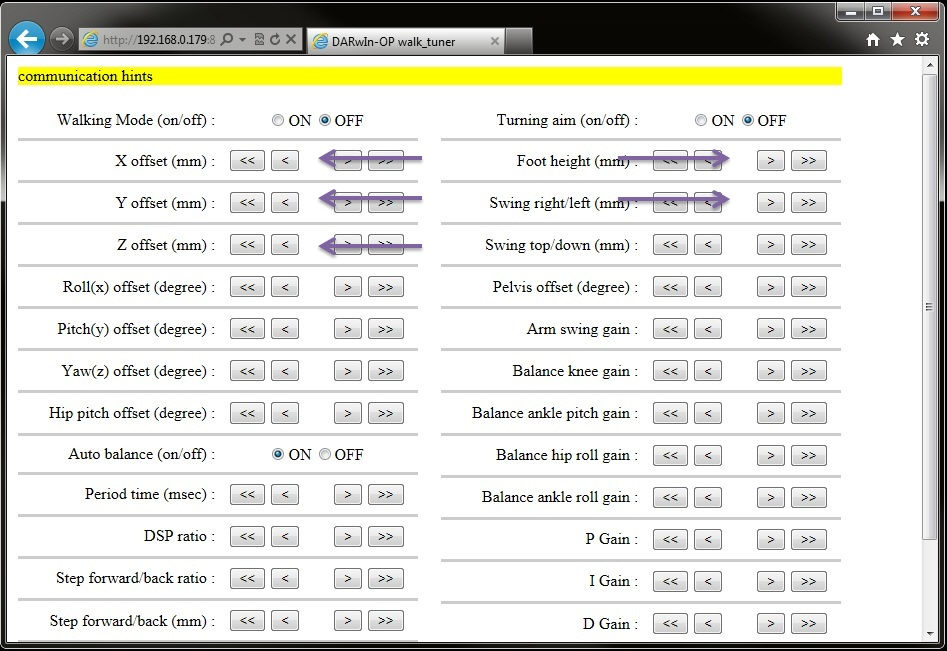
In any case simply double click on the empty area(s) and the initial value will appear.
- Clicking on the
<button decreases the value by 1 unit - Clicking on the
>button increases the value by 1 unit - Clicking on the
<<button decreases the value by 10 units - Clicking on the
>>button decreases the value by 10 units
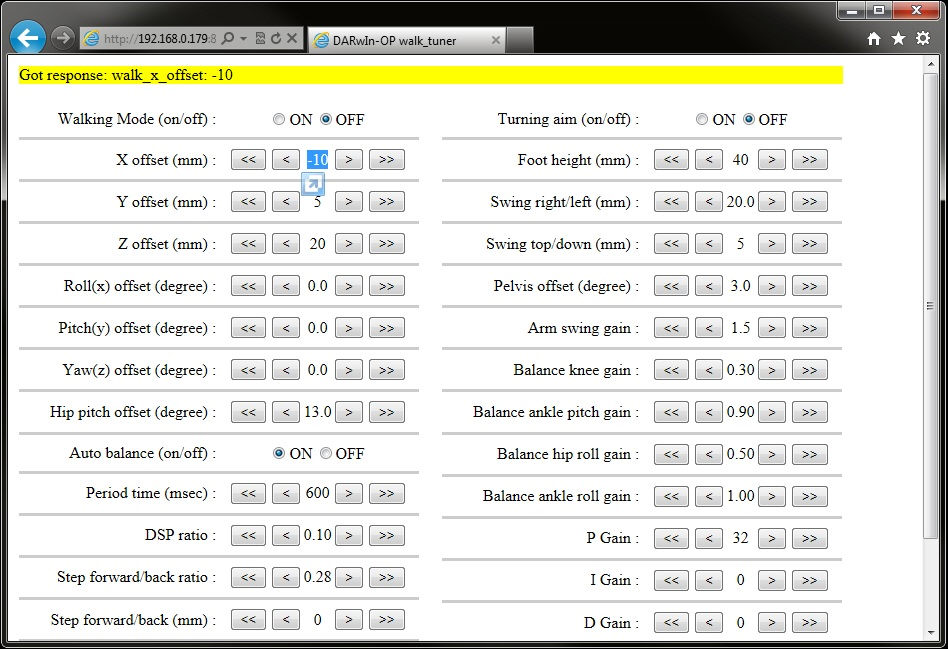
Accessing Walk Tuner from a mobile device or tablet (via wifi interface)
- Ensure that Walk Tuner is running 2, Ensure that you know the IP address provided by DHCP
Here are some sample screenshots
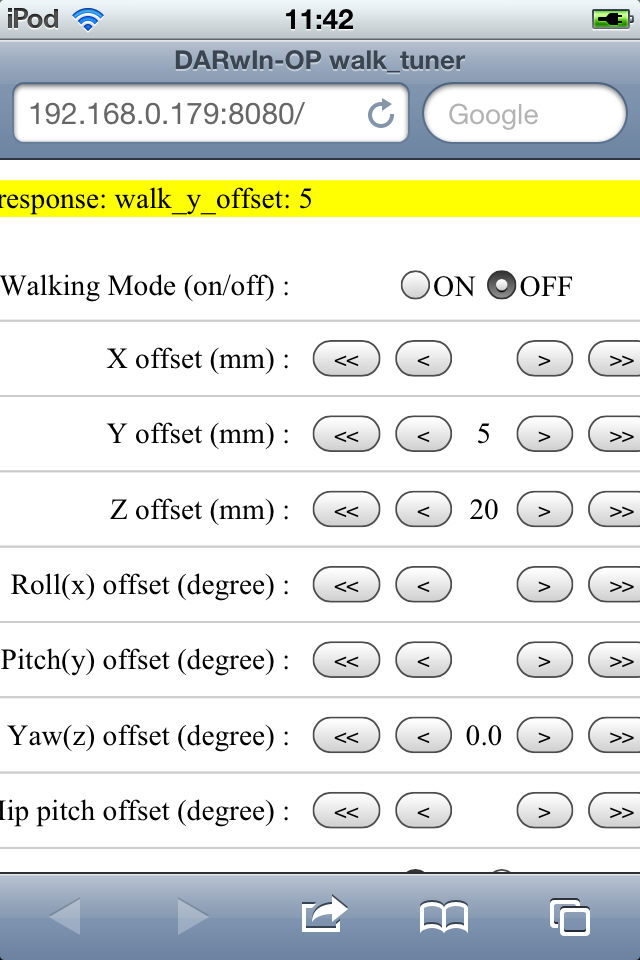
from an iOS device
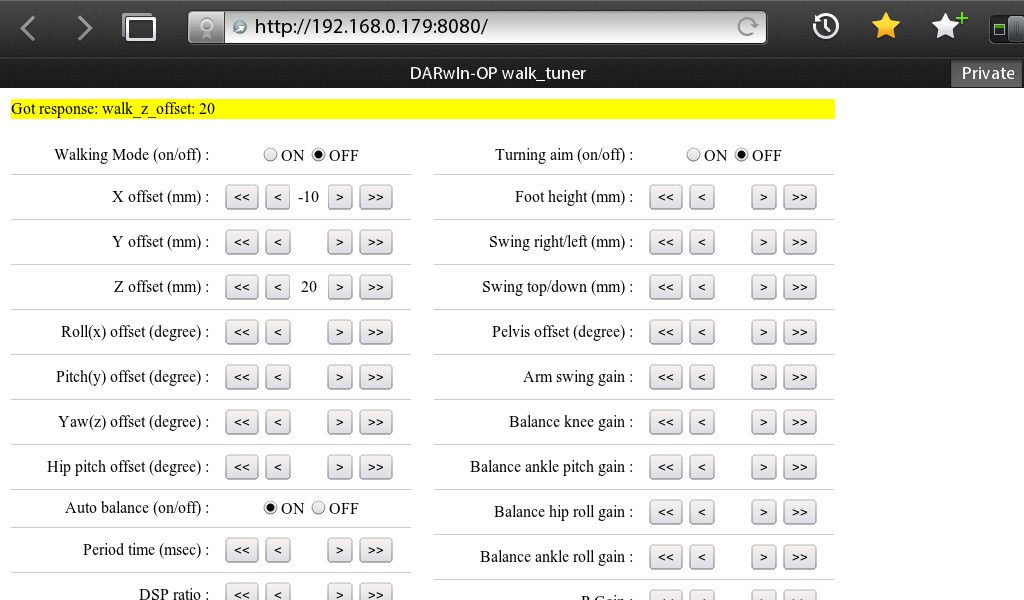
from a tablet (QNX)
You may also notice the same missing fields as in the computer-based web browser. However, double clicking/double tapping the screen will only magnify/decrease the display. In this case increase a value by 1 unit and decrease it again by 1 unit the browser will display the initial value.
Firmware Installer
Software version 1.2.0 or higher
Firmware installer can be found at /darwin/Linux/project/firmware_installer
To download firmware software into the sub controller or actuator at the directory /darwin/Linux/project/firmware_installer
- Make sure that there is an executable file named “firmware_installer”.
- Input -h or -help argument for usage.
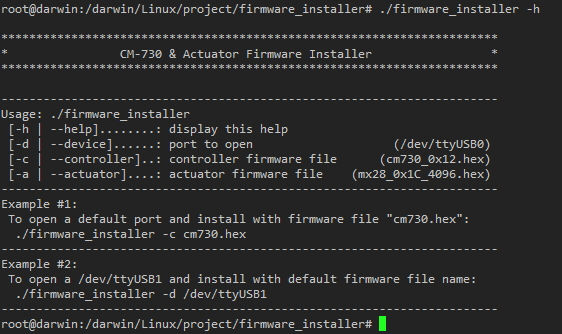
- If there is no said file then create it by typing make the compiler will automatically generate the file.
- Ensure that “cm730_0x12.hex” and “mx28_0x1C_4096.hex” are present.
- Run the program by typing ./firmware_installer **
By default the installer will choose cm730_0x12.hex and mx28_0x1C_4096.
To load mx28_0x1A_1024.hex then you must type **./firmware_installer -a mx28_0x1A_1024.hex
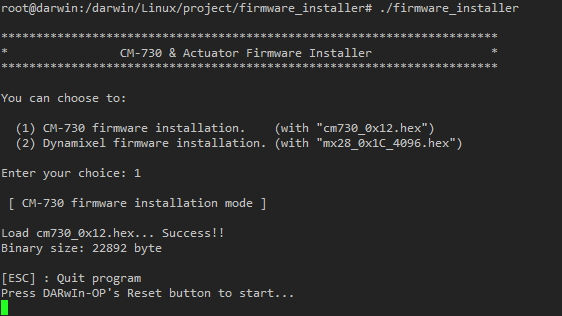
Install the CM-730 firmware by selecting the first option.
- Press the CM-730’s “RESET” button.
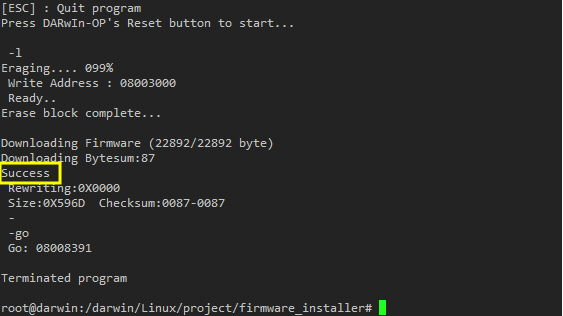
Ensure that download succeed.
- To install the firmware for the RX-28M actuators select the second option from firmware_installer.
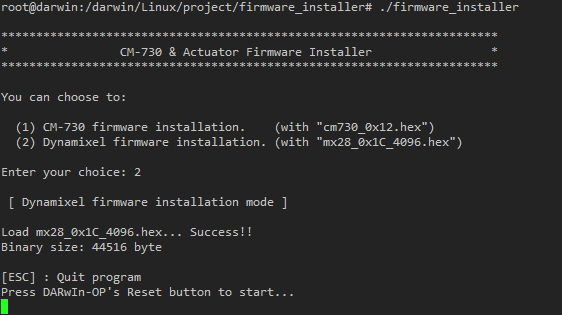
- Press the CM-730’s “RESET” button.
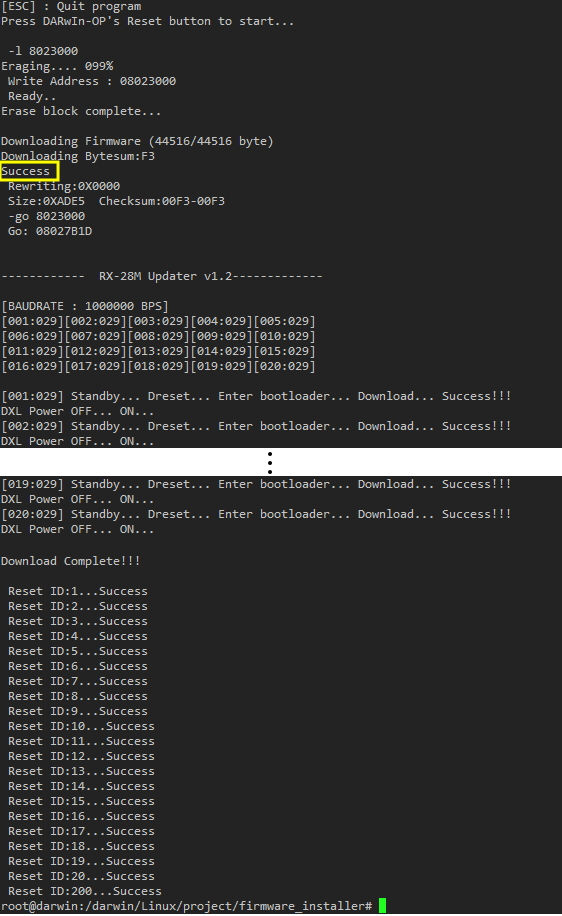
The installer automatically lists connected ID’s and installs the firmware of each ID individually. Afterwards verify success.
You may install your own firmware by typing
./firmware_installer -c YOUR_CM_FIRMWARE.hex -a YOUR_MX_FIRMWARE.hex
this process assumes that YOUR_CM_FIRMWARE.hex and YOUR_MX_FIRMWARE.hex are located at /darwin/Linux/project/firmware_installer/
If your firmware file is located elsewhere then you needs to specify its location by typing:
./firmware_installer -c /DIRECTORY/SUBDIRECTORY/.../.../YOUR_CM_FIRMWARE.hex -a /DIRECTORY/SUBDIRECTORY/.../.../YOUR_MX_FIRMWARE.hex.
Software version 1.1.0 or lower
Firmware installer can be found at /darwin/Linux/project/firmware_installer
To download firmware software into the sub controller or actuator at the directory /darwin/Linux/project/firmware_installer
- Make sure that there is an executable file named “firmware_installer”.
- Input -h or -help argument for usage.
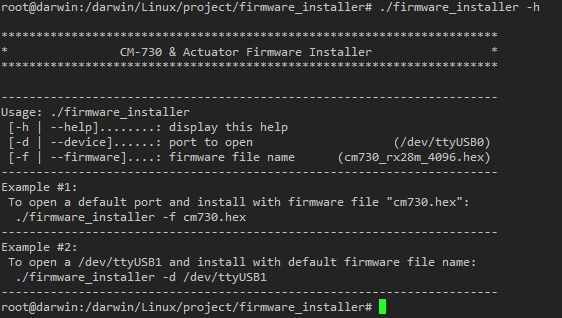
- If there is no said file then create it by typing make the compiler will automatically generate the file.
- Ensure that “cm730_rx28m_4096.hex” and “cm730_rx28m_1024.hex” are present.
- Run the program by typing ./firmware_installer ** By default the installer will choose cm730_4096.hex. To load cm730_1024.hex thenyou must type **./firmware_installer -f cm730_1024.hex
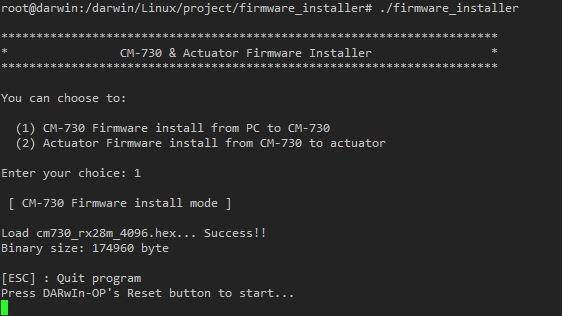
Install the CM-730 firmware by selecting the first option. This option also includes installation firmware for the MX-28 actuators. Please note that DYNAMIXEL firmware will only be installed into the controller.
- Press the CM-730’s “RESET” button.
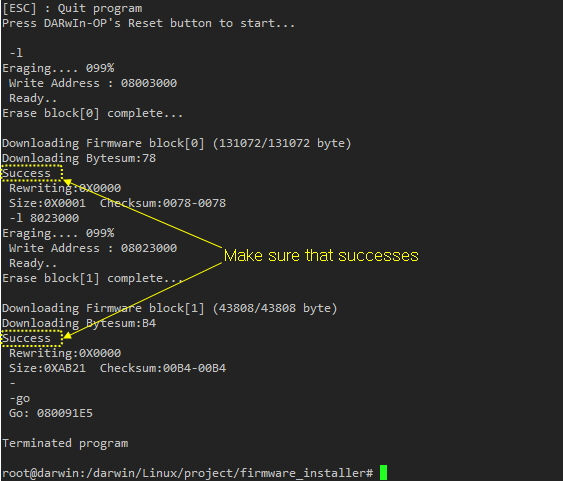
The installer will assign 2 blocks of 128KB/each for firmware download. Ensure that both blocks succeed.
- To install the firmware for the MX-28 actuators (from controller to actuators) select the second option from firmware_installer. Note that this option installs the firmware that is currently installed on the CM-730 sub controller. This process does not include any actuator firmware installed in the main controller (PC).
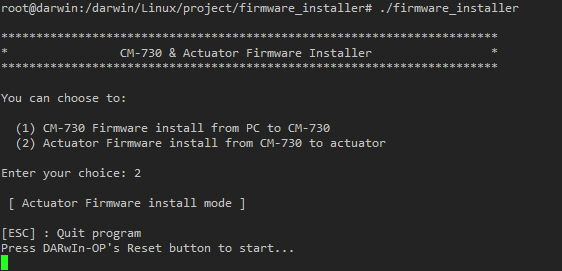
- Press the CM-730’s “RESET” button.
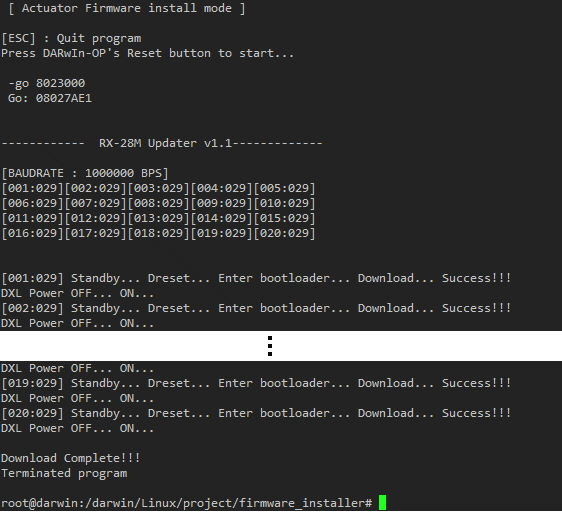
The installer automatically lists connected ID’s and installs the firmware of each ID individually. Afterwards verify success.
You may install your own firmware by typing
./firmware_installer -f YOUR_FIRMWARE.hex
This process assumes that YOUR_FIRMWARE.hex is located at /darwin/Linux/project/firmware_installer/
If your firmware file is located elsewhere then you needs to specify its location by typing:
./firmware_installer -f /DIRECTORY/SUBDIRECTYRY/.../.../YOUR_FIRMWARE.hex.
Offset Tuner
The purpose of offset tuner is to offset DARWIN-OP’s poses. Changes made in Offset Tuner will affect DARWIN-OP when running other programs (i.e. demo programs). This program is practical to make some changes on DARWIN-OP when performing under certain environmental conditions.
Warning
Before you change any value(s) it is highly recommended that you become very familiar and proficient with DARWIN-OP and the MX-28. Remember that changes made with Offset Tuner affects DARWIN-OP’s performance.
Some motions may need to be edited as a result of Offset Tuner. Use Action Editor to edit the motions (i.e. when trying to get up after falling).
Improper modifications with Offset Tuner may affect DARWIN-OP’s performance adversely.
ROBOTIS is not responsible for any damages caused as result of changes in value due to lack of user expertise or user negligence.
Offset tuning files can be found at /darwin/Linux/project/offset_tuner
Before starting walking pace tuner ensure that DARWIN-OP is in the kneeling position.
To tune walking parameters go to the directory /darwin/Linux/project/offset_tuner.
- Make sure that there is an executable file named
offset_tunerby typinglscommand in the terminal window. - If there is no such file, then create it by typing
make. The compiler will automatically generate the file. - Run the program by typing
./offset_tuner. You will notice DARWIN-OP’s head LED change from green to amber. - DARWIN-OP will stand up. Please be very cautious as DARWIN-OP can fall while standing up.
- Once in the program type
helpfor information. - From there you may follow the options given to you.
- To exit the program type
exit. - You may see a message “are you sure? (y/n)”. Press the
ykey to confirm. Press thenkey to cancel. This message will appear if you made changes but didn’t save them.
Offset tuner allows you to manipulate the MX-28 position values.
For more information about the MX-28, please refer to MX-28 manual.
For more information about Actuator ID Map of DARWIN-OP, please refer to ID Map.
Ensure that you have a properly sized window
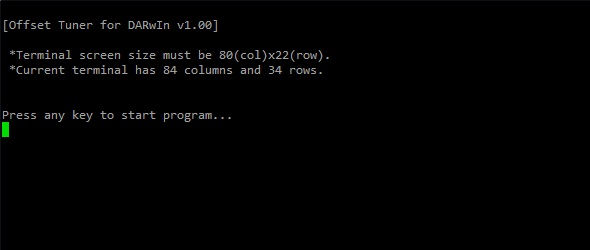
Afterwards the following window appears
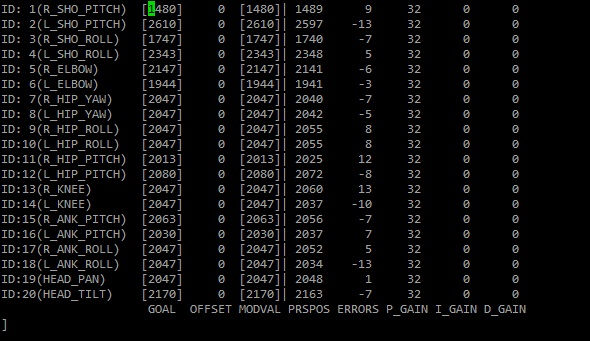
- GOAL: is the value set for DYNAMIXEL ID. For more information about Goal refer to dxl_monitor. If you modify this value MODVAL value will modify automatically. For example if you decrease ID 11 by 13 units then MODVAL from ID 11 will automatically decrease its value by 13 units. Changes made here will not be saved.
- OFFSET: is the value set for DYNAMIXEL offset. to change poses edit Offset value(s). This is the difference between MODVAL and GOAL. You may edit this value directly or via MODVAL. Changes made here can be saved
- MODVAL: This is the “new” goal position. This is the modified value. You may edit this value directly or via OFFSET. Changes made here can only be saved as OFFSET values
- PRSPOS: is current position of DYNAMIXEL ID. This PRSPOS may change after a screen refresh or running the program at a different time. This is the current position value.
- ERRORS: is the difference between PRSPOS and MODVAL.
- P_GAIN: is the value set for P (proportional) gain. You can modify the P gain value in this program but cannot save changes.
- I_GAIN: is the value set for I (Integral) gain. You can modify the P gain value in this program but cannot save changes.
- D_GAIN: is the value set for P (differential) gain. You can modify the P gain value in this program but cannot save changes.
type help and the following window appears
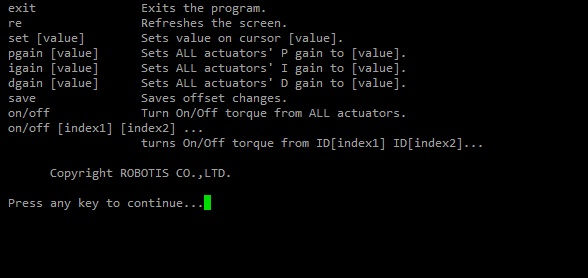
- exit: exits the program. After exiting the program press the “RESET” button on DARwin-OP.
- re: refreshes the screen.
- set [value]: sets position value on chosen actuator. You may set the offset on OFFSET of the new value in MODVAL. If change value in MODVAL OFFSET value will automatically change and viceversa. Use the directional arrows to select the value you wish to change.
- pgain [value]: sets the P (proportional) parameters on all DYNAMIXEL’s.
- igain [value]: sets the P (integral) parameters on all DYNAMIXEL’s.
- dgain [value]: sets the P (differential) parameters on all DYNAMIXEL’s.
- save: saves any changes you’ve made ( /darwin/Data/config.ini ). The config.ini file only contain changes made in OFFSET (either directly or via MODVAL).
- on/off: turns on/off torque from all DYNAMIXEL’s.
- on/off [index1] [index2] [index3] …: turns torque on/off from ID[index1] ID[index2]ID[index3]. For example if you type off 13 16 19 then torque from ID 13, 16, and 19 will be released.
- Pressing the
[key will decrease value by 1 unit. Holding theshift key + [will decrease value by 10 units. Use the directional arrows to select the value you wish to change. - Pressing the
]key will increase value by 1 unit. Holding theshift key + ]will increase value by 10 units. Use the directional arrows to select the value you wish to change.
Example with Offset Tuner
Let’s make some changes of the upper body so that DARWIN-OP appears in a more relaxed pose.
The ID’s involved in this change are 1, 2, 5, and 6.
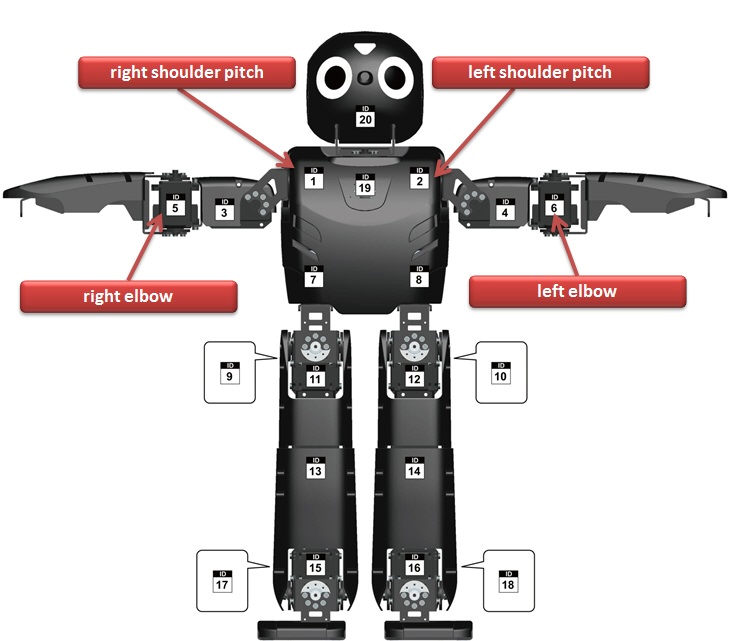
Once you run the program you will notice that DARWIN-OP remains in the standing pose.
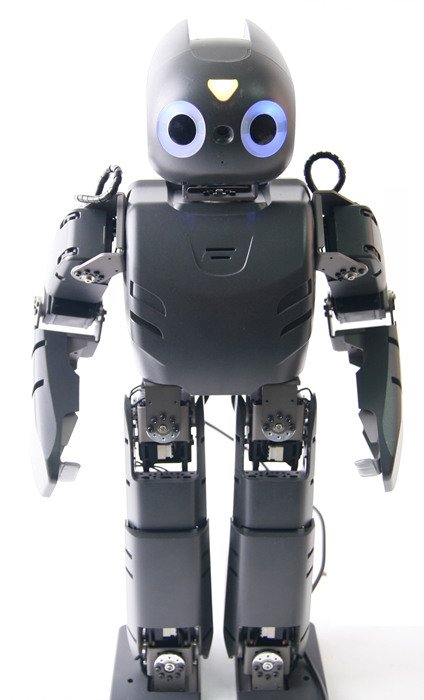
and the following screen provides information on the MX-28 at the current pose
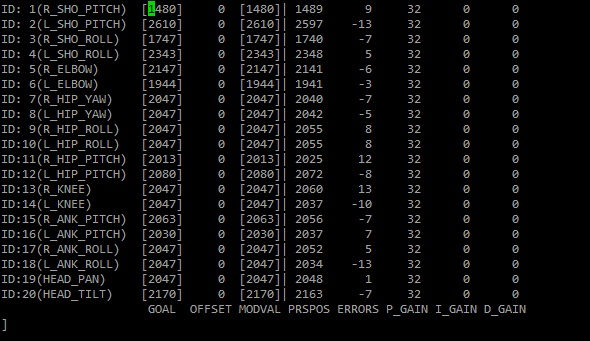
The current pose may not look as relaxed so let’s make some changes in the arm joints.
Use the directional keys to move the cursor over to the OFFSET column. Use the [ key to decrease (hold the shift key + [ key to decrease by 10 units at a time). Use the ] key to increase (hold the shift key + ] key to increase by 10 units at a time). Make the appropriate changes for ID’s 1, 2, 5, and 6.
You can visually see the changes of pose on DARWIN-OP as you increase/decrease the values.
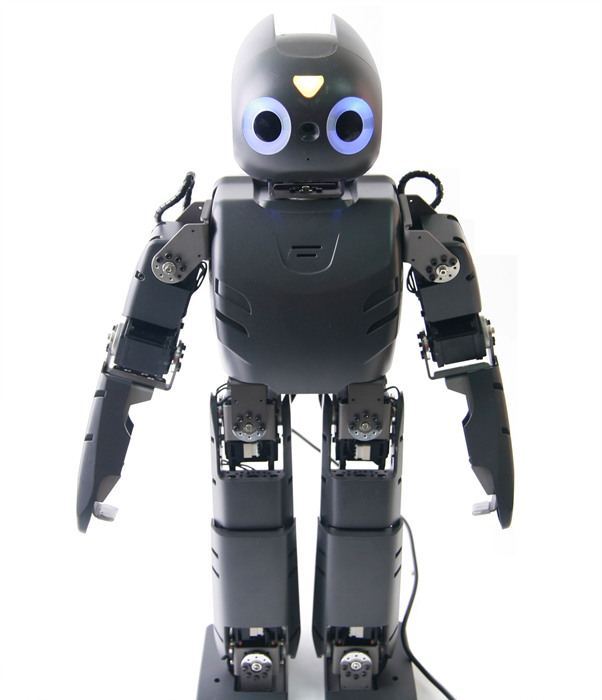
DARWIN-OP;s standing pose is now more relaxed.
The following screenshot is information on the MX-28 with the new pose
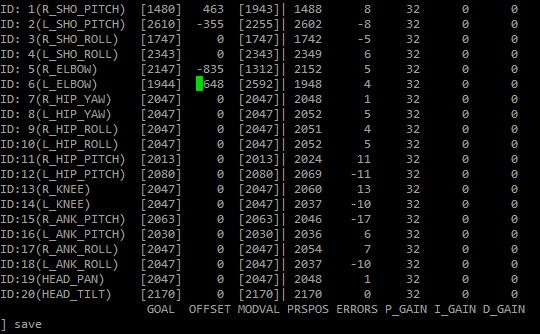
Notice that only OFFSET on ID’s 1, 2, 5, and 6 has been changed. During the changes if you think the errors are too large (like ERRORS of 8 for ID 1 and -8 for ID 2, then adjust the P I D gain values. Please keep in mind that changes in P I D gain values will not be saved.
Type save to save changes. to view the saved file go to /darwin/Data and read the “config.ini” file by typing cat config.ini
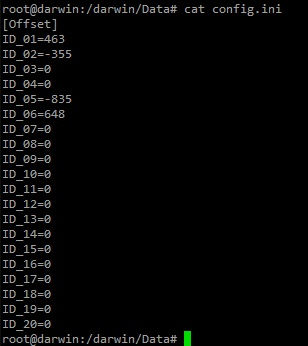
As you can see only OFFSET values are saved.
Since this is an offset tuner program any position data on ID’s 1, 2, 5, and 6 from the motion_4096.bin file will be offset by the amount edited. In other words any other program will be affected by the changes (i.e. the demo program).
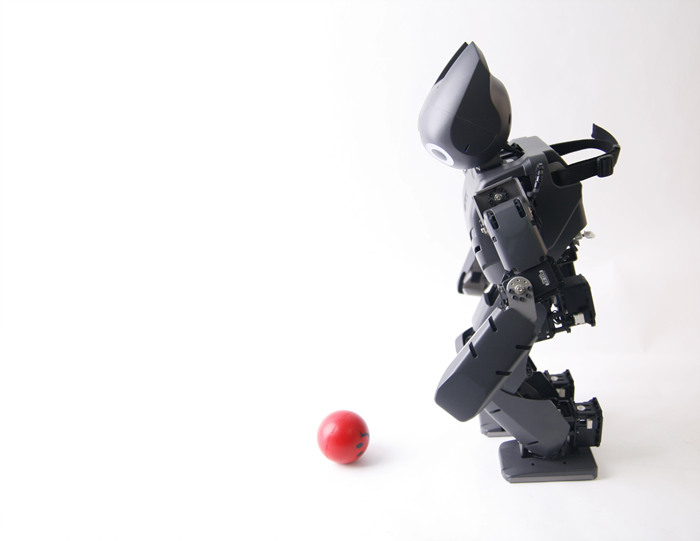
Notice the arms as DARWIN-OP pursues the ball. Compare this pose with an unedited version of the offset.
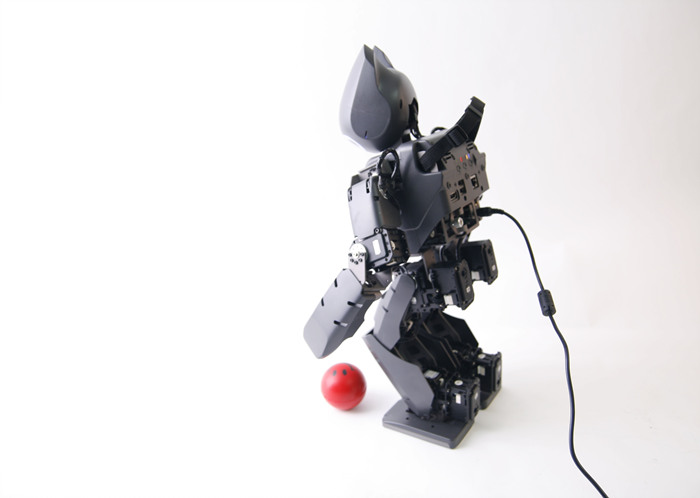
Another picture showing DARWIN-OP with the new arm pose.
Let’s compare 2 DARWIN-OP’s (left DARWIN-OP unchanged, right DARWIN-OP with the edited offset). Both DARWIN-OP running under Interactive Mode of the demo program synchronized.
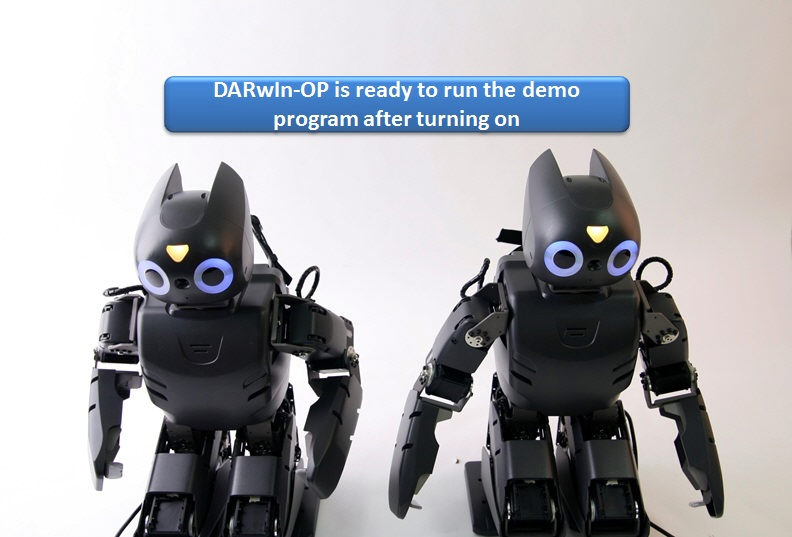
Notice how the changes take effect as soon as the demo program is loaded.
Select Interactive Mode on both DARwIn’s and press the Start button simultaneously.
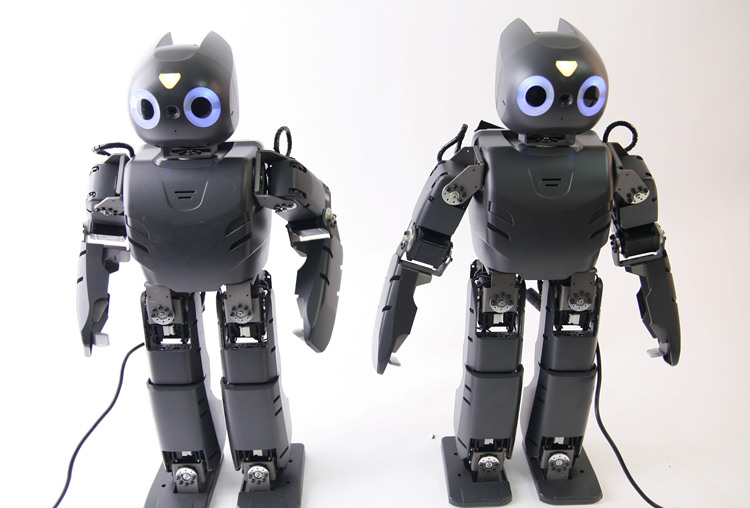
Both are about to say “thank you” (notice the arms from each DARwIn). The DARwIn on the right appears more relaxed.
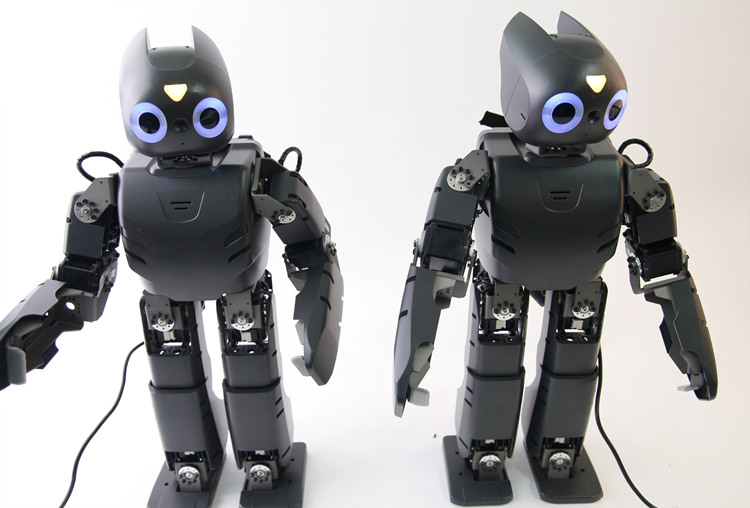
The arms and shoulders from DARwIn on the right are affected as a result of Offset Tuner.
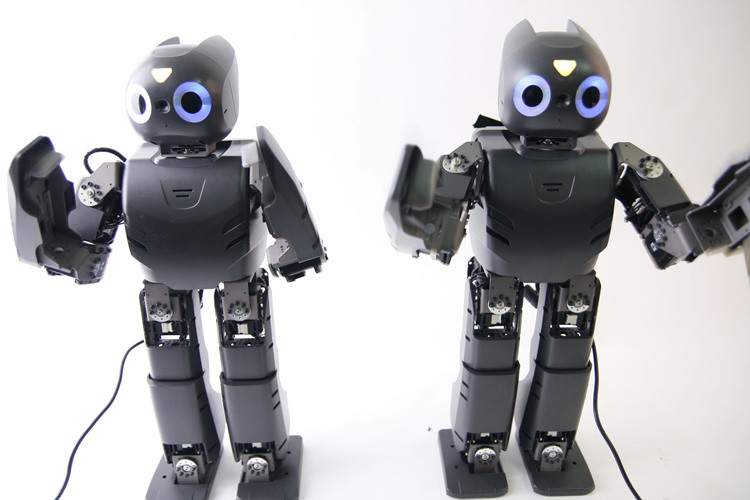
As both DARwIn’s announce “wow!”
