Motion Programming
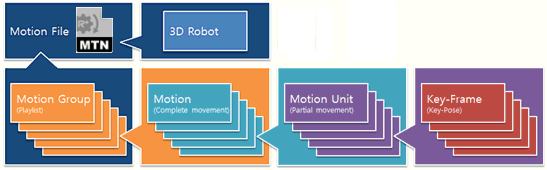
The motion file includes position data of each joint to move the robot, and the data structure of a motion file is described in the image below.
-
Key-Frame
It is a combination of pose and time on timeline, to express WHAT (pose) to show WHEN (time). For example, if aHellopose is saved at the Key-Frame on 13 second in the timeline, the robot will start to move into theHellopose as the timeline approaches 13 seconds.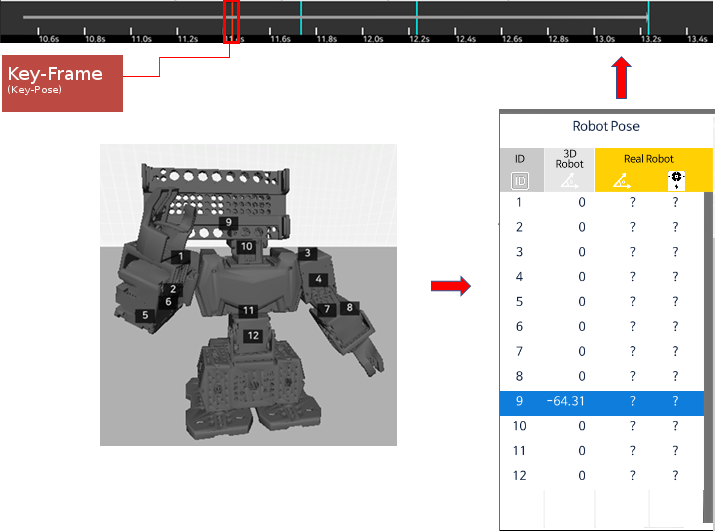
-
Motion Unit
It is a group of Key-Frames placed in the timeline to show a continuous movement.
As seen on the image below theSalutemotion unit has theSaluteKey-Frame on 11.2 second, andSalute EndKey-Frame on 13.2 second. The continuous movement (Motion Unit) will be a Salute motion.
-
Motion
Motion is a group of Motion Units to express long movements, such a dancing motions.
As seen in the image below, theMartialArtMotion is a link (group) of the Motion UnitsMartialArtReady,MartialArt, andInitPose.
Green Arrowis the button to insert another Motion Unit to be played back after the current Motion Unit.Red Arrowis the button to insert a Exit Motion Unit that is played when a current Motion Unit is interrupted by a particular command, parameter or etc.- More information is available at Edit Motion
-
Motion Group
Users must select the specific Motions to download to the robot, while checking the available space on the robot.
The list comprised of the selected Motions is called the Motion Group. The bar on the right displays the amount of space the Motion Group will take up on the robot’s controller.
On the image below, themainMotion Group takes up 12.6% of the controller memory space.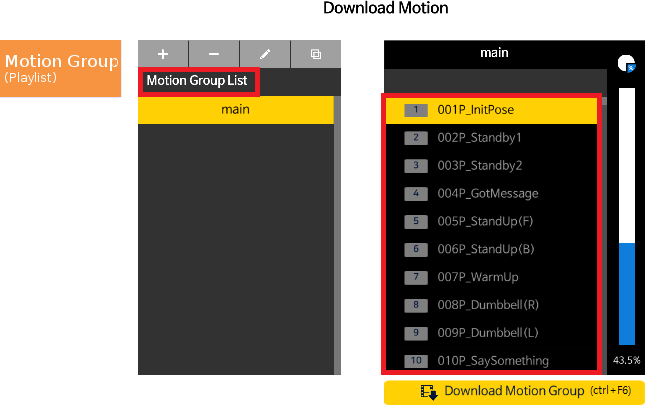
-
3D Robot
The 3D robot is the simulator which motion data can be applied to. It is also active even when an actual robot is not connected, so users can easily check and playback the motion they are creating.
Users are required to select a 3D robot when creating a motion file, and may also use theChange 3D Robotmenu.
The image below is an example showing the same motion data opened on different 3D robots.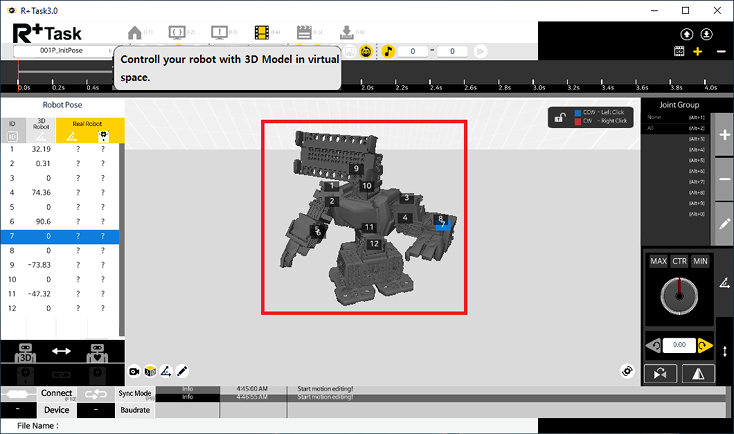
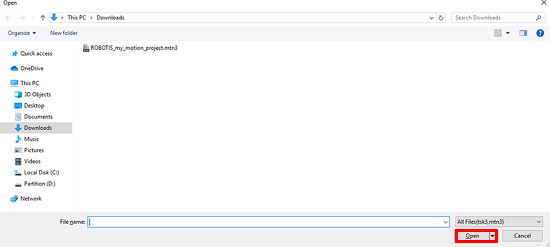
Open Project
- Click
Openbutton in the home tab.
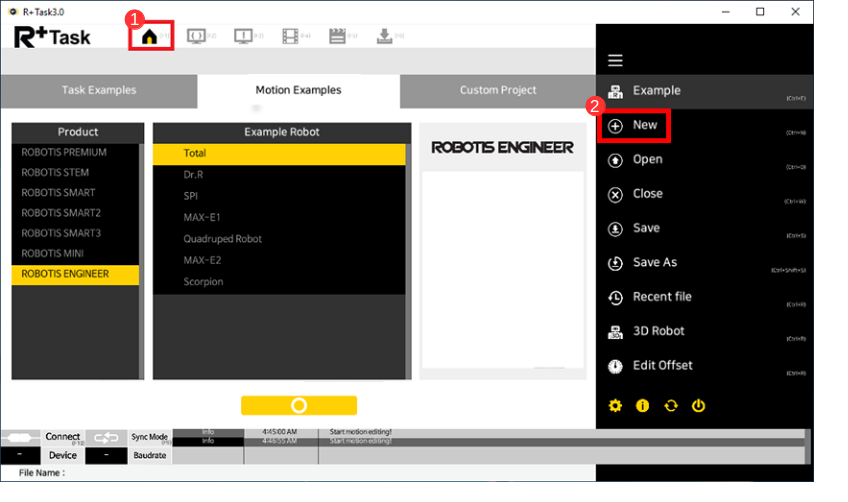
- Select the motion project file to open.
- Click
Openbutton.
Connect to Robot
-
Click the
Connectbutton on the bottom.
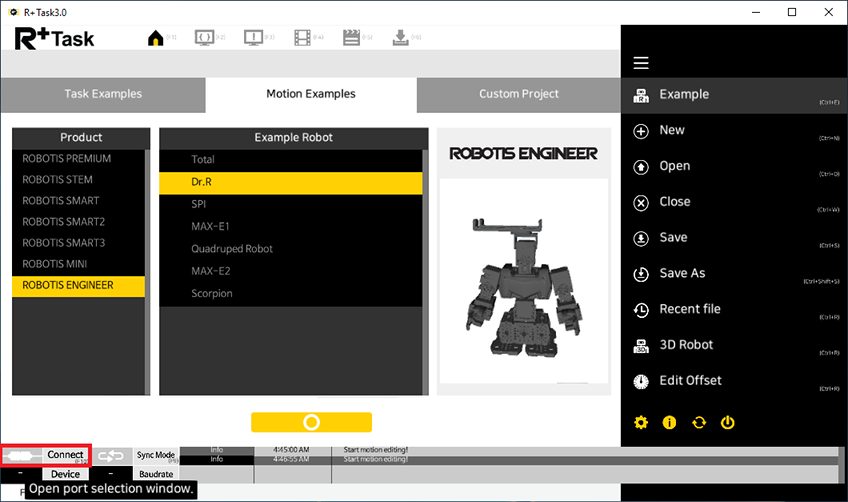
-
Select the port the robot is connected to, and click the
Connectbutton.
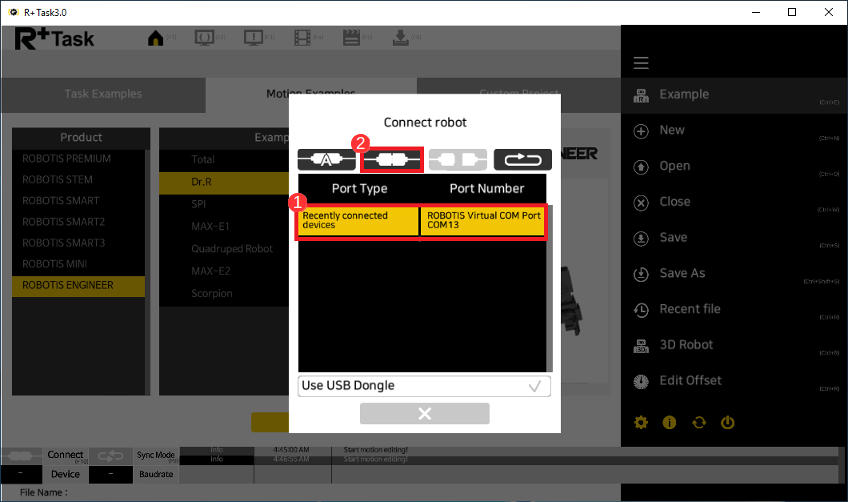
-
If port is not detected, click
Refreshbutton.
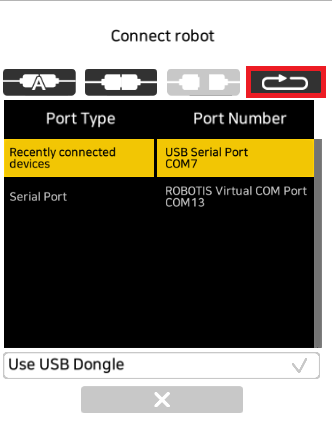
-
When connection is successful, the port number and baud rate will be shown.

Create New Motion Unit
Motion Unit is the link of poses placed on the timeline, to create a motion. The links between the poses are interpolated, like a fade in/out function.
-
Select the Motion Examples tab.
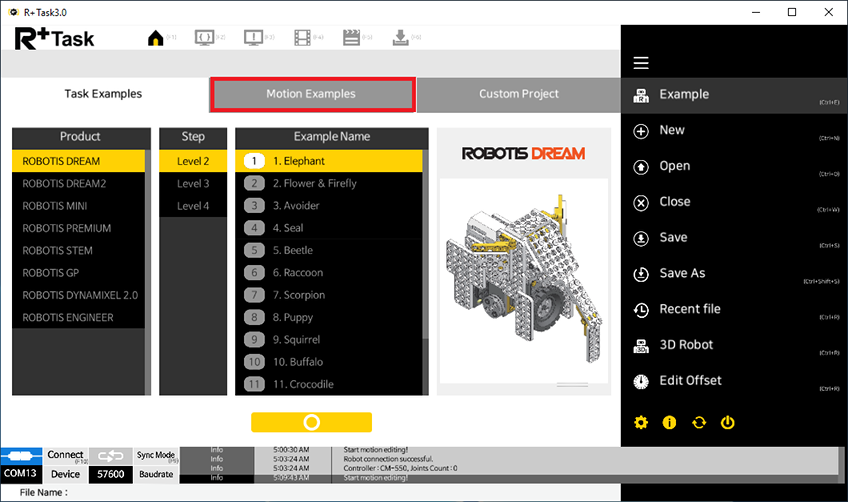
-
Select the desired product from the Product tab.
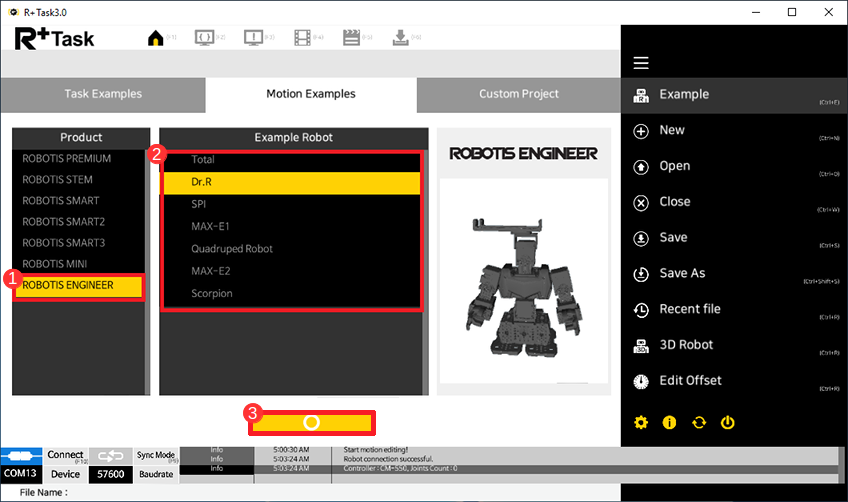
-
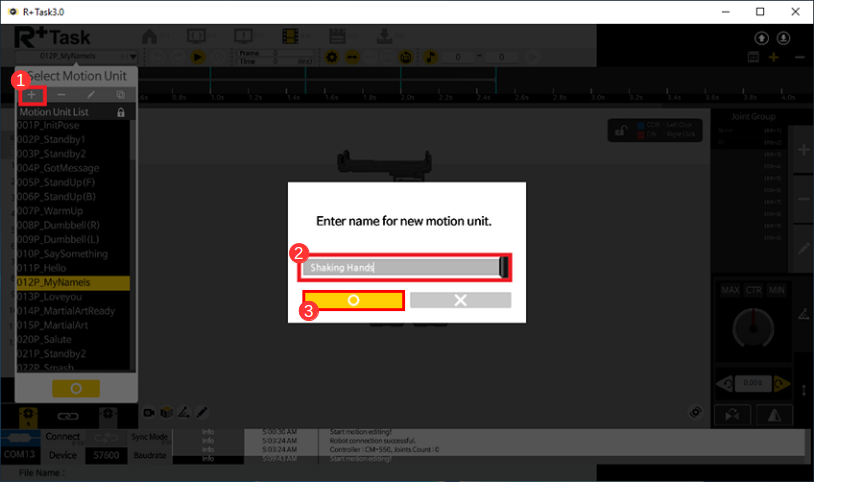
Click the Motion Unit list.
-
Name the new Motion Unit and click the “Apply” button.
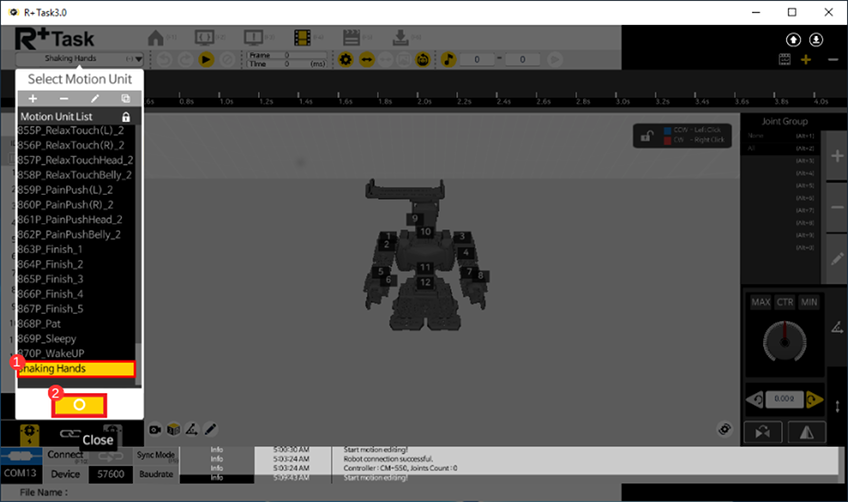
-
Select the newly created Motion Unit and click the “Apply” button.
Edit Motion Unit
Using 3D Robot
This section explains how to edit Motion Units when an actual robot is not available. Users will edit the 3D robot’s pose and save the pose on the timeline to create Motion Units.
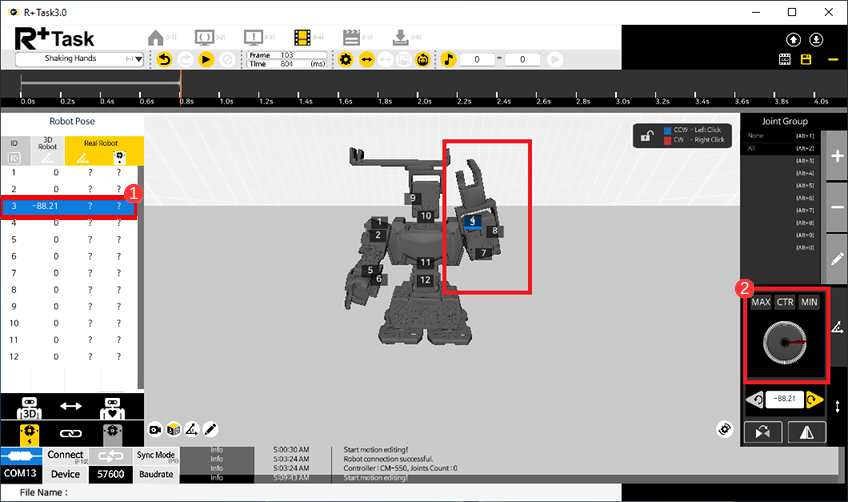
- Click anywhere on the timeline to select a time.
-
Select joint ID 3.
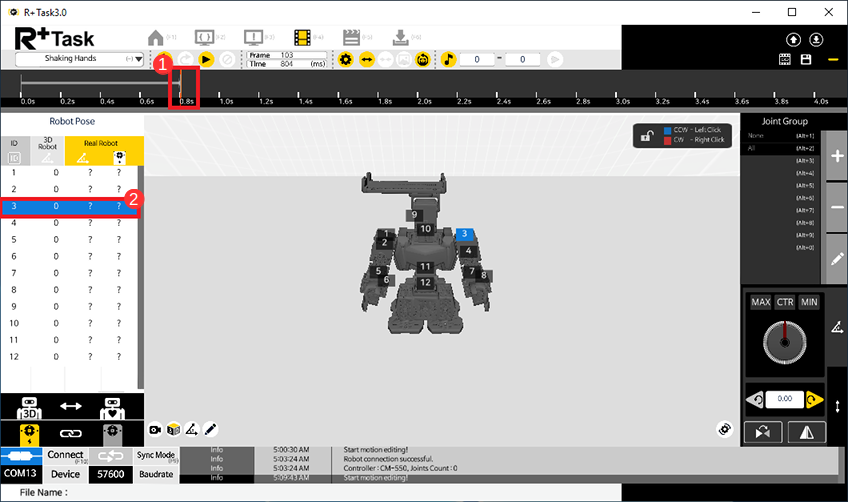
-
Use the “Positioning” menu on the bottom right to rotate the selected joints. Try creating a pose by moving the robot’s arm joints.
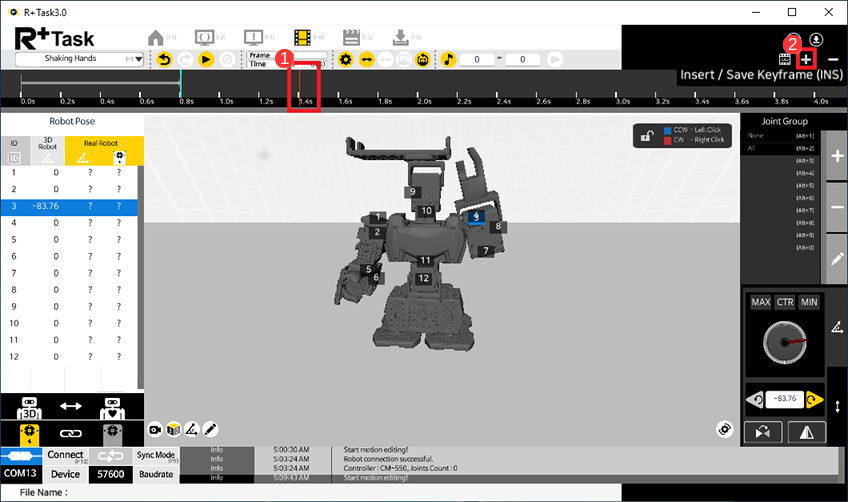
-
Click the “Insert Key-Frame” button on the top right to insert the created pose on the timeline.

-
Again, click on another spot on the timeline and click the “Insert Key-Frame” button to insert the same pose again.
-
Then, change the 3D robot’s pose the click the “Save Key-Frame” (same button as Insert Key-Frame) to overwrite the previous pose.
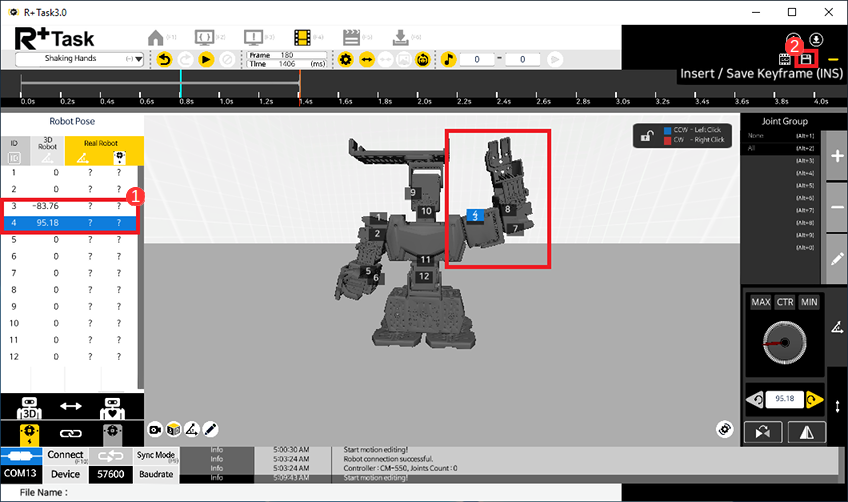
-
Repeat step 1 through 6 to create a connected motion.
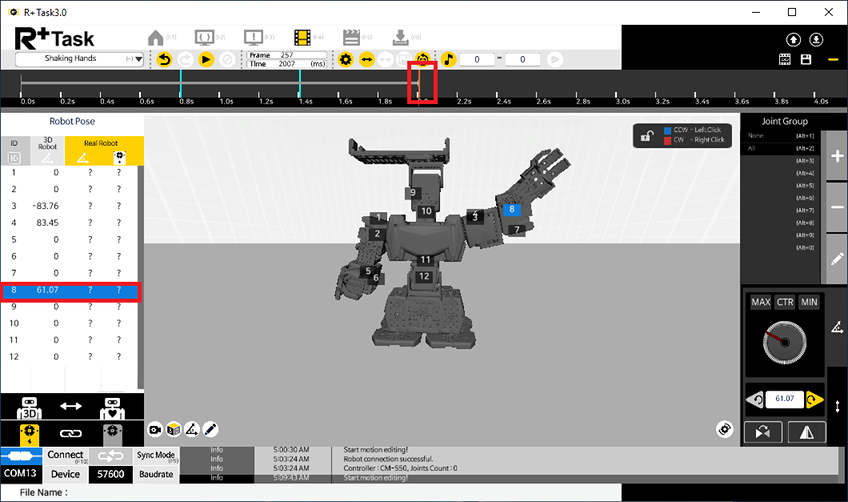
- Click the
Playbutton on the toolbar to playback the created Motion Unit. The poses created will be played back in the order they were placed on the timeline.
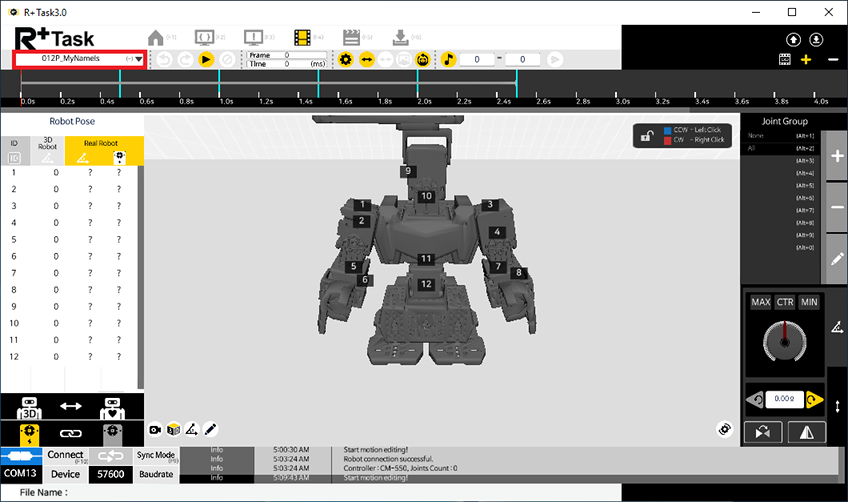
Using Actual Robot
This time, an actual robot will be used to edit a Motion Unit. Users will set the pose using the actual robot, and save the pose onto the timeline.
- Click the
Connectbutton on the bottom left to connect to the robot. (Connect to Robot) - Create a new Motion Unit. (Create New Motion Unit)
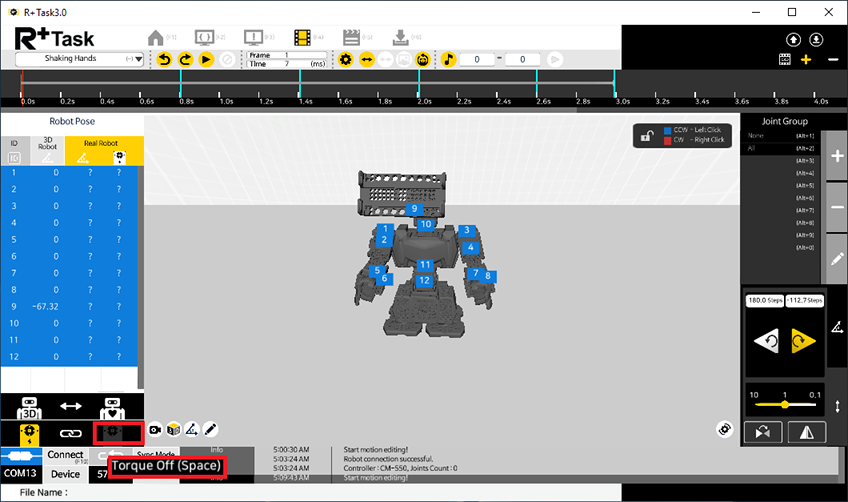
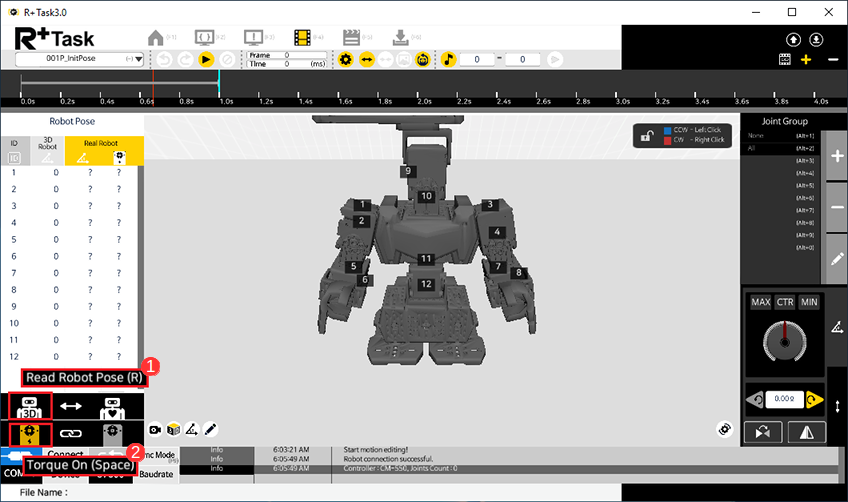
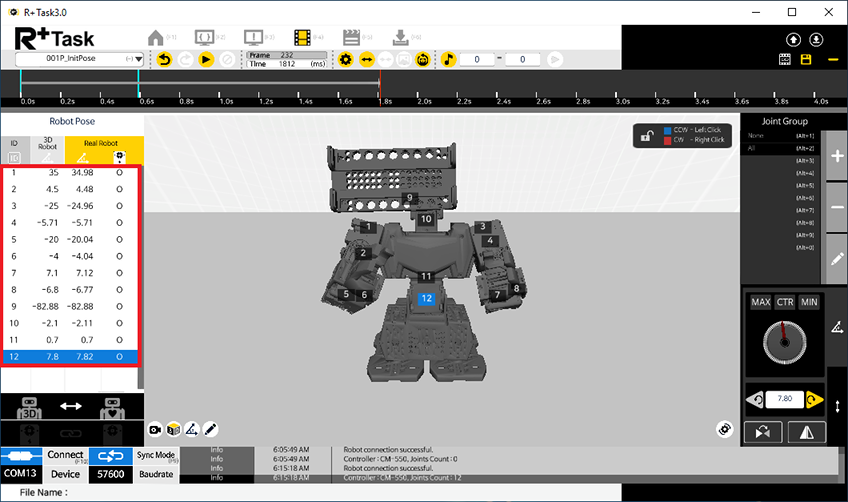
- Select all the joints, and click on the
Torque Offbutton to turn the actual robot’s torque off (Ctrl+Ato select all joints)
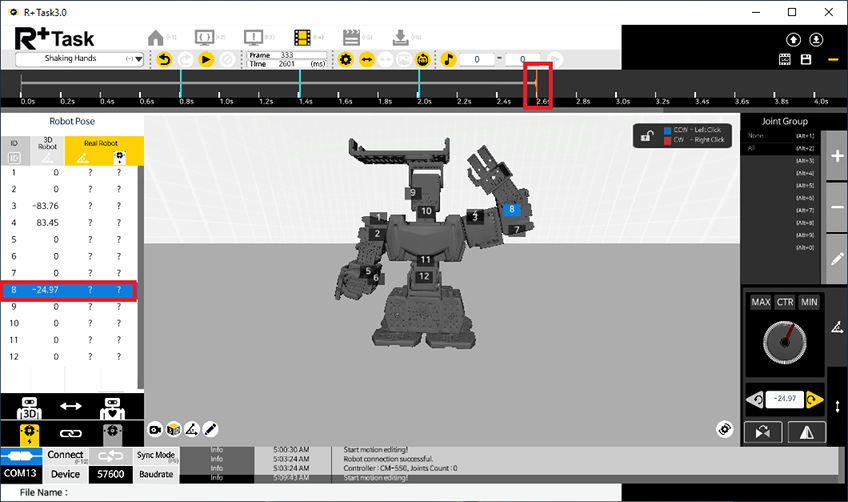
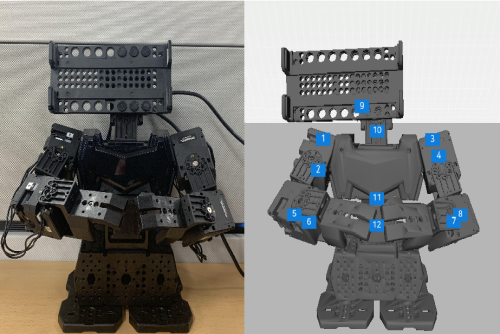
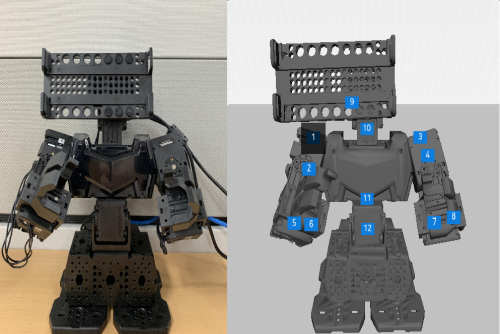
- Move the actual robot to create the pose to save, click
Torque On, then clickRead Robot Pose(the 3D robot will mimic the actual robot’s pose).
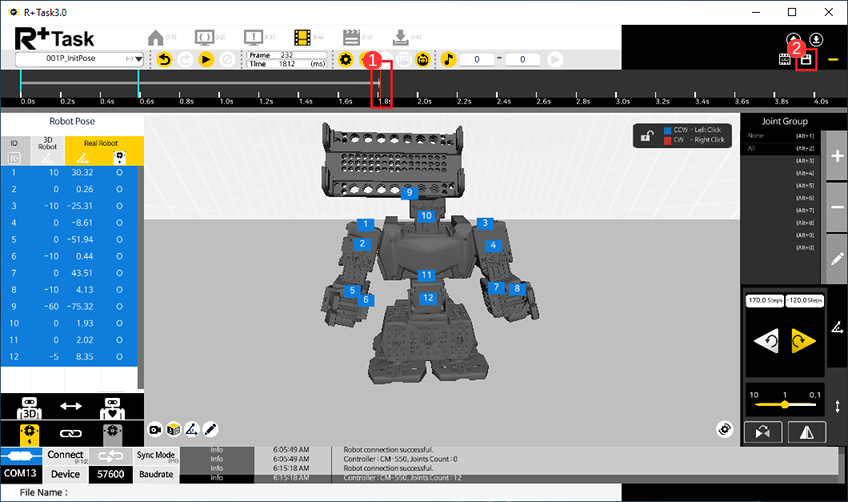
- Click anywhere on the timeline and click the
Insert Key-Framebutton to add the pose onto the timeline.

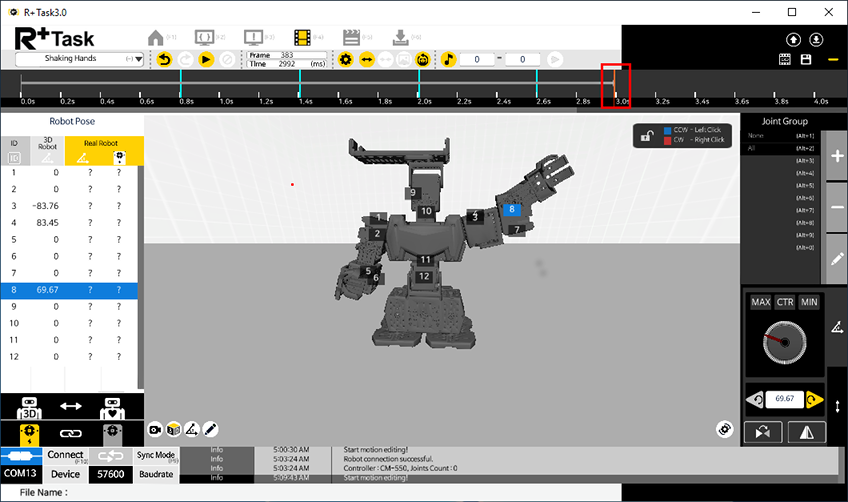
- Again, click on another spot on the timeline and click the
Insert Key-Framebutton to insert the same pose again.
- Click
Torque Offto turn the actual robot’s torque off.
- Move the actual robot to create the pose to save, click
Torque On, then clickRead Robot Pose.
- Click the
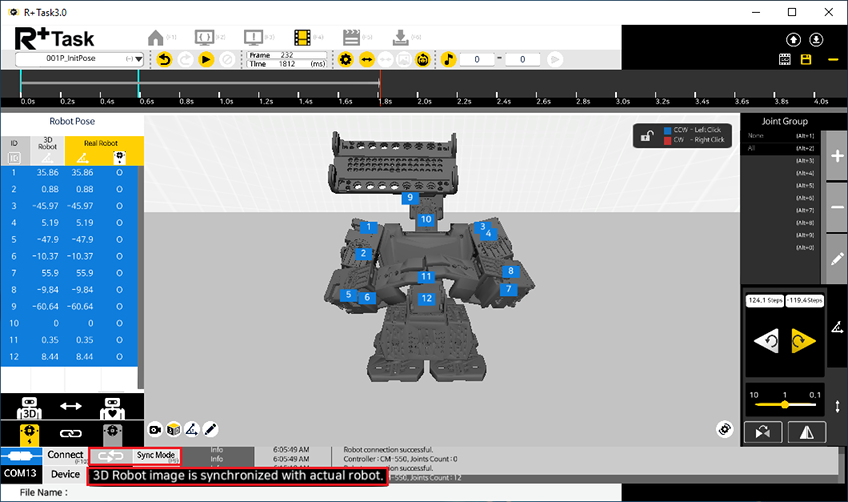
Save Key-Framebutton to overwrite the second pose with the new pose. - Click the
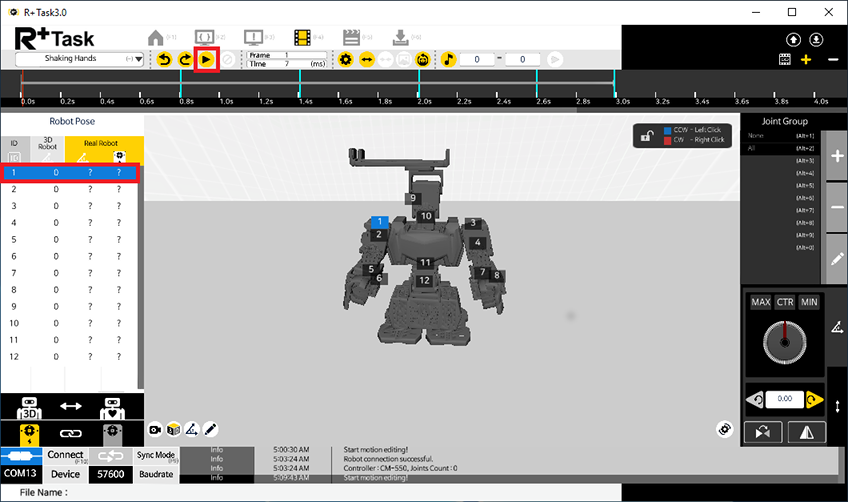
Sync Modebutton on the bottom to activate it. (When activated, the 3D robot’s pose is automatically inputted to the actual robot) - Click the
Playbutton on the toolbar to playback the created Motion Unit. The poses created will be played back in the order they were placed on the timeline.
Create New Motion
Motion is a set of Motion Units linked together. Users can also change the number of repetitions for each Motion Unit or set the playback speed to efficiently create long dance motions.
In order to use a motion in a Task code, a Motion (set of Motion Units) must be created.
-
Move to the Motion tab, and click on the list on the toolbar.
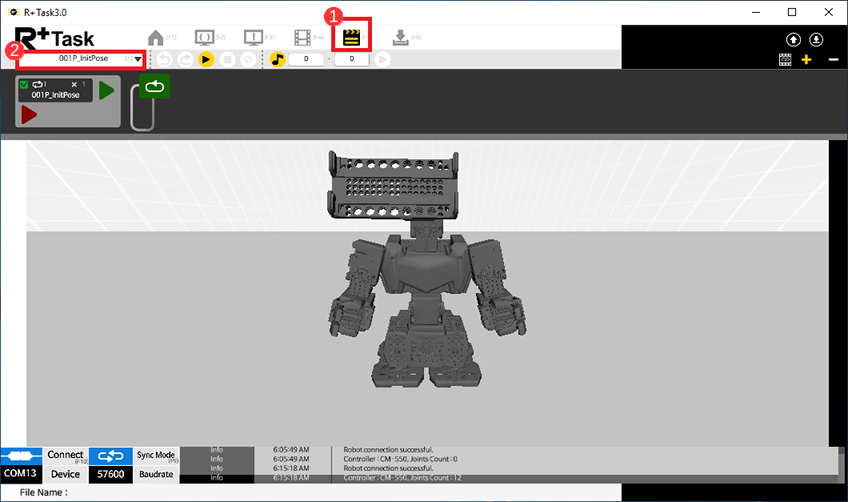
- Click the
New Motionbutton on the list. -
Enter a name for the new Motion and click the
Applybutton.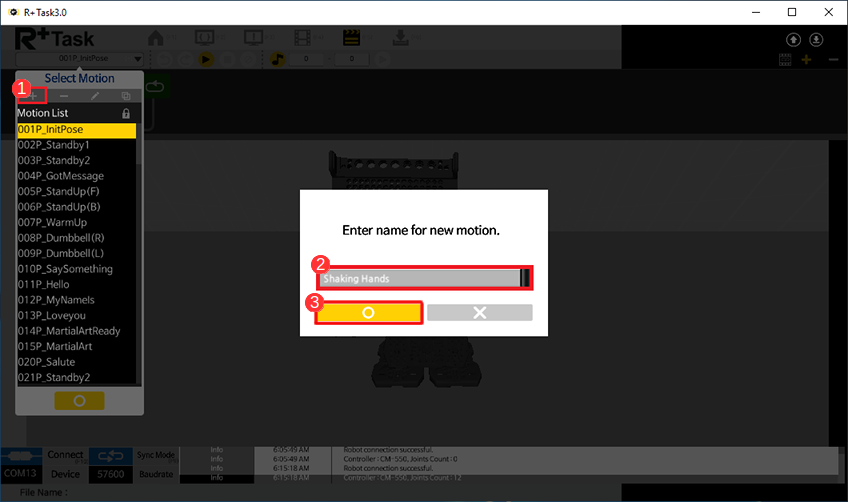
-
Select the newly created Motion and click on the
Applybutton.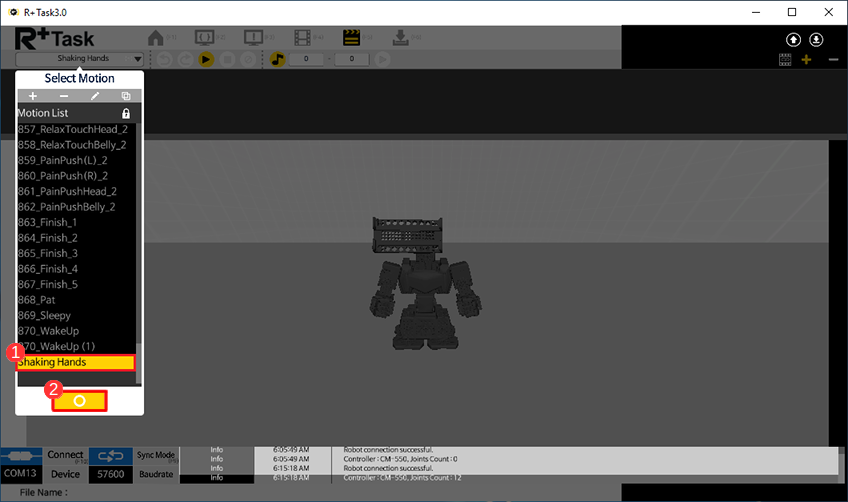
Edit Motion
This section will describe how to insert the Motion Units in an empty Motion, and how to edit the playback parameters.
-
Click on the
Insert Motion Unitbutton on the top right.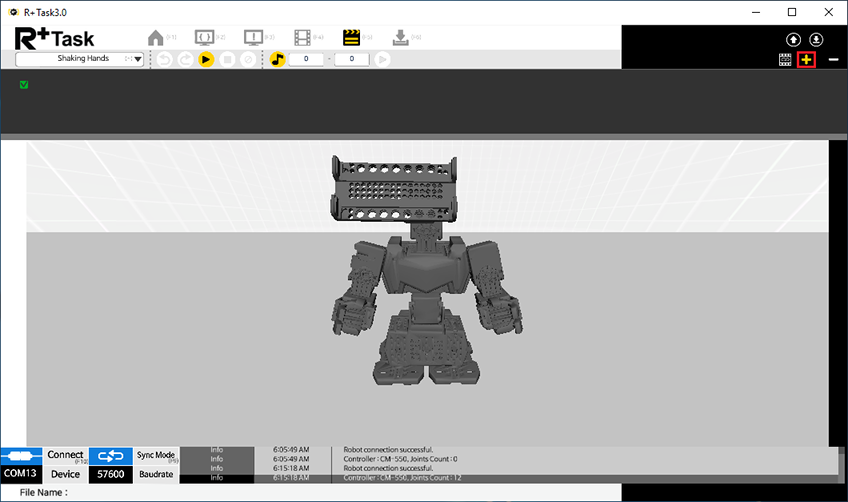
-
Select the Motion Unit to insert and click on the
Play Parameterstab.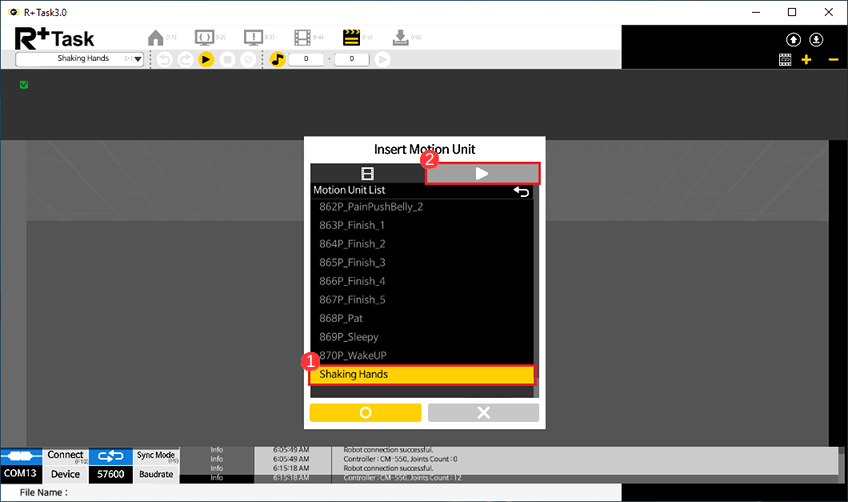
-
In the Play Parameters tab, users can edit the Motion Unit’s playback speed, repetition number, and Index Number. For now, don’t change any setting and just click
Apply.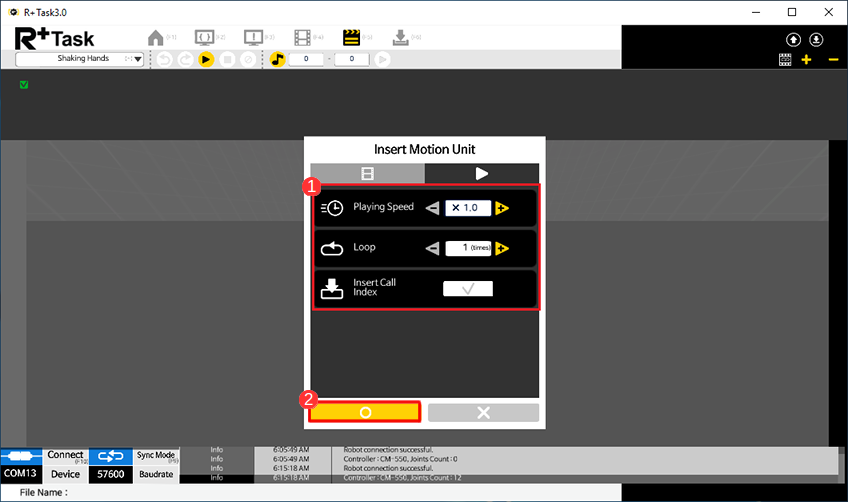
-
Check the Motion Unit that is inserted and click the
Playbutton to check the Motion.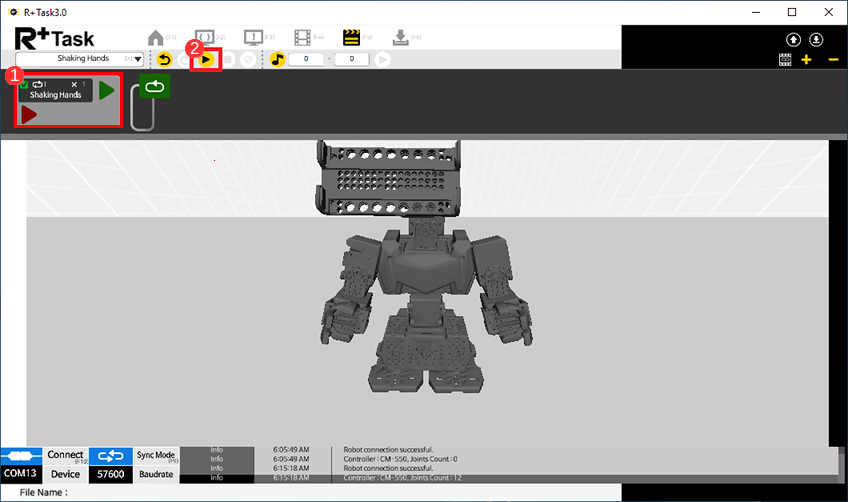
- Double-click on the inserted Motion Unit to change it into a different Motion Unit, or change the Play Parameters.
- Double-click on the
Green Arrowto insert another Motion Unit to be played back after the current Motion Unit. -
Double-click on the
Red Arrowto insert a Exit Motion Unit that is played when a current Motion Unit is interrupted by a particular command, parameter or etc.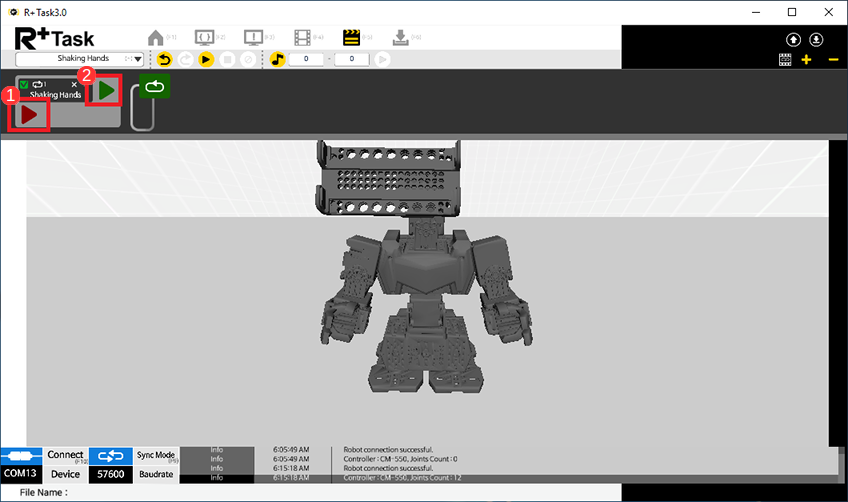
WARNING: The
Red Arrow, Exit Motion, may not be displayed and not available to use if the sum of used-keyframes’ size in a motion unit exceeds its assigned space in a motion unit. To use the Exit Motion, please use the Keyframes from 7 to 8 approximately. But note that the available numbers of keyframes may differ depending on the remaining space in the motion unit. -
Double-Click on the
Green Arrowand insert theInitPoseMotion Unit.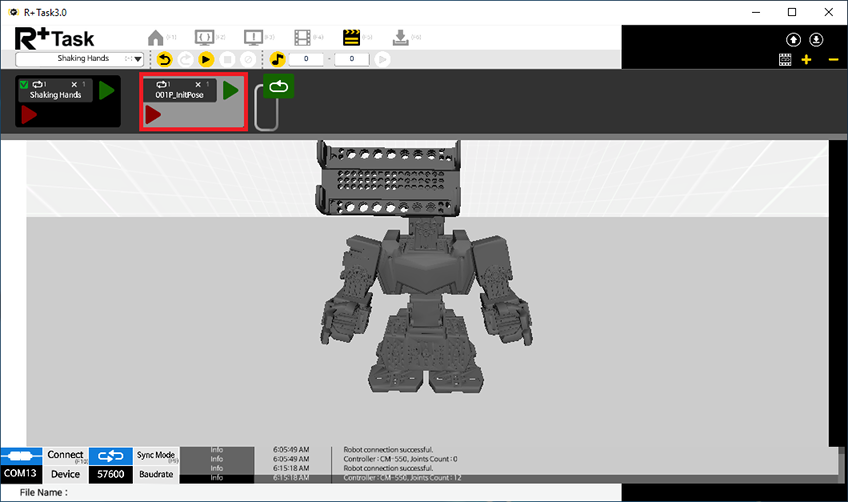
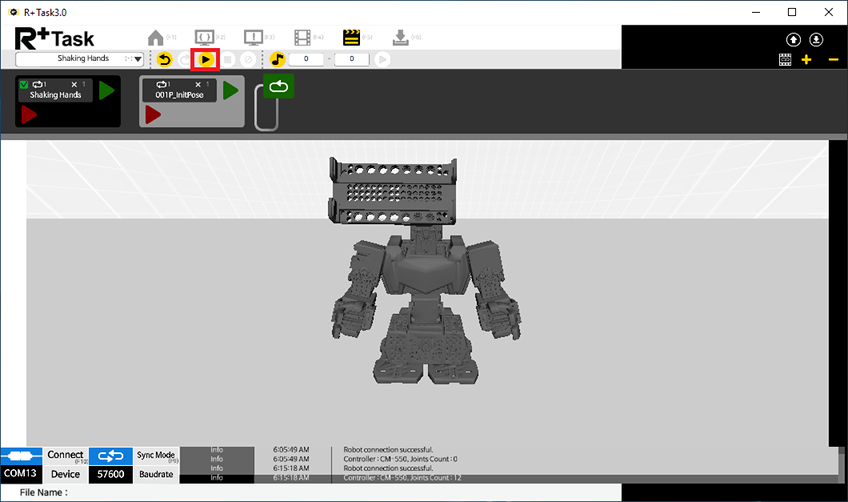
-
Let’s playback the completed Motion.
Create New Motion Group
The Motion Group must be created to download motions onto the robot. The Motion Group is a group of selected Motions to be downloaded on the robot.
-
Move to the
Motion Downloadtab and click on theNew Motion Groupbutton.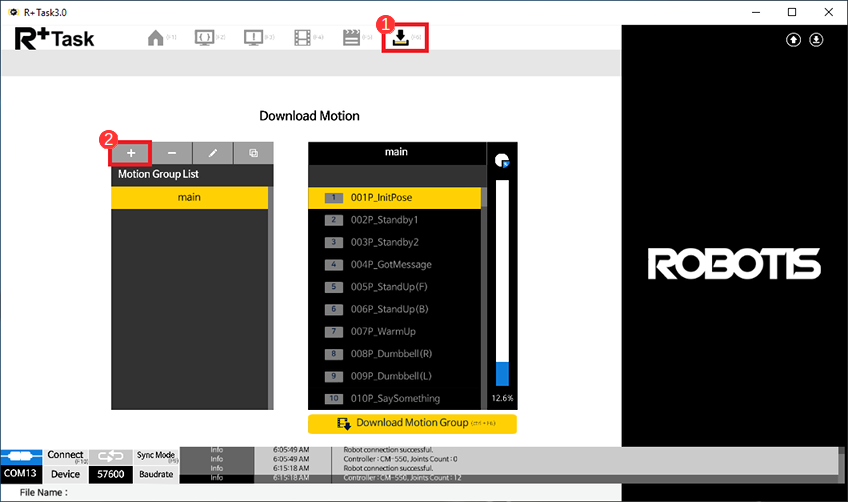
-
Enter the name for the new Motion Group and click
Apply.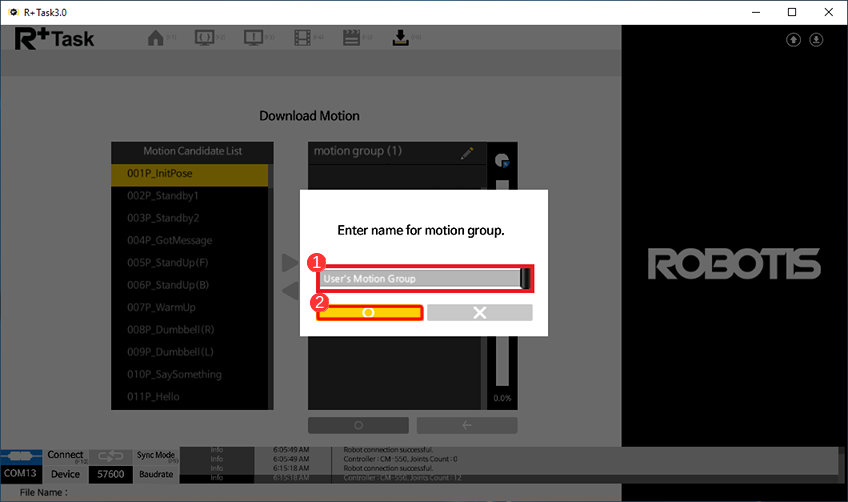
-
Out of the Motion Candidate List, select the Motions to be inserted into the new Motion Group, and click on the
Add Motionbutton.
The bar on the right will update in real-time to display the storage space status. ClickApplyto create the Motion Group.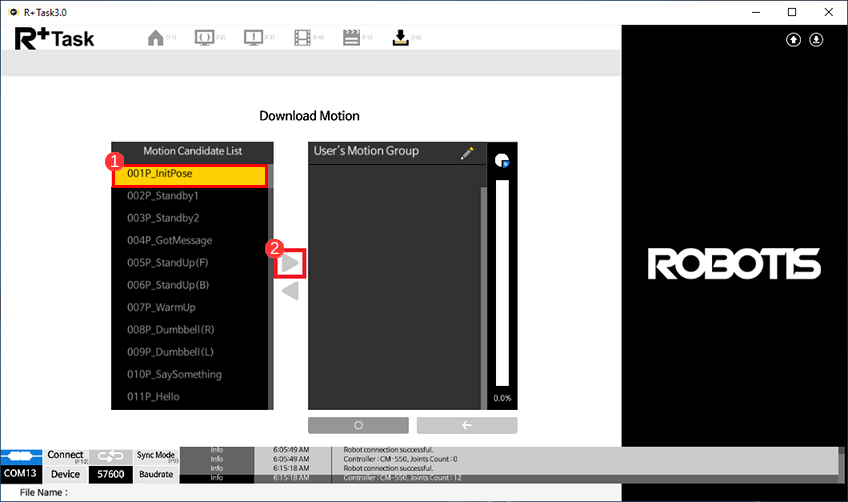
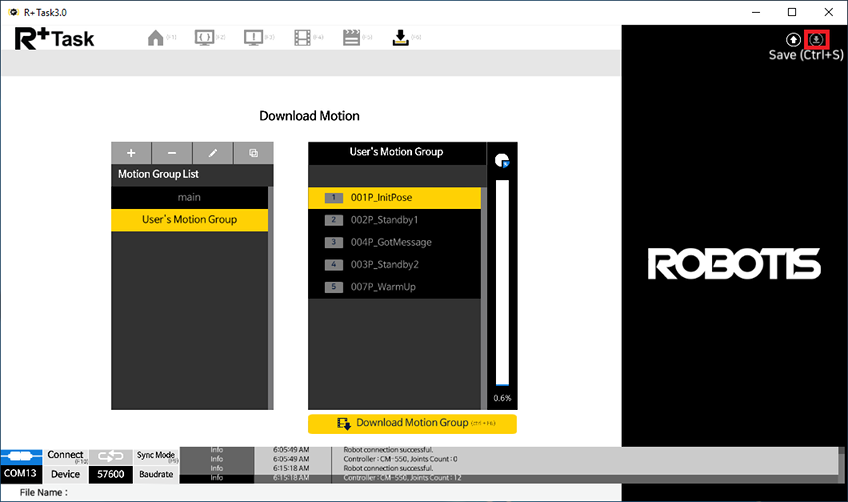
Download Motion
-
Out of the list of Motion Groups, select the Motion Group to download onto the robot. Please make sure to check that the Motion Group size doesn’t exceed the space available on the robot.
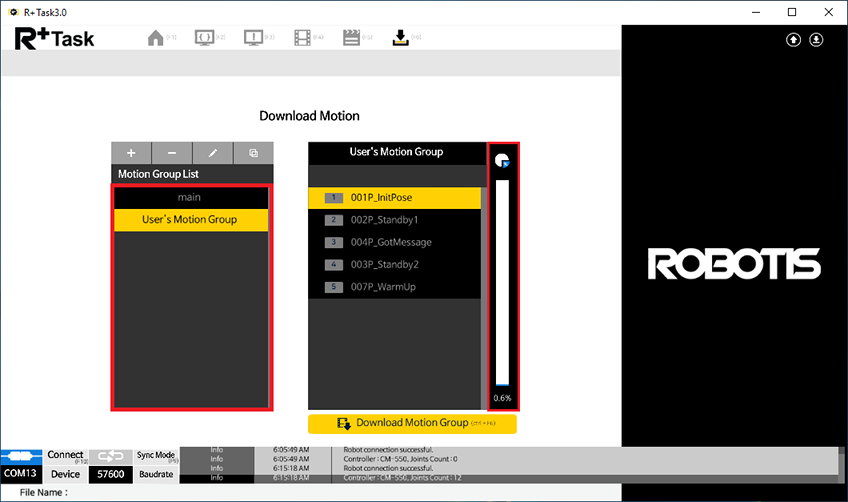
-
Click on the
Motion Group Downloadbutton the download onto the robot. The download progress will be shown on the center of the screen.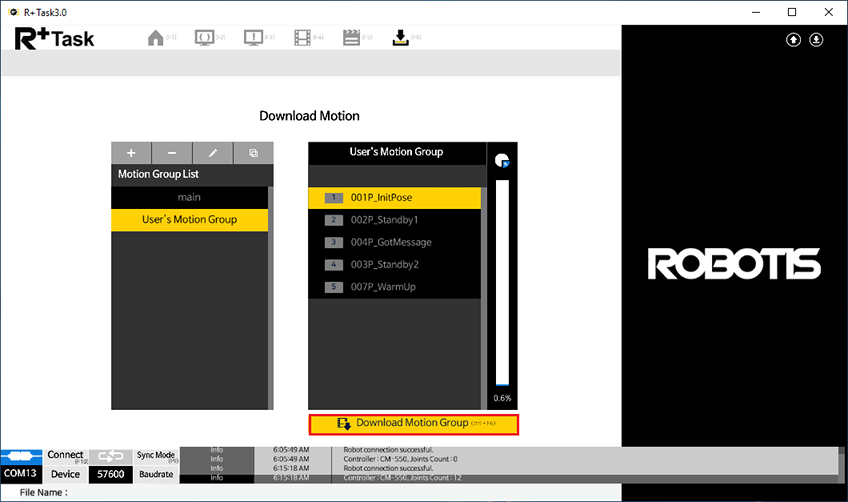
Download Precautions
Motions in the motion project can be selected grouped into a motion group, and one of the motion groups can be downloaded to the controller.
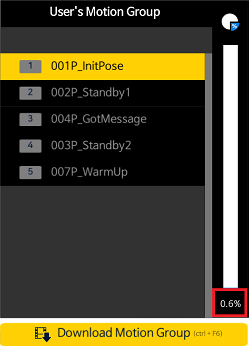
The memory gauge on the right shows expected memory usage of selected motion group.
Motions in the motion group will be assigned with numbers and this number can be used to call a specific motion from the task code.
CAUTION If a motion is played with the actual robot while editing motion and motion units, previously downloaded motion data will be erased from the controller.
Save Motion
After completing motion edit, click the save icon on the top right corner or use Ctrl + S shortcut to save.