Useful Tips
Search Variables/Functions
This is a feature to find the location where a variable or function has been used. It provides the option to change the name of each variable or function.
- Click the “Variable (or Function)” button on the right. (There must be at least one variable or function.)
- Select the target that you wish to find reference in the “Variables list (or Functions list)”
-
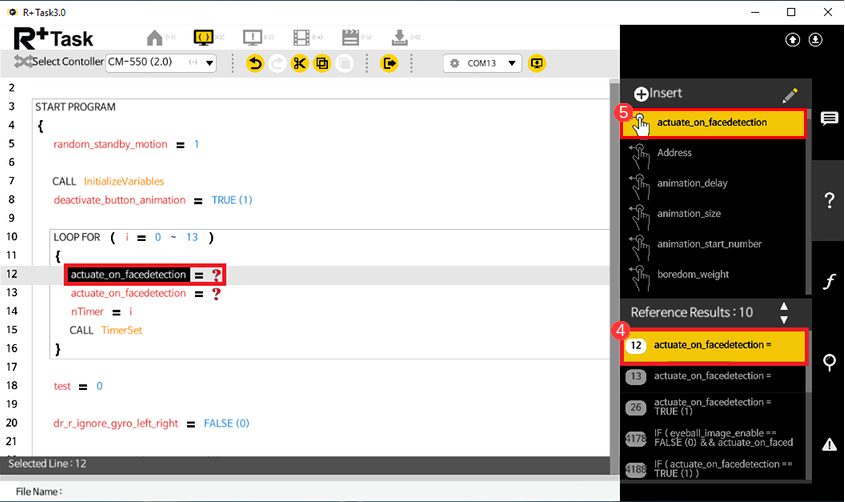
You can check the locations at which the selected variable (or function) has been used in the “Reference Results” field
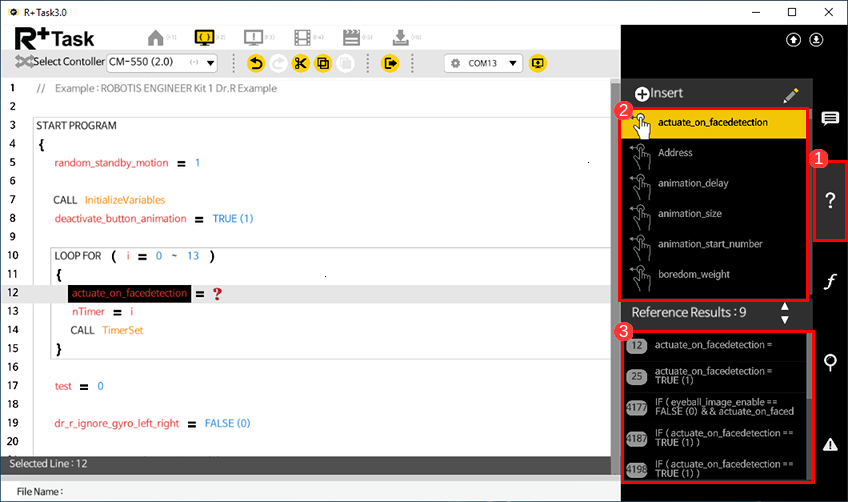
- If you select one of the results in the “Reference Results” field, it will take you to the specific location within the source code.
-
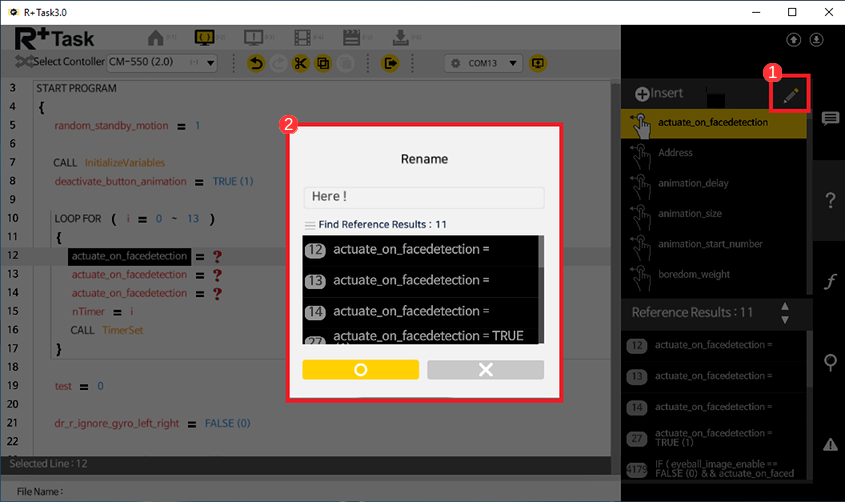
If you click the “Rename” button at the top, you can change the name of the variable (or function) for the whole source code.
Search Keyword
This is a function to search for components used in the program code.
- Click the Search button at the bottom right.
-
Type the search word in the search bar that appears on top.
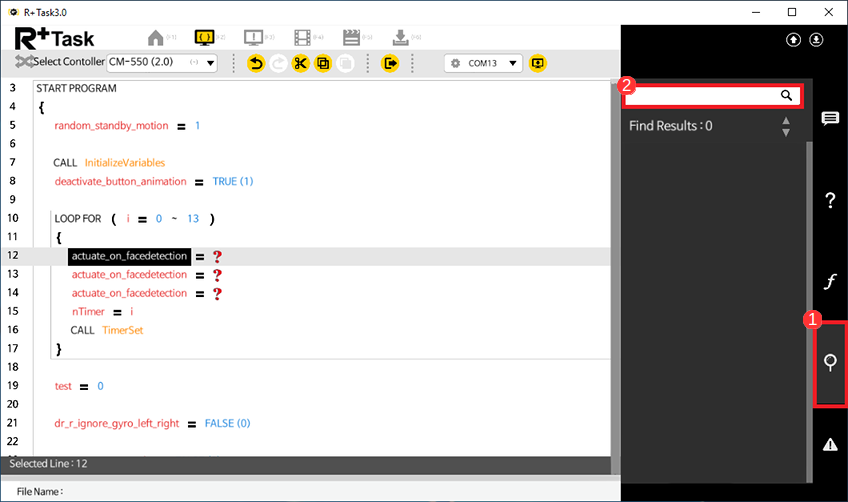
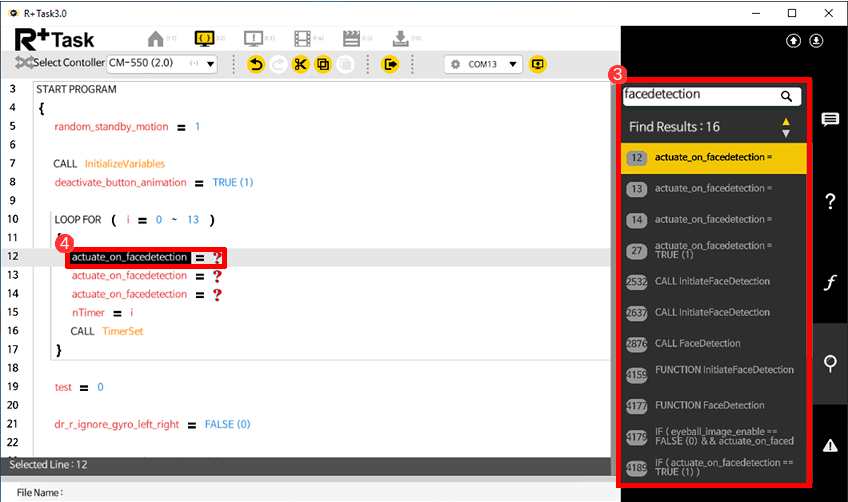
- In the task code, the “search result” will be shown as a list below.
-
If you click on an item in the list, it will move to that line.
Grammar/Compile Check
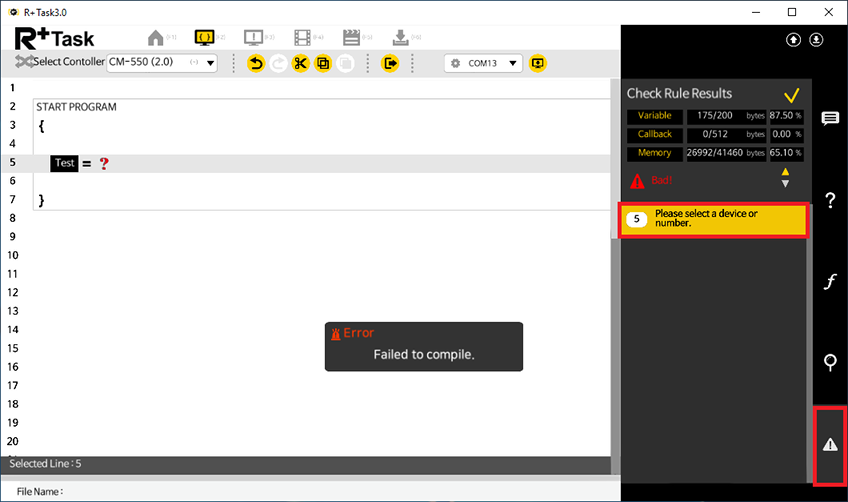
In order to download the task code to the controller, it must go through a grammar check and compile process. If you try to download to the controller or click the “Error” button, it will run the grammar check and compile process automatically.
- Grammar Check : This is the process of examining whether the instructions used in the task code are compatible instructions with the controller, and whether there are any errors in the grammar.
All errors must be corrected before it can move on to the next step. - Compilation : This is the process of converting the code that has finished grammar check into a machine language that the controller can interpret.
The number of variables, callback usage, and memory usage are examined during the compilation process.
Keyframe
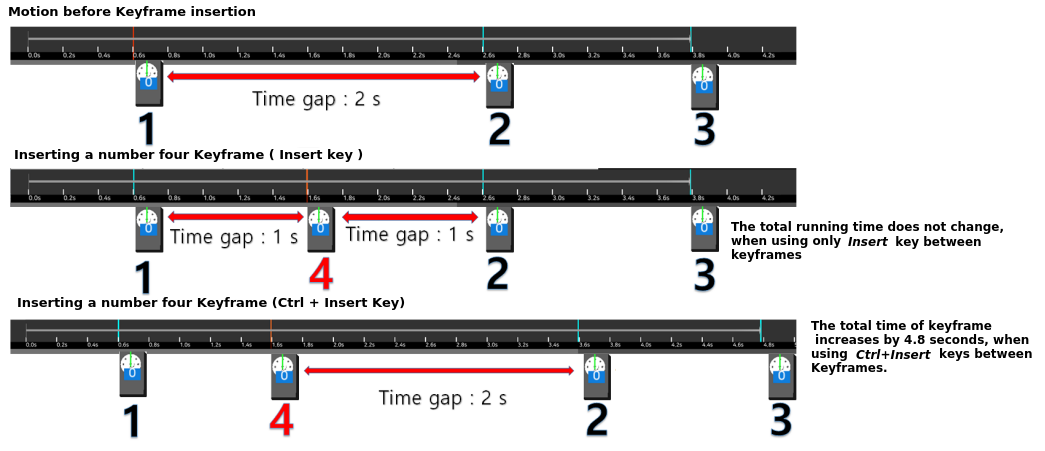
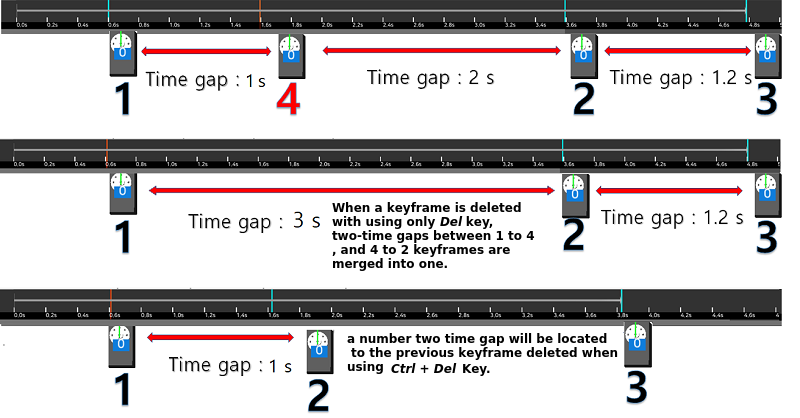
Combine Ctrl key when using Insert or Delete key to keep the time between keyframes when insert or delete key frame.
Insert Keyframe
The following shows how to keep the time between keyframes by using Ctrl key with Insert key.
Delete Keyframe
The following shows how to keep the time between keyframes by using Ctrl key with Delete key.
Selective Keyframe Play
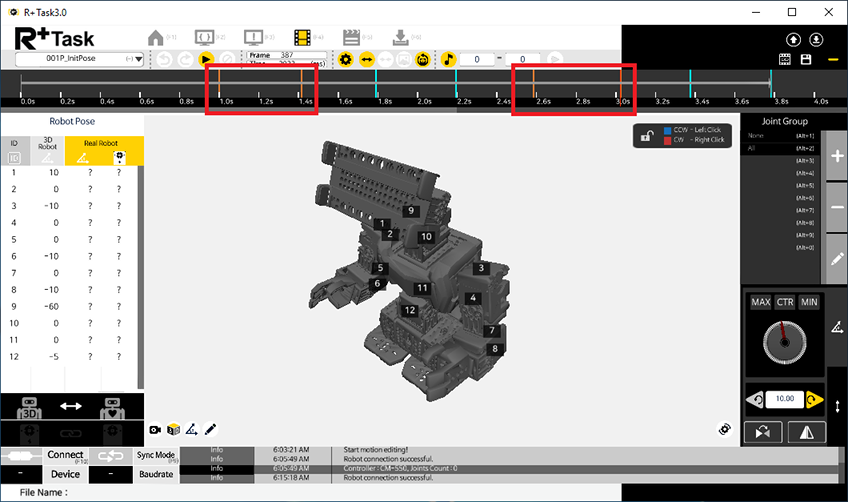
Press Ctrl key when selecting specific keyframes to play. Only selected keyframes will be played.
Play Music
Music can be played along with motion play.
-
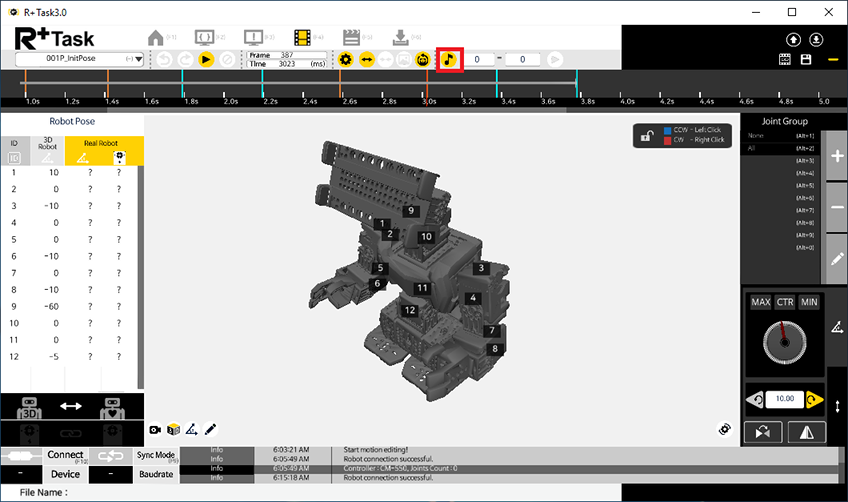
Click the
Insert Musicbutton and select the audio file.
-
Click the
Music Playbutton to play the music.

-
Specify the music section to play.

-
When playing motion, the music will also be played which is very handy when creating a dance motion.
Create Custom Robot
-
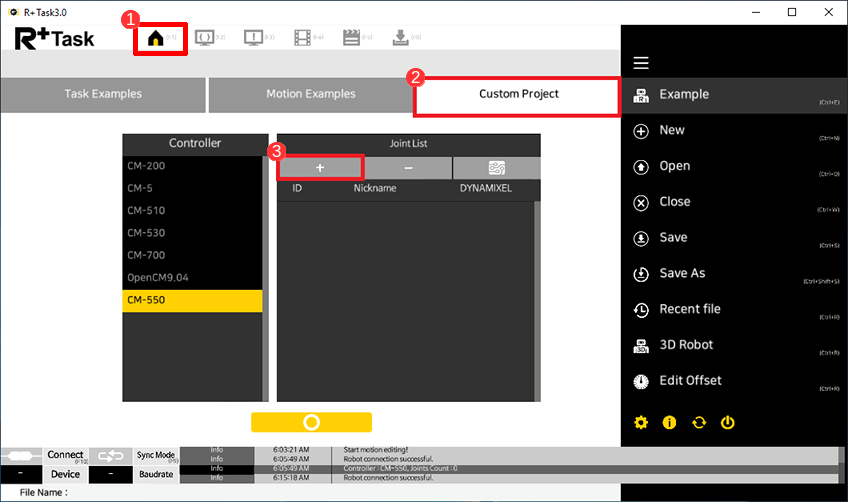
Move to the Home tab and select the controller to use, and click on the
Add Jointbutton.
-
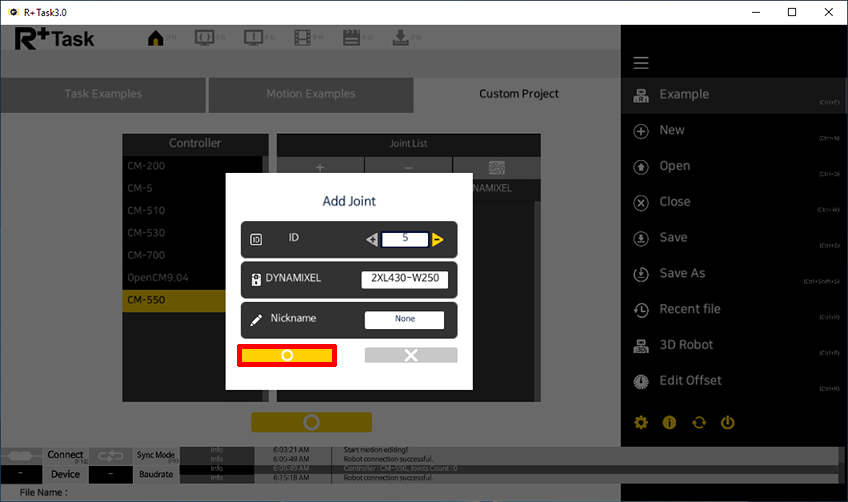
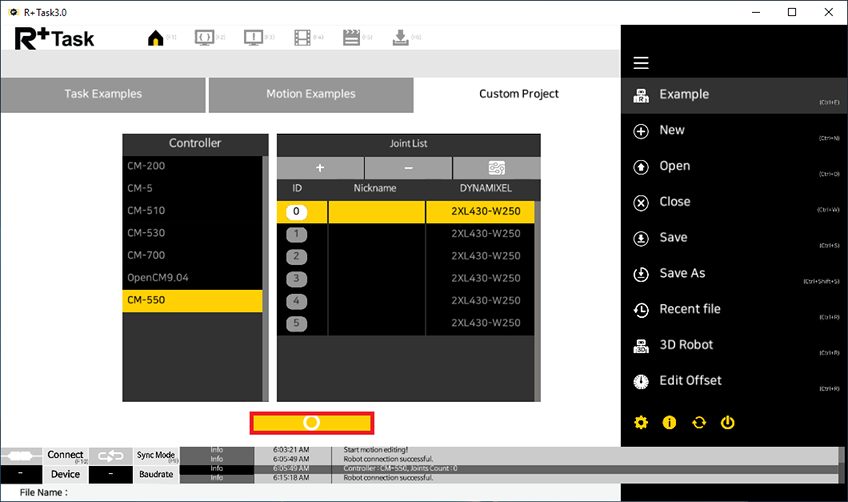
Select the type of joint (motor) to use and set its ID. Click
Applyto add the joint to the joint list.
-
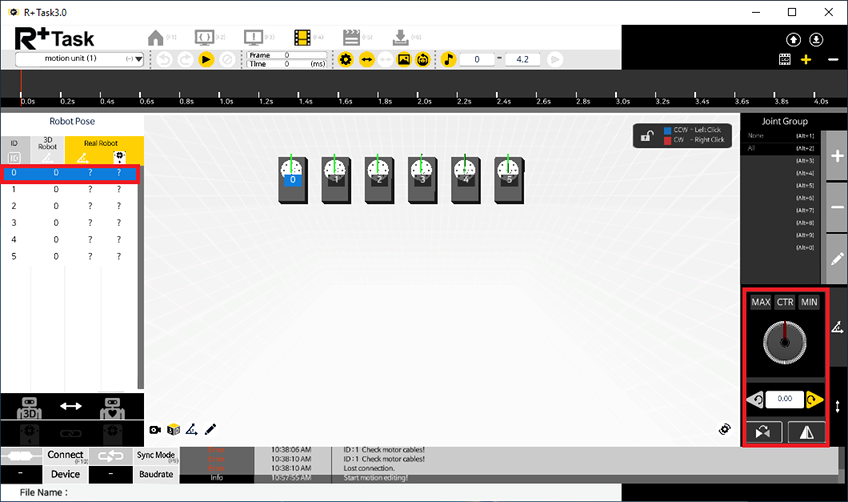
Once the joint list is completed and the new project is created, the custom robot will be shown on the screen.
Since it is difficult to analogize and display the actual custom robot on the 3D model, it will be helpful if the users frequently playback the motion on the actual robot (Sync Mode) to check on their status.
Change 3D Robot
The Motion file is created and edited based on the initial 3D robot that was selected. Users can change the 3D robot while in the midst of a project, while maintaining the motion file data.
The guide below is an example of changing the 3D robot from MAX-E1 to Dr.R.
-
Move to the Home tab, and click on the
3D Robotbutton on the left.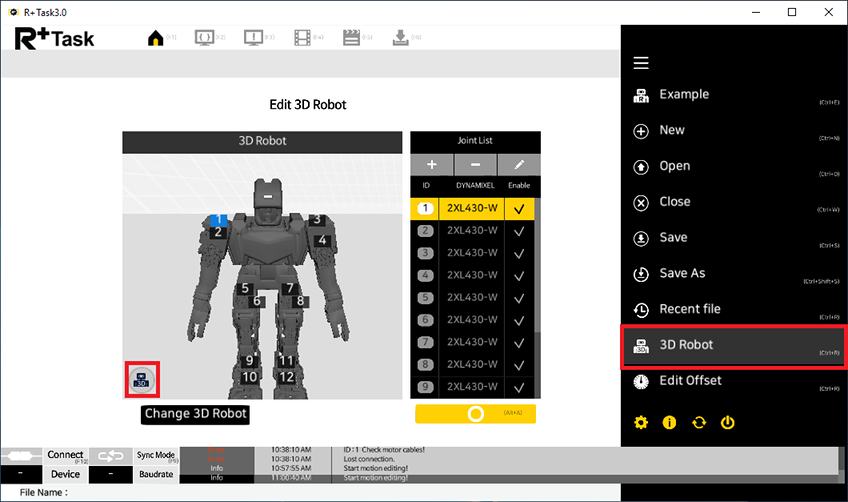
-
Click on the
Change 3D Robotbutton on the bottom, and select the robot to be change into.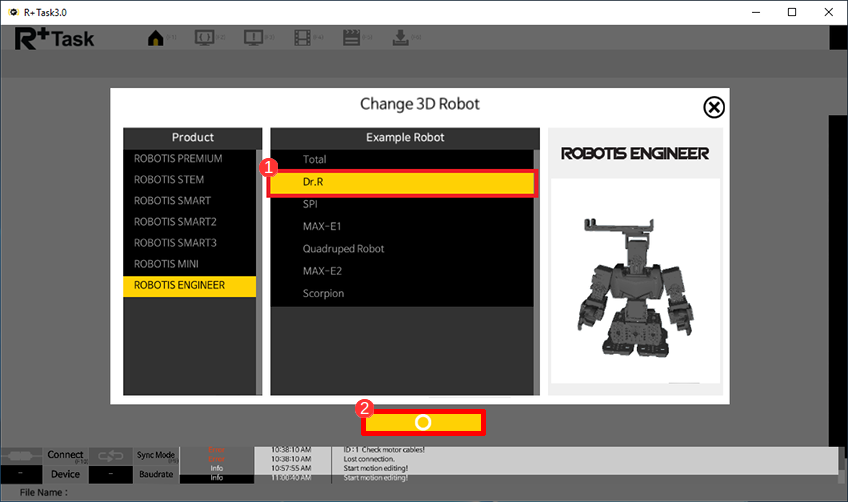
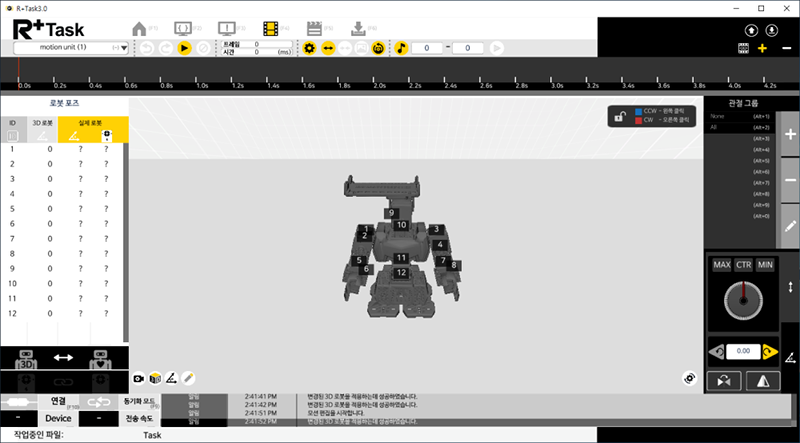
- Once the 3D robot is changed, the window will automatically change.
- If there are unnecessary joints it is recommended to delete them. Move to the Home tab again and click on the
3D Robotbutton. (If there are no joints to delete, please skip the step 5) -
Select the motors to delete, and click on the
Remove Jointbutton to delete. Once you are done with deleting, click theApplybutton.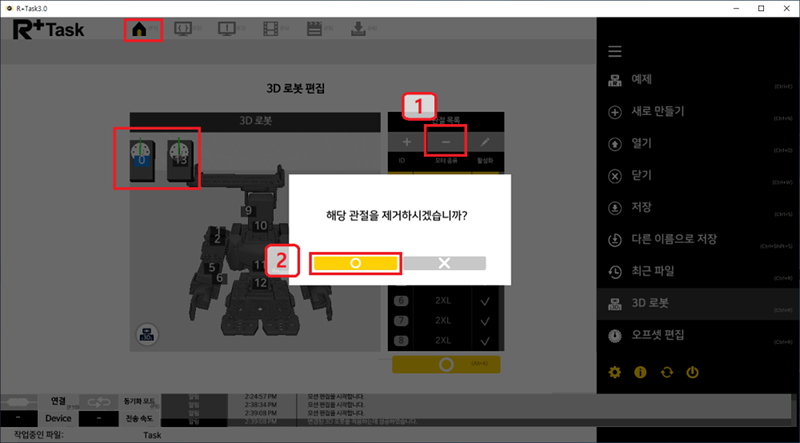
-
The unnecessary joints are now deleted.
Pose Mirroring
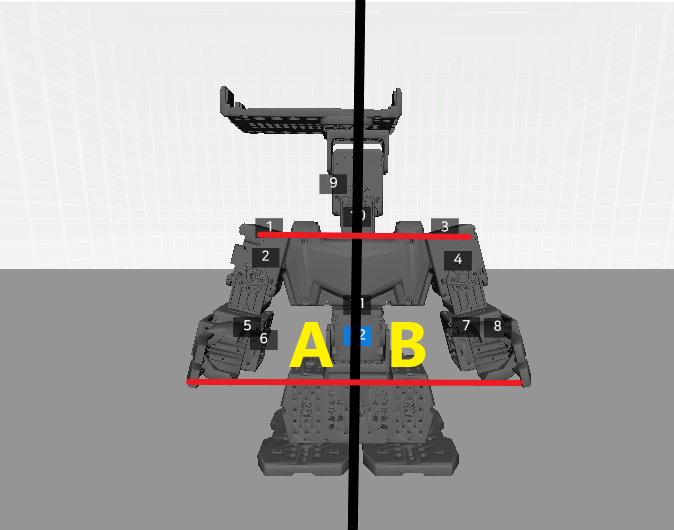
The 3D Robot’s joints have a horizontally symmetrical matching joint on the opposite side, based on the vertical center line drawn below.
The Mirroring function uses this symmetry for mirroring or exchanging the pose on the opposite side.
Pose Symmetry
- For Pose Symmetry, users must first select the joints that will be the basis for the opposite side.
-
Click on the
Mirroringbutton.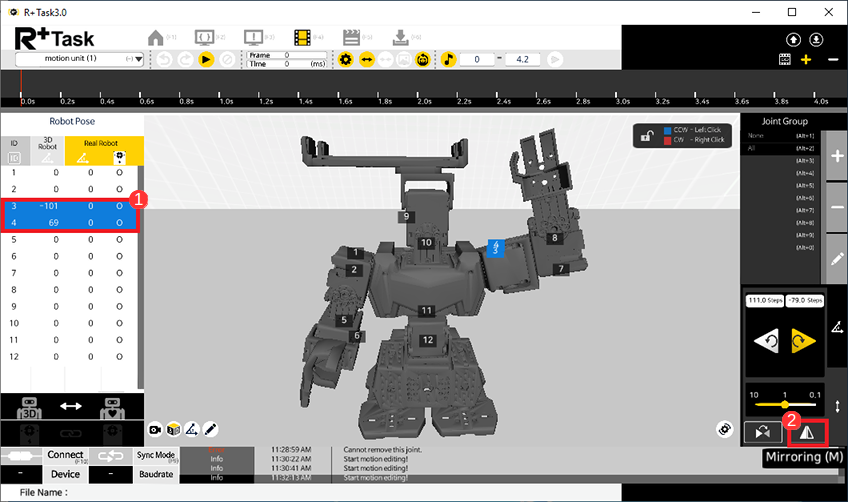
-
The selected joints’ values will now be entered (mirrored) onto the horizontally symmetrical joint on the opposite side.
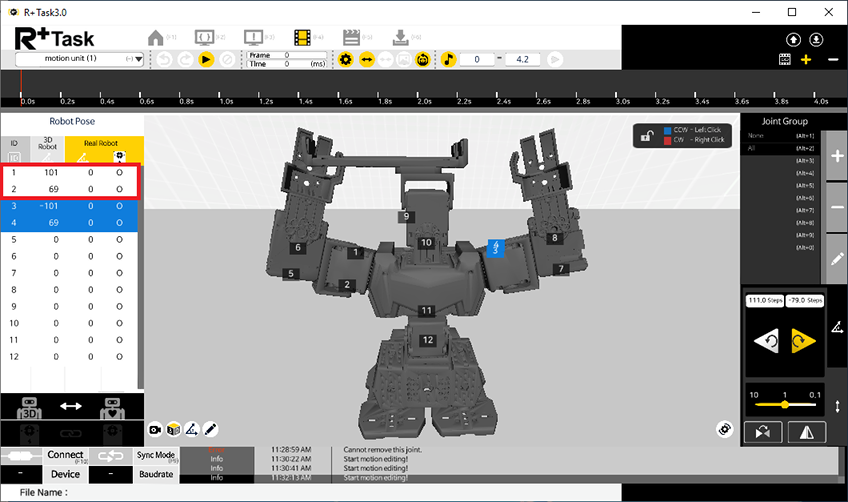
Pose Exchange
- For Pose Exchange, users must select the joints that will be the basis for exchanging, and also select the corresponding joints that will receive the values from the basis joints.
-
Click on the
Mirroringbutton.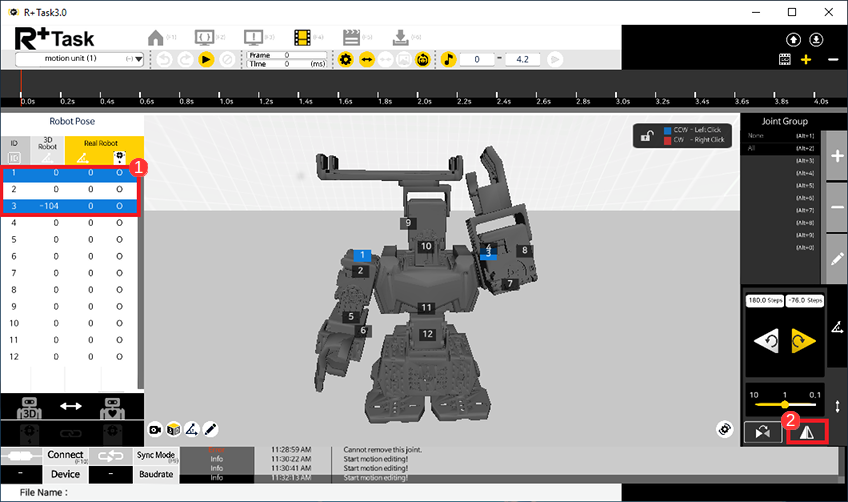
-
The selected joints will now have their values exchanged with each other.
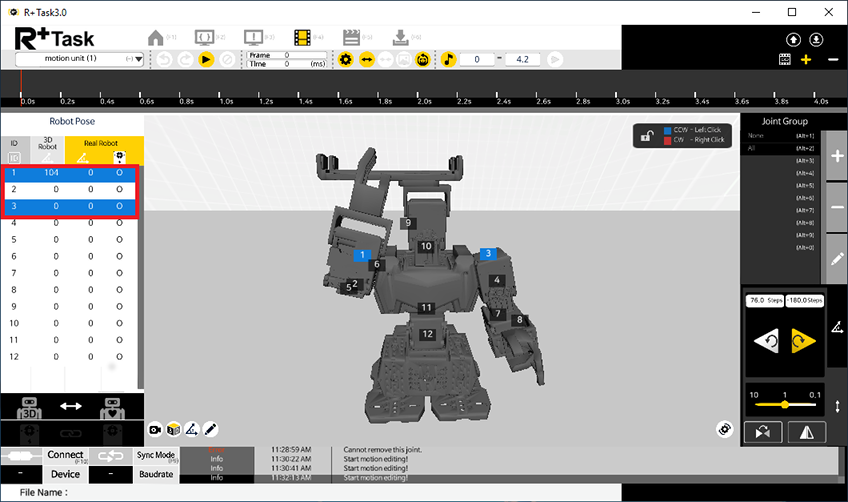
Edit Motion Index Number
The Motion Index Number is used when a motion data has to be called in RoboPlus Task.
The Index Number of the Motion data downloaded on the controller must match the Index Number used for calling in Task.
-
Move to the
Motion Downloadtab, select a Motion Group for editing its Index Number, and click on theEdit Motion Groupbutton.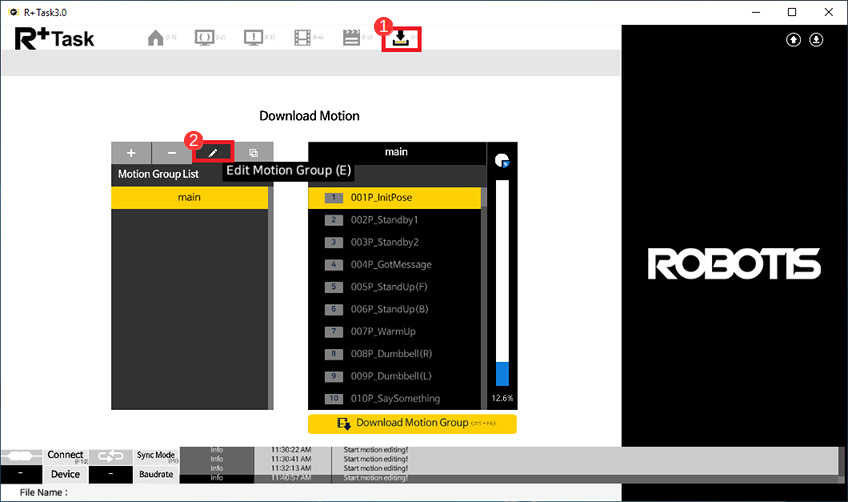
-
Select the Motion Number you would like to edit the Index (or Exit Index) number for, change the number, and click the
Enterkey.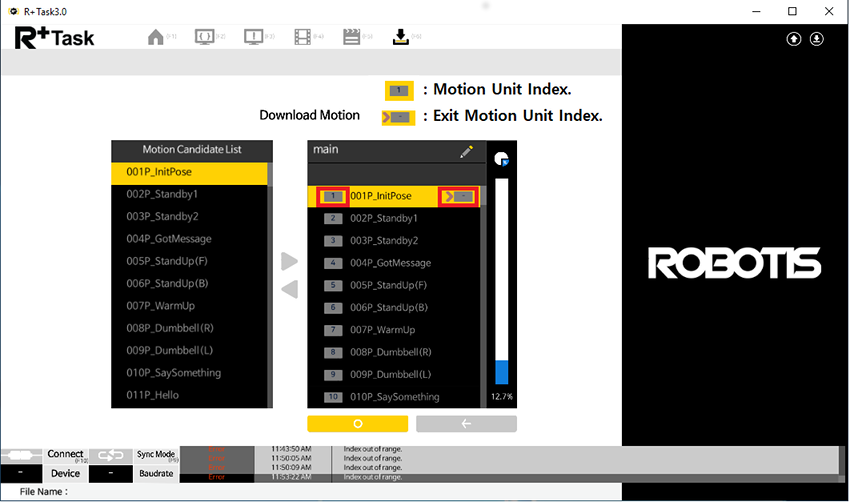
-
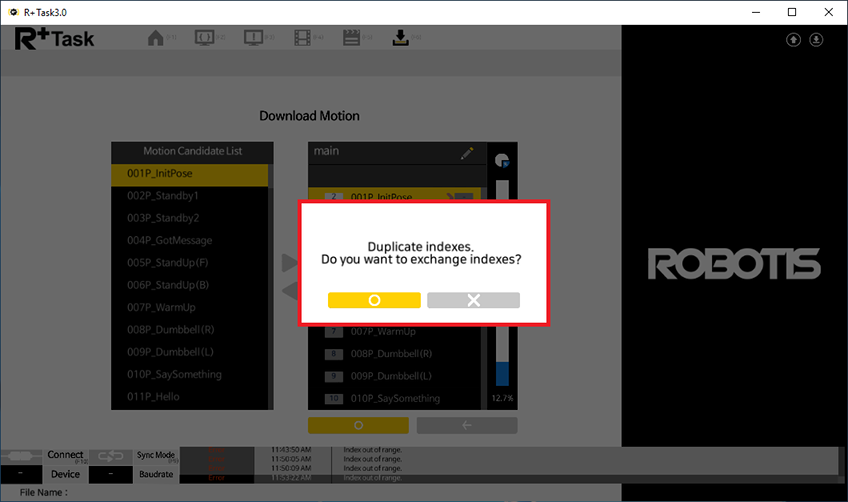
If a duplicate number is already present, a message will be shown as below, and the user must select how to proceed. If the Exit Index is not inputted, a random number will be assigned.
Copy Motion Data
- Open the Motion file with the data to copy.
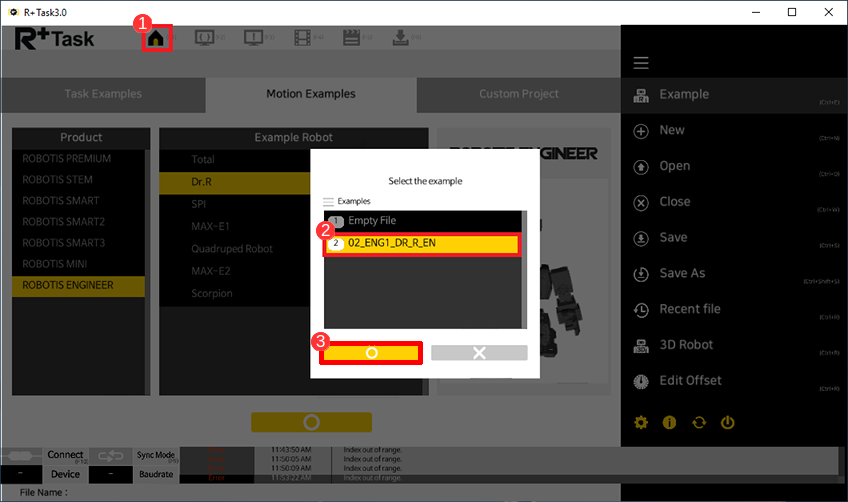
- Open the Motion Unit List and select the unit to copy. Use
Ctrl+Cshortcut to copy the motion.
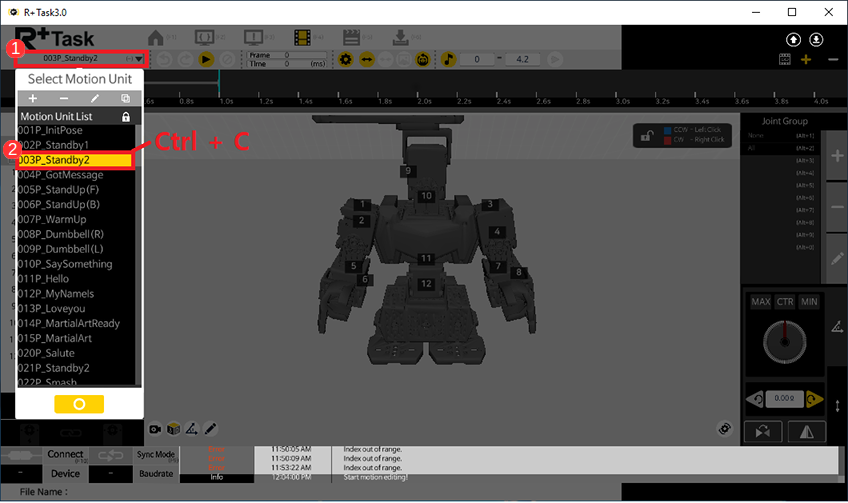
- Open the target motion file to paste the motion and open the Motion Unit List to paste the motion by pressing
Ctrl+V.

NOTE Multiple R+ Task 3.0 can be run to copy and paste the motions.
CAUTION : When copying data between Motion files
- Data that can be copied : joint value, Key-Frame, Motion Unit, and Motion.
- If a data with the same name already exists in the new (blank) project, the data will not copy.
- Copying must be proceeded in the order of Motion Unit -> Motion. If a Motion is copied without copying any Motion Units, an empty Motion will be pasted.
Edit Offset
- Move to the
Hometab and click on theOffsetbutton.
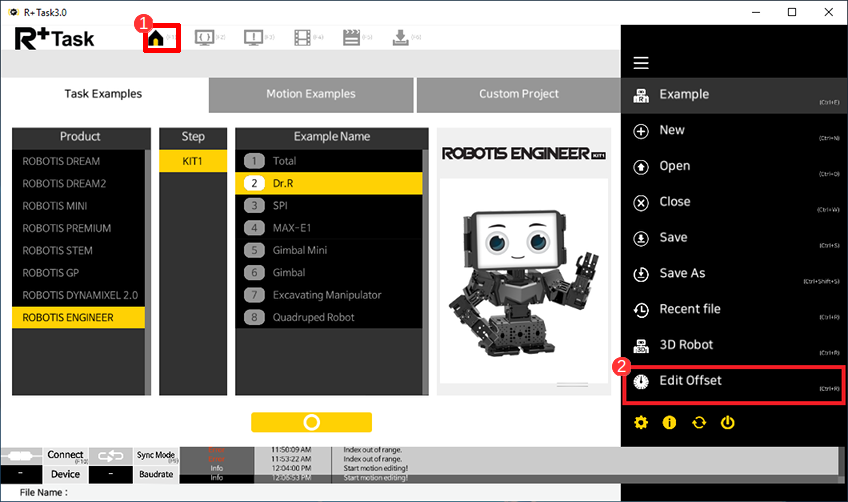
- Connect the robot. (Refer to Connect to Robot)
- Turn on the Sync Mode.
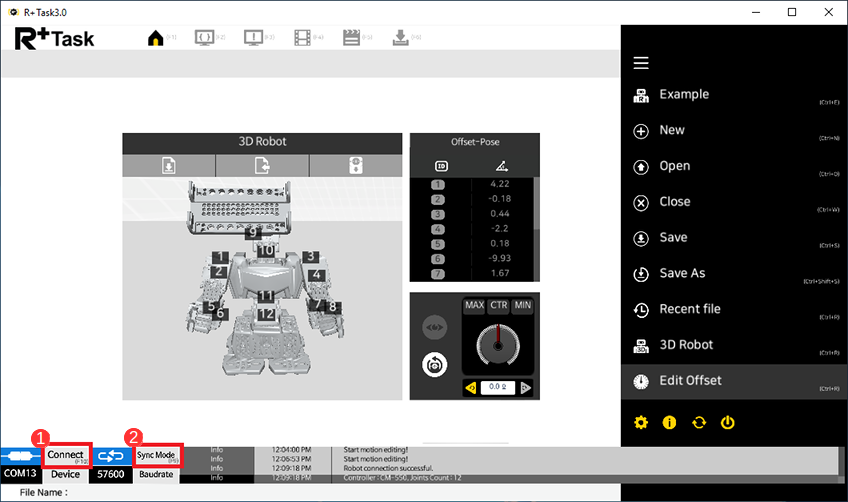
- Set the initial pose, check the robot, and edit the offset pose.
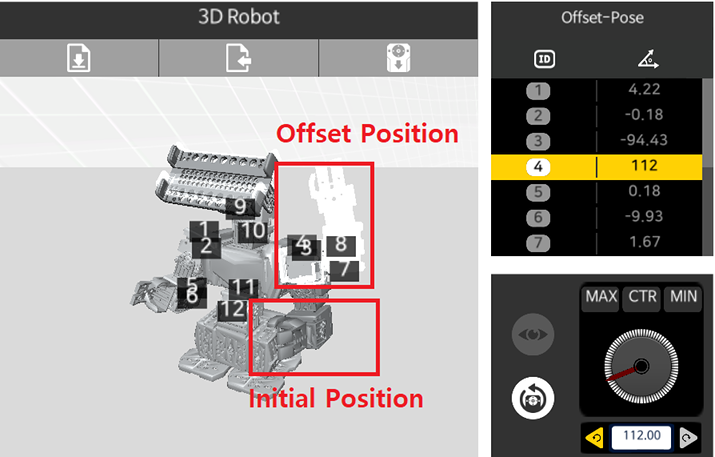
- The ideal offset is when the actual robot’s pose is identical to the initial pose.
- Adjust the offset so the actual robot’s pose matches the 3D robot’s initial pose.
- Click on the
Download Offsetsbutton to save the offset onto the robot’s controller.
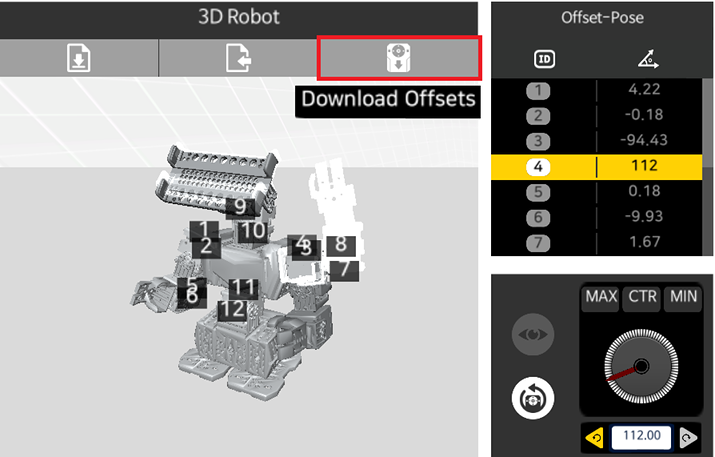
- The difference between the initial pose and the offset pose will be applied as the offset. (Offset pose – Initial pose = Offset)
Convert Files

R+ Task 3.0 can convert R+ Motion 1.0 and R+ Motion 2.0 files into *.mtn3 file.
In order to use *.mtn or *.mtnx files in R+ Task 3.0, they have to be converted to *.mtn3 as below.
CAUTION Converting mtn or mtnx files into mtn3 could modify the size of the file and motion numbers. Please check motion number after converting the file.
-
Run R+ Task 3.0 and click
Openbutton.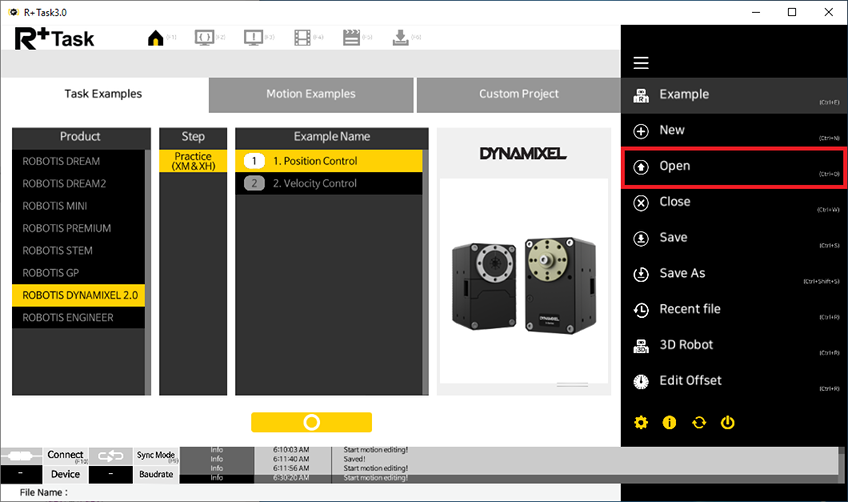
-
Select the mtn or mtnx file to convert.
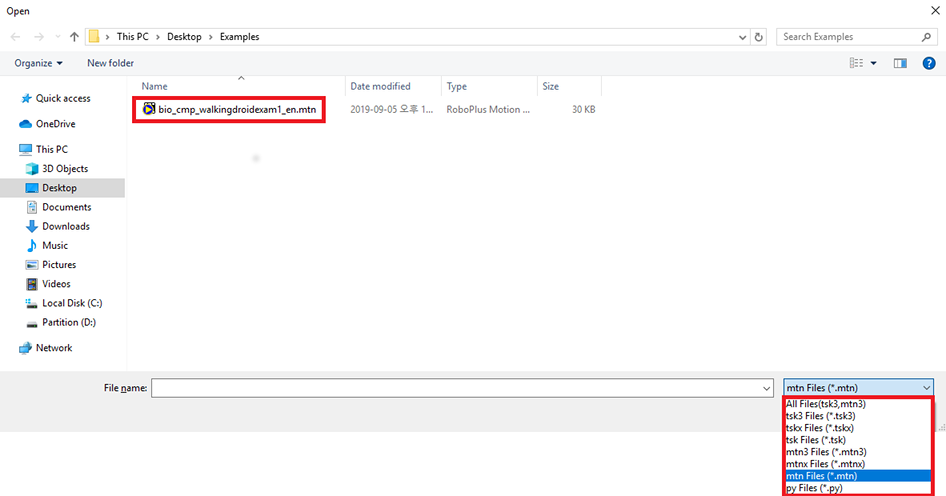
-
The below message will appear to confirm the file conversion. Click
OK.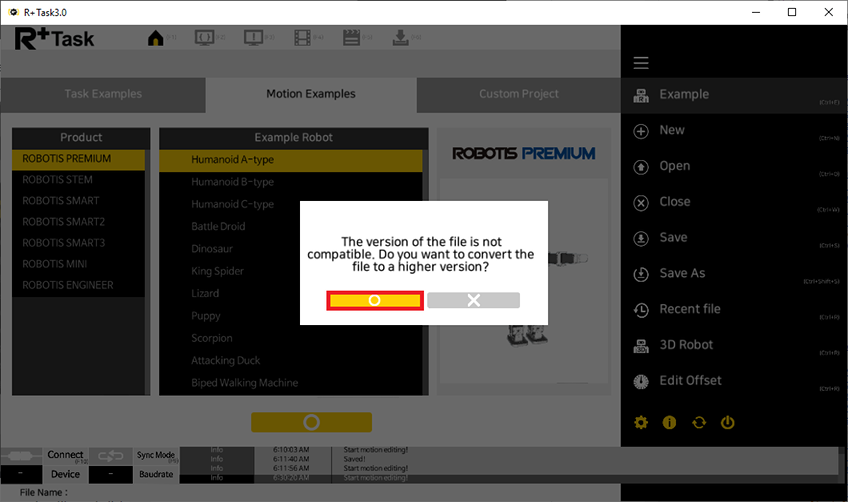
-
Select the 3D robot to use the motion file and click
OK.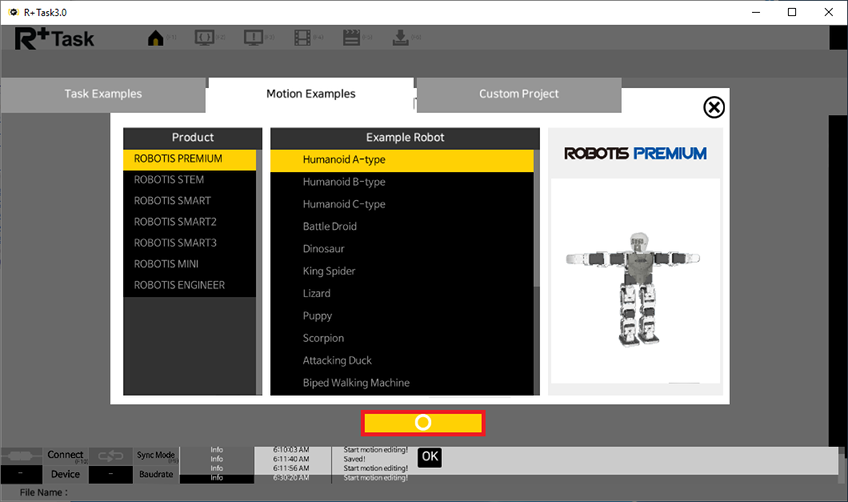
-
Save the converted mtn3 file.

Control 3D Camera
-
Hold the right mouse button and drag to rotate the point of view.
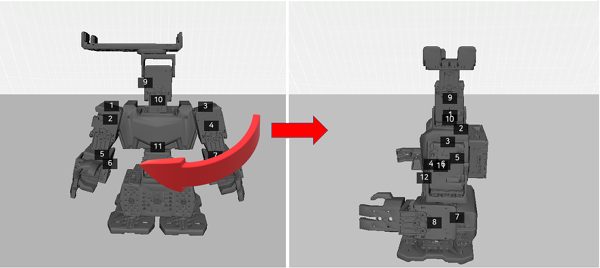
-
Press the
Homekey or scroll up the mouse wheel to zoom in.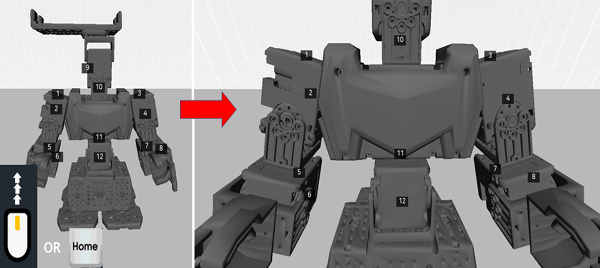
-
Press the
Endkey or scroll down the mouse wheel to zoom out.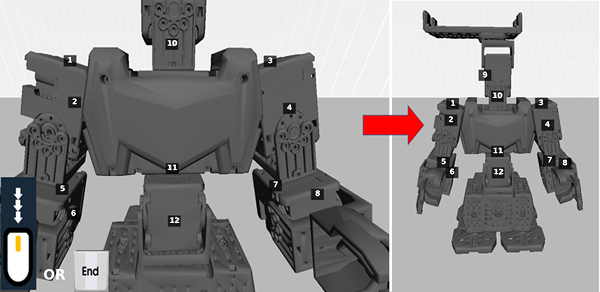
-
Press the
Page Downkey to lower the point of view.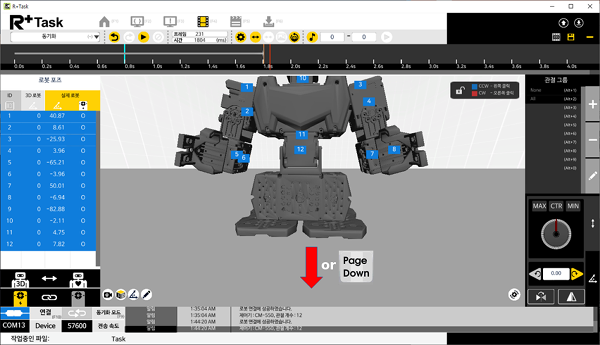
-
Press the
Page Upkey to heighten the point of view.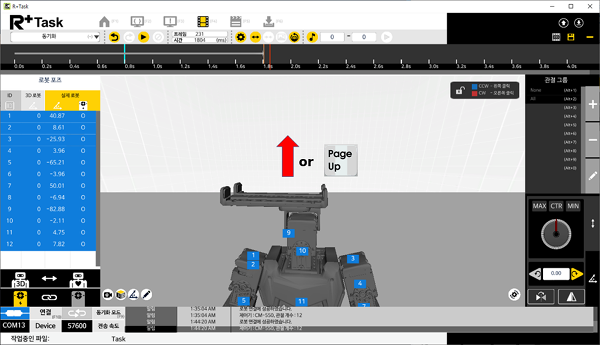
Display Angle
Click the Angle Value button to display the angle of each joint.
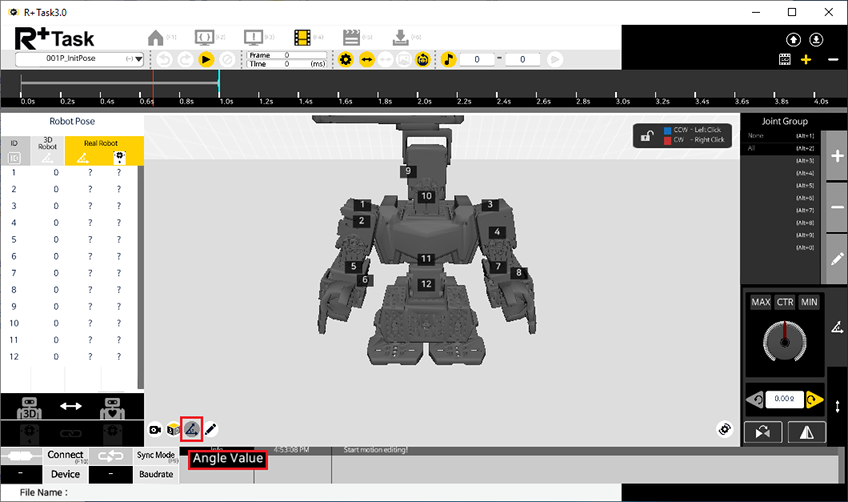
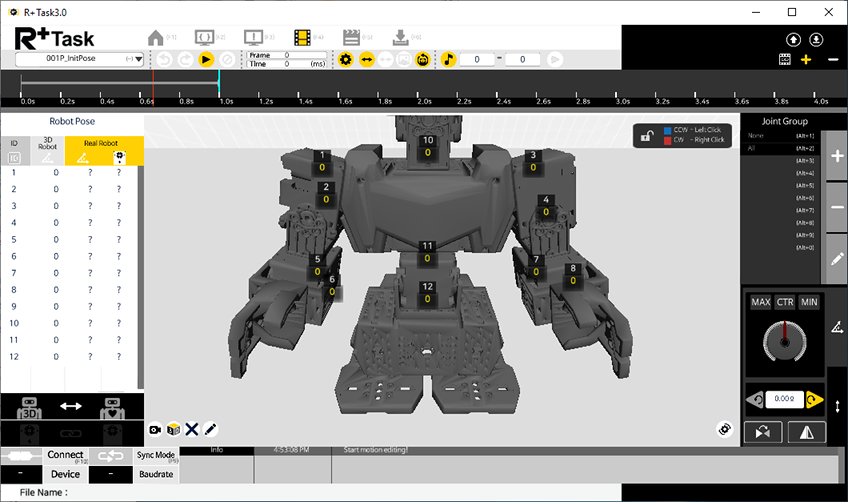
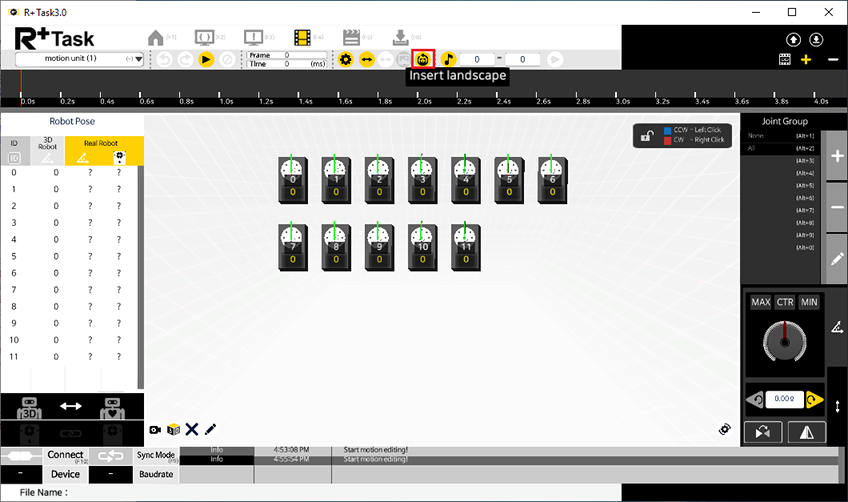
Background Image
When creating a User Robot Project, a background image can be displayed in order to deploy DYNAMIXEL.
-
Click the
Insert landscapebutton and select the file to apply.
-
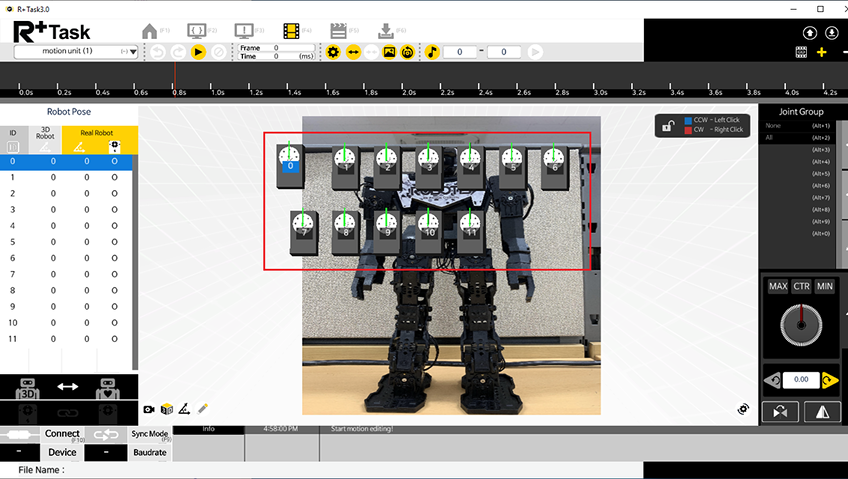
DYNAMIXEL can be deployed over the image to help identifying joint.
-
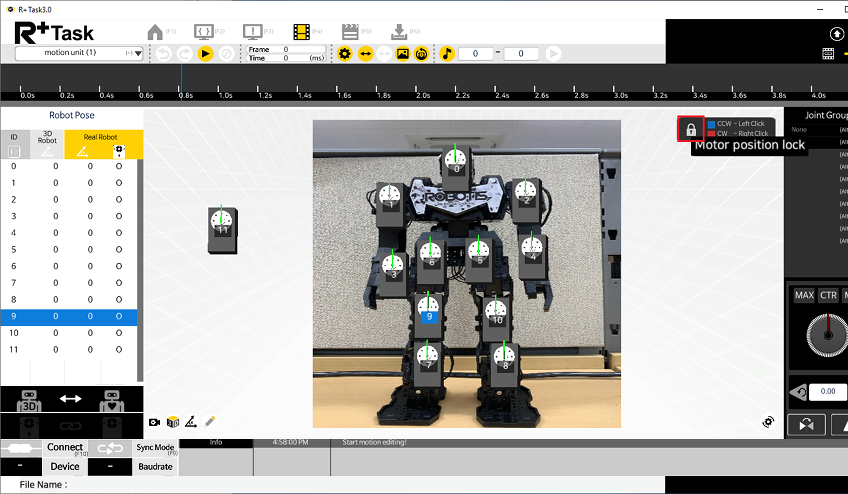
Click the
DYNAMIXEL Relocationicon to hold DYNAMIXEL at current location.
Initial Pose
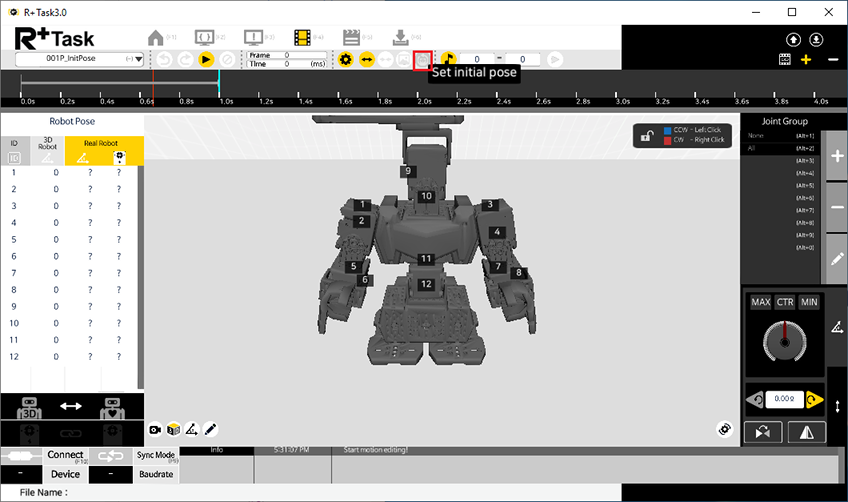
Click the Set Initial Pose button to set all joint to initial position.
