
Perceptions
NOTE Please run the instructions below on a PC with ROS packages installed.
NOTE Please run the instructions below on a PC with ROS packages installed.
Camera
Realsense D435/D435i
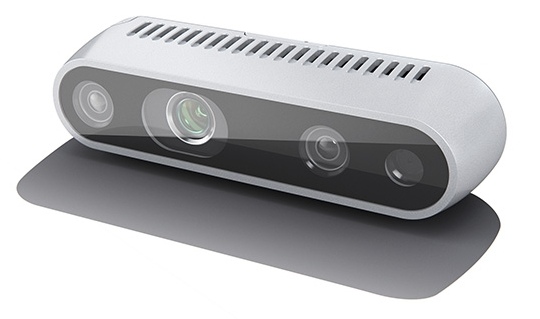
The Intel® RealSense™ Depth Camera D435 is a USB-powered depth camera and consists of a pair of depth sensors, RGB sensor, and infrared projector. It is ideal for makers and developers to add depth perception capability to their prototype development. The D435 is designed to best fit your prototype.
| Items | Specifications |
|---|---|
| Use Environment | Indoor/Outdoor |
| RGB Sensor Resolution and Frame Rate | 1920 x 1080 at 30 fps |
| RGB Sensor FOV | 69.4°(H) x 42.5°(V) x 77°(D) (+/- 3°) |
| Depth Stream Output Resolution | Up to 1280 x 720 |
| Depth Stream Output Frame Rate | Up to 90 fps |
| Depth Field of View (FOV) | 85.2°(H) x 58°(V) x 94°(D) (+/- 3°) |
| Minimum Depth Distance (Min-Z) | 0.2m |
| Maximum Range | Approx.10 meters |
| Dimension | 90 mm x 25 mm x 25 mm |
| Connectors | USB 3.0 Type - C |
Specification
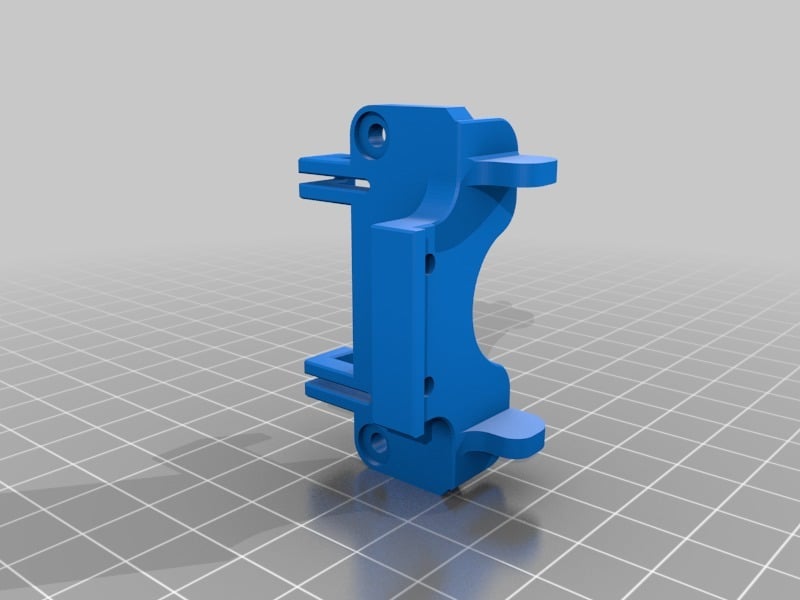
- How to use the mount: Download the stand_rs-d435_s01.stl file, then print it using a 3D printer.
Realsense D435/D435i
The Intel® RealSense™ Depth Camera D435 is a USB-powered depth camera and consists of a pair of depth sensors, RGB sensor, and infrared projector. It is ideal for makers and developers to add depth perception capability to their prototype development. The D435 is designed to best fit your prototype.
| Items | Specifications |
|---|---|
| Use Environment | Indoor/Outdoor |
| RGB Sensor Resolution and Frame Rate | 1920 x 1080 at 30 fps |
| RGB Sensor FOV | 69.4°(H) x 42.5°(V) x 77°(D) (+/- 3°) |
| Depth Stream Output Resolution | Up to 1280 x 720 |
| Depth Stream Output Frame Rate | Up to 90 fps |
| Depth Field of View (FOV) | 85.2°(H) x 58°(V) x 94°(D) (+/- 3°) |
| Minimum Depth Distance (Min-Z) | 0.2m |
| Maximum Range | Approx.10 meters |
| Dimension | 90 mm x 25 mm x 25 mm |
| Connectors | USB 3.0 Type - C |
Specification
- How to use the mount: Download the stand_rs-d435_s01.stl file, then print it using a 3D printer.
This example is not supported.
https://github.com/ROBOTIS-GIT/open_manipulator_perceptions
The following is an example of connecting the OV7725 camera module with AL422B buffer to the GPIO of OpenCR.
https://community.robotsource.org/t/opencr-with-ov7725-al422b-camera-2-8-tftlcd/1413
The Arduino sketch code can be found from OpenCR examples in Arduino IDE.
Install Camera Package
Option 1: Using OM Container
When using the OM container, run the RealSense camera with the following command after starting the OM container:
ros2 launch realsense2_camera rs_launch.py
Option 2: Local Installation
Install Realsense Library
The following commands will install relevant Intel® RealSense™ Depth Camera D435 library.
  $ sudo apt update
  $ sudo apt install ros-$ROS_DISTRO-librealsense2*
  $ sudo apt install ros-$ROS_DISTRO-realsense2-camera
  $ cd ~/ros2_ws/src
  $ git clone https://github.com/IntelRealSense/realsense-ros.git
  $ cd ~/ros2_ws && colcon build --symlink-install
Run Realsense Launch File
Run the following command.
$ ros2 launch realsense2_camera rs_launch.py
You can use RViz or image_view to verify driver. You can select data topic name related to Intel® RealSense™ Depth Camera D435 from drop down menu at the top of the application.
$ rqt_image_view
Reference
Not supported in Arduino
Install AR Marker Package
Not supported in Jazzy yet.
Not supported in Humble yet.
Not supported in Arduino
Pick and Place Example
Not supported in Jazzy yet.
Not supported in Humble yet.
Not supported in Arduino