
Device Setup
This section provides instructions on how to configure the device.
Requirements
NOTE : The Quick Start Guide explains how to use DYNAMIXEL with a PC as the controller. Instead of a PC, controllers such as OpenCR, OpenRB, or Arduino can also be used.
- OpenRB-150
- OpenCR
- OpenCM9.04
- Most other Arduino boards.
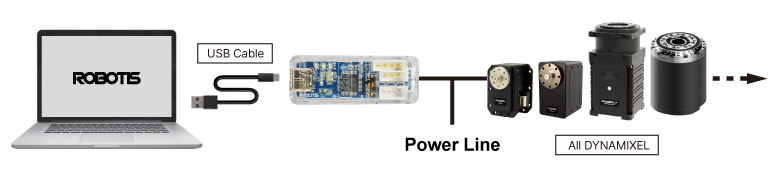
In order to use DYNAMIXEL with a PC, you need a U2D2 to convert USB signals to TTL or RS-485.
The U2D2 does not supply power to the DYNAMIXEL, so a U2D2 Power Hub Board is also required to provide power.
USB2DYNAMIXEL Driver Installation
NOTE : Recent Linux include the kernel which contains the FT232RL driver for the FTDI driver used by the U2D2. Most Linux users won’t need to install the driver manually.
Windows users need to install the FTDI driver to enable USB-to-serial communication.
Install the latest VCP driver from the FTDI Driver Download page.
Connecting The Motor
Please use an SMPS that matches the operating voltage of the motor you are using.
- 12V for
X Series(also forAX,EX,RX, andMXseries) - 24V for
PandYseries
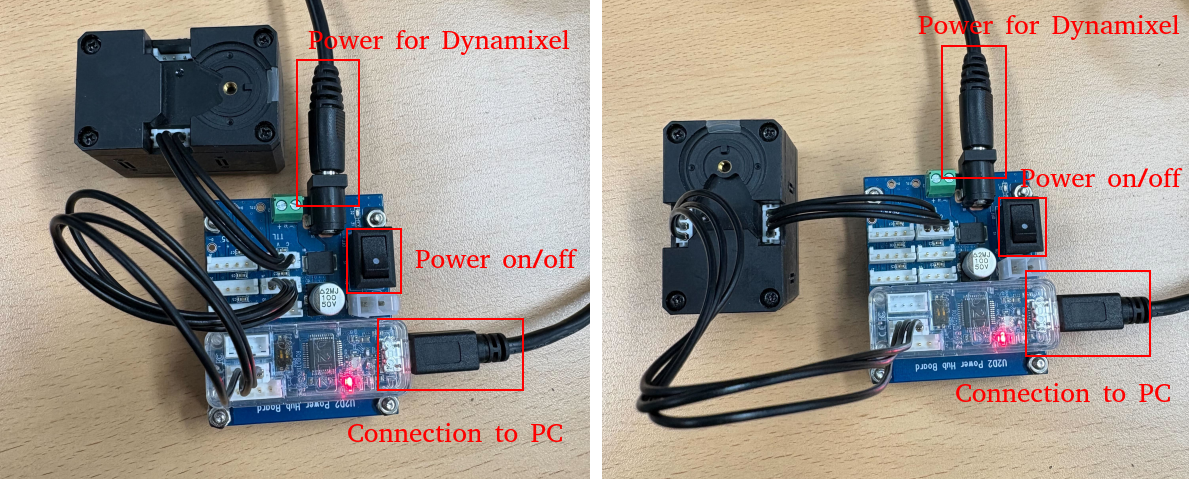
How to connect the motor
Connect as shown below.
You can either daisy-chain the U2D2 and Power Hub Board (PHB) to the motor, or connect them separately.
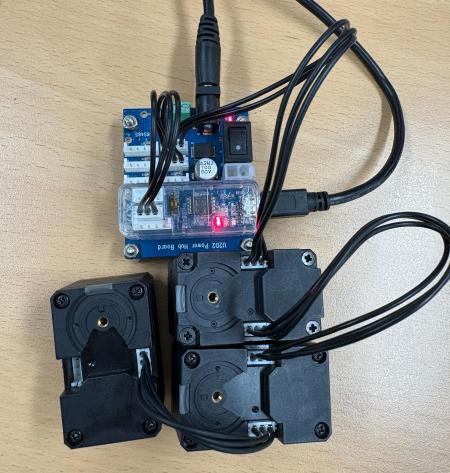
You can connect multiple DYNAMIXELs in a daisy-chain configuration as shown below.
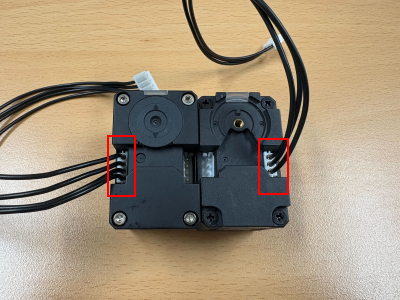
NOTE : You should match the port according to whether your DYNAMIXEL supports TTL or RS-485.
TTL: TTL-based DYNAMIXEL’s have 3 pin connectors
RS-485: RS-485-based DYNAMIXEL’s have 4 pin connectors.
Verifying Connection
Once all the above settings are complete, you can use the Dynamixel Wizard 2.0 to ensure the connection is working properly
DON’T SKIP THIS STEP!
For checking and setting Motor ID, this process is essential.